Up next in 10

Read more about REALME GT 5G:
https://www.hardreset.info/devices/realme/realme-gt-5g/
Tips and tricks for REALME GT 5G. Find the best-hidden features, secret options, and useful settings. Let's become a pro user of REALME GT 5G.
#tricksRealmeGt5G #tipsRealmeGt #RealmeGt
Follow us on Instagram ► https://www.instagram.com/hardreset.info
Like us on Facebook ► https://www.facebook.com/hardresetinfo/
Tweet us on Twitter ► https://twitter.com/HardResetI
Support us on TikTok ► https://www.tiktok.com/@hardreset.info
Use Reset Guides for many popular Apps ► https://www.hardreset.info/apps/apps/
Show More Show Less View Video Transcript
0:00
Welcome
0:08
Inflame is a realme GT and today I'll show you a couple tweaks and tricks you can do
0:12
on this device. So we're going to start off with the swipe down for notification panel
0:17
Normally when you try to swipe down it gives you this search
0:21
Personally I don't really care for it so I like to have a swipe down for notifications
0:25
so I don't have to reach all the way to the top to get it down
0:29
To enable this all you need to do is go into the settings. From here navigate to home screen, lock screen and always on. Display
0:38
Find the swipe down on home screen and select notification. And now once you swipe down as you can see you can pull down notification from like basically
0:47
as low as you can swipe down. So makes it really nice in my opinion
0:52
I rather have this over the search. And moving on to the next option it's going to be the simple dark mode
0:59
Now you can enable it through settings obviously. You can also quickly access right here to the basically notification tray
1:07
And once you tap on it it turns on the dark mode. As you can see this will extend over the entire android along with default applications
1:18
So calls, messages, browser, photos and so on will be supported by it now
1:25
Applications that are basically like additional applications so as an example video or prime
1:32
videos, amazon, netflix, stuff like that will probably not be supported. They usually have their own settings associated with it
1:39
So you will need to either find those settings in there or there's also a chance that some
1:45
applications that you have downloaded from play store simply don't have any kind of dark mode
1:49
And if that is the case everything will be in dark mode apart from those applications
1:55
And additionally if we go into the settings under the display and brightness we have the
2:00
option for dark mode to have auto switch. When enabled it will basically choose the, actually switch it up, there we go, it will
2:08
choose light mode during the day and dark mode during the night
2:12
Now if you have it enabled it will be the reverse so during the day you will have dark
2:17
mode, during the night you will have light mode which might seem a little bit redundant
2:21
at that point. But that's personal opinion, you might like it that way
2:25
I prefer to have it light during day so it is easier to see during this direct sunlight
2:31
and when you're outside. Now anyway, moving on to the next option, it's going to be associated primarily with
2:38
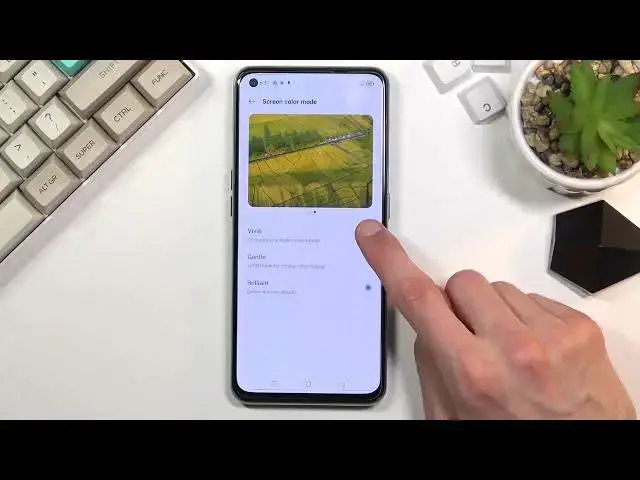
the screen. So number one will be the screen color mode. Again it's all under display right here
2:44
So if we scroll down we have screen color mode and by default it is set to vivid
2:47
We have also gentle and brilliant. I'm not really sure what brilliant is supposed to be because vivid is already enhanced color display
2:59
So anyway, brilliant or well gentle is more I guess accurate color rather than vivid
3:08
Vivid is just to pump up the saturation of colors to make them look as colorful as you
3:13
possibly can. And the brilliant is basically almost the exact same as you can see by switching them
3:19
on between. There is like almost no difference between them. And ironically it seems like vivid is a little bit less saturated compared to the brilliant
3:29
so it again doesn't really make sense. Now we do have additional images
3:36
Again we can see a little bit more saturation in this one
3:41
And if we go with the gentle as you can see there is a difference between the saturation
3:47
between those so this is the more accurate one. And last option as you can see
3:54
Now here you can see a bit more of a difference between those two
3:59
But at the end of the day it is more up to what you like to see
4:03
If you prefer the vivid then go right ahead and stick with it. I personally prefer something a little bit less saturated, a little bit more well toned
4:11
down and this one will be for me the middle option. Now going back we have also a couple of additional things associated with screens
4:20
We have video color enhancer and also video image sharpener. So as you can see there is a little bit of an animation right here how it looks like now
4:29
I don't think this will show much of a difference right here
4:35
But you can test it out. It looks like this image is a little bit sharper than this one
4:44
So it basically artificially sharpens it to make it look a little bit more high quality
4:49
than it actually is. And video color enhancer just adds additional color to it, makes the image look a little
4:55
bit more lively. Again this is something similar to the color aspect that we chose, so vivid, gentle and brilliant
5:07
It's kind of similar to this but just done for videos itself
5:11
So if you want it you can turn it on from here and there you go
5:16
So moving on to the next option. It's going to be the screen refresh rate
5:21
And again it's under the display although it's under the more option right here at the bottom
5:27
So we have screen refresh rate, then we have auto select, we have the standard and we have high
5:32
Now auto select basically determines it for you so sometimes it will set it to 60 even
5:39
though it might be probably beneficial to have it at 120. But in other cases for instance if you're looking at images or basically anything that
5:48
is standing still like this page right here it will drop the refresh rate to lower one
5:53
to preserve battery. While when you're trying to scroll up and down like this it will boost it up to 120
5:59
so scrolling through content looks a little bit more smooth and nice
6:05
But honestly in here you can also cap it to a specific amount so if you want to for instance
6:10
have 60 you don't see much of a difference between 120 and 60
6:15
Then go right ahead and change it to standard. If you prefer to have it always capped at 120 you can select this
6:22
Personally I think I prefer to have it always capped. Now additionally by setting it up at 60 you will gain a little bit more battery rather
6:30
than with 120. 120 Hz will drain it a little bit quicker
6:35
So there is a trade off. You will have smoother content but also you will have less battery life
6:43
But to me the trade off right here is fairly worth it when you're scrolling up and down
6:50
to content and you just have pages moving. With 120 it just looks super battery smooth
6:57
And I can't really show this on camera because the camera is recording at 60 frames so anything
7:02
above it gets basically lost. But if you have been using this device already then you probably already see the difference
7:10
between like the video or what you see on this video right here and for instance when
7:15
you're scrolling up and down on your device everything just moves way nicer than it is
7:21
on the video. But anyway let's move to the last option which is the gesture navigation and by default it
7:30
comes disabled and you don't have anything about it during the setup so you can actually
7:35
enable it by going into the convenience tools right over here and then navigation and simply
7:44
select the swipe gestures from both sides. This removes your buttons from the bottom and substitutes them for gestures
7:51
Now it does give you an animation here how to use them and just to quickly go over it
7:56
you can swipe from either side as you can see there is this arrow appearing to go back
8:00
So once I let go it just moves page back. Same goes for the other side
8:04
Then you can swipe up to go home and swipe up and hold to go to recent
8:10
Now when it comes down to the swipe up gesture it is a little bit more tricky for people
8:14
that have never used this. So if you're having problems with actually activating this gesture what I can advise
8:21
you to do is when you're trying to swipe up normally you do have this tiny little bar
8:25
in here. Let me just bring it up. There we go. I don't know why it didn't want to open but you can barely see this tiny bar right here
8:36
and you're supposedly supposed to swipe up on it. If you try to swipe up a little bit too high you might basically activate the swipe up
8:44
gesture like this. So you're trying to go up and down on a page
8:48
So to combat this what you want to do is start the swipe off of the screen from the bezel
8:52
the black area that doesn't light up. When you swipe up on it from that area onto the screen you are basically guaranteed to
9:00
get the gesture correctly. So anyway this will conclude all the tweaks and tricks that I wanted to share and if you
9:08
found this video helpful don't forget to hit like, subscribe and thanks for watching
#Cosmetic Procedures
#Fashion & Style
#Software
#Gardening & Landscaping
#Home Improvement
#Science