0:00
Welcome in front of me I have followed next slide and today I'll show you a couple
0:09
camera tricks that you can use. So the first I'm going to focus on the features that we have here and after that I'm going
0:15
to move to the modes. So the first let's tap on the right upper corner for enter the settings and when you're here
0:23
we can activate the audio control. So tap on the switcher and as you can see we got two options
0:29
can say cheese to take photos or speak loudly let's check the second option as can see the microphone is
0:36
activated take photo and as can see the photo was taken we can also switch to cheese cheese
0:51
and it works also nice next we can quickly change the frame rate of our
0:59
video as you can see it's set up on the 30 frames per second but you can go more
1:03
smoothly to the 60 frames per second we can also save some data on our smartphone
1:09
when we activate this video format but we have to remember that there is that if we
1:16
want to move this video to other device sometimes it may not play on other devices so be careful with that one We can activate the green lines and horizontal level on our photos to take better composition
1:32
When you take photo. As you can see, it appears right now on the screen
1:43
We can set the timer, for example, for the 2 seconds, and right now
1:46
So when you are going to use our cheese option, cheese, the photo will be taken after two seconds
1:56
Oh, that was the misclick. When you are here we can also add the watermark to our photos
2:06
So when you take photo just like that. On the left bottom corner we will find mark of our smartphone
2:22
Unfortunately we cannot customize watermark here. We can also mute this annoying shutter speed
2:33
As you can hear right now it's mute. We can also quickly adjust the temperature of our photos
2:40
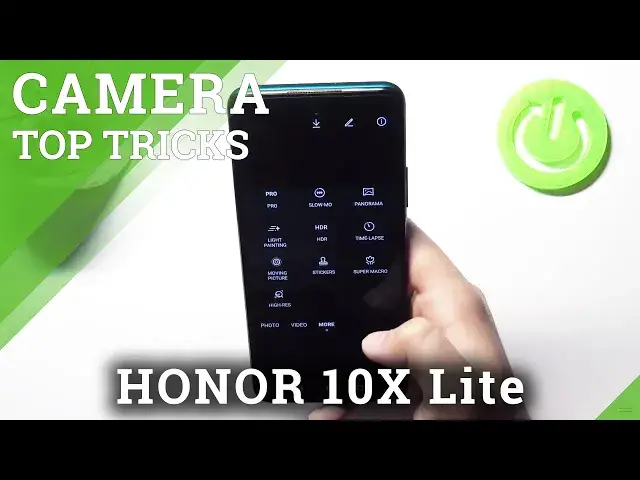
even in the normal photo mode by tapping here. And as you can see there we got few modes filters that we can quickly apply we don have to download external apps we can use just this
2:58
Okay, and we can go for more modes and take a look when you are here
3:04
We got high resolution photo, so when we switch to this one, right now we are going to take photo with 48 megapixel resolution
3:12
so I'm trying to show you the difference I'm going to take okay I will take this coin
3:22
and take photo with 48 megapixel with high quality I will take it like that
3:33
and right now I'm going to turn off this mode and go for the normal
3:42
Okay and right now take a look on a difference there is a photo taken with normal mode
3:49
and it looks like that and then go for a higher resolution as you can see here we
3:56
got more details and you can zoom in more closely we can also hear the light
4:06
painting unfortunately I not able to test this one but at all it very very cool the star trace it really amazing so just if when you are outside just definitely try to test this mode now here we got
4:23
also the stickers that we can apply on our photos so as you can see there we got
4:33
the mark from our from the date and the time we can set the location so we can type for example London okay let's go back
4:53
and as you can see there is the sticker we can place it for example maybe
4:58
right here and take photo with this one and it will appear on the photo as you
5:04
can see okay and when you go for the more modes Again, we get normal modes, like the super macro, time-lapse, slow motion or palorama
5:16
so everybody know the modes, so I'm not going to talk about them. And here we got also the standard mode like portrait night, the aperture
5:25
So, that's it. If you found this video helpful, don't forget to leave a like, comment and subscribe to our channel