0:07
Infronomy is an op-po FindX5 Pro and today I'll show you how we can bypass the Google
0:14
verification on this phone. Now you can see that the phone I have right here is locked using the pattern and if I also
0:21
close this I can unlock it using the Google account. So assuming I don't know either of those, what do you want to do begin the bypass
0:29
we're going to, number one, connect to network. Now, I believe there is also a way to bypass the device quicker by just not connecting to anything
0:41
Just skip connecting to network, just press next and finish up the setup like that
0:47
And perform a factor reset up the phone that I believe might unlock it
0:52
But once you connect to Wi-Fi, you're kind of like bummed out because you can't disconnect it
0:56
So this will be the second way. and also assuming the first one that I said doesn't work, then this one most certainly should
1:06
So connect to a Wi-Fi and then go back to the second page, which is the language selection
1:14
Top on this little guy up here. Turn on Accessibility Mini. And from here we're going to now also enable the..
1:22
Let me quickly check. I believe it's going to be this option
1:33
I'll go. So the second. Welcome to Talk Back. Welcome to Talk Back
1:40
Page one of five. Talkback is a screen screen. So yeah, a second last option, which is the I can also turn on Select to Speak
1:51
We'll take you right here. Now once you see this page, what you want to do is draw an L like this, a mirrored L
1:58
mirrored L, starting from the bottom, which will give us another pop-up
2:05
I like this one. Now, when the Talkback is enabled, you need to first
2:11
tap on an option to select it and then double top on it to confirm it So with that in mind you want to select that you allow access to record audio And before you do this I will kind of go through what we need to do next just because it will be
2:30
one after another and it requires you to speak. So you most likely won't be able to listen to me
2:37
basically doing it in a process or just go from one to another. So what happens is we will enable
2:44
the Google Assistant which will start listening to us. And once it's listening to us, you want to
2:50
select, or yeah, you want to say open Google Assistant. From there, once it opens Google Assistant
2:58
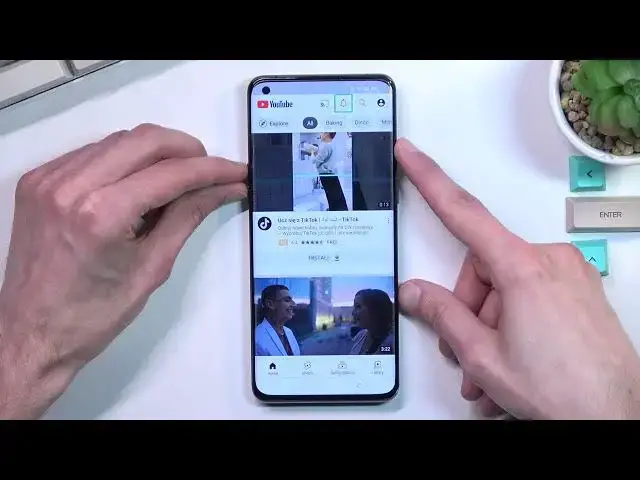
you want to select open YouTube. Or not select, but speak, open YouTube. So what happens is right now
3:06
when we tap on this, I believe it's right now. There is going to be another window
3:11
Yep, like this one. You'll want to select. like right here use voice commands and when you double top on it you will I
3:18
believe see something like pop up right here with a green or whatever color
3:22
kind of notifications that it is are right now listening to you once it is you
3:27
want to say open Google Assistant it will open Google Assistant and then you
3:32
want to immediately say open YouTube if it's listening you'll know if it's
3:36
listening or not because when this pop-up right here shows up you will have like these three dots at the bottom which will kind of act like a like a voice-detest
3:44
section. So let's add right now. Open Google Assistant. Open YouTube. So there we go
4:00
That's basically what we needed to do. As you've seen it was one after another. And if you
4:07
if it won't recognize your voice or if you won't speak for I don't some like couple seconds
4:13
the Google Assistant will stop listening and you will need to redo it or you will need to
4:20
tap on this button like right here where you had these like couple colorful dots that were listening
4:25
to you. You will now have a microphone. You want to top on it once and then double top on it and it
4:31
will start listening to again so then you can say open YouTube Okay so from here once you have opened up your YouTube you want to hold the volume buttons
4:44
Press and hold. There we go. And this will show the talkback option so you want to select turn on
4:55
And now we can actually... Oh, not yet, let's try it again
5:02
And now we can use the screen normally without needing to double top and single top
5:10
like we did before. So from here, click on the account icon
5:15
And you want to navigate into the settings. And then About. And from About, select Google Privacy Policy
5:26
This opens up YouTube, so from here we'll need to select accept and continue and no thanks
5:32
and then right at the top in the field to type in the address you want to type in hard
5:40
reset that info slash bypass. Like so, if you need a moment to write it down do, pause the video
5:55
I can go with it and in here you want to simply select consent, scroll down
6:02
and you'll see settings up click on it and from the settings we're going to
6:08
scroll down to system settings so right to the bottom of it system settings and
6:14
we're going to now select backup and reset reset phone and then erase all
6:25
data and from here I guess both of them will work
6:35
Just depends if you want to retain your ESM or not, assuming you are even using it
6:40
I'm not using ESIM, so I'm just going to select remove it as well
6:43
Erase data and remove ESM profile. And this will now begin the process
6:48
Now this will probably take like two minutes to finish up and once it has we should be presented
6:53
with the Android setup screen again So I come back once I can see that again Now I mention once we see it the process is basically finished
7:03
Once the factory reset has gone fully through, the device will be fully unlocked
7:07
and the setup screen is just a typical setup screen so you can go through it however you like
7:12
I can skip Wi-Fi connection and all that stuff, and the device will just work normally as it would when it's brand new
7:19
So anyway, I'm going to be back just to do a quick setup once it's finished. And as you can see the process is now finished and you can set up your device however
7:33
you like. So I'm going to quickly go through it just so you can see this
7:39
Like I mentioned, the entire bypass is now finished. Now we can skip connecting to Wi-Fi if you want to
7:52
I will connect to it just so we can see that even when it scans for verification, there
7:58
is nothing to, that needs to be verified. So quickly do that
8:06
Okay, so there we go. Let's go to the next page. The Google login page right here is just an optional one so you can simply sign in or can skip this
8:52
and here we go. So as you can see this is how you could bypass your Google
9:00
verification and if you found this very helpful don't forget to hit like
9:04
subscribe and thanks for watching