Up next in 10

MOTOROLA Moto E7i Power FRP Bypass | How to Bypass Google Verification Motorola Android 10
Jul 7, 2024
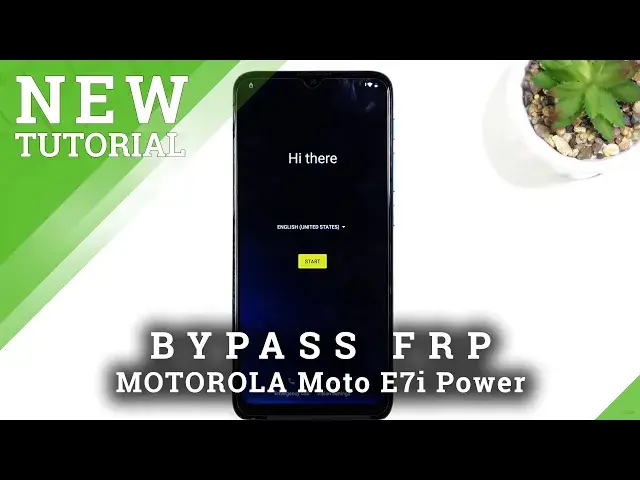
Remove Factory Reset Protection on MOTOROLA Moto E7i Power:
https://www.hardreset.info/devices/motorola/motorola-moto-e7i-power/faq/bypass-google-verification/frp-nokia-android-10-2021/
Skip FRP Lock on MOTOROLA Moto E7i Power. Let's remove Google account verification without PC. It's the only solution for a forgotten Google password. Find the way to bypass Google lock on MOTOROLA Moto E7i. This bypass FRP method works for every Motorola with Android 10.
How to bypass Google Account protection in MOTOROLA Moto E7i Power with Android 10 / 10 Go and 05.2021 security patch? How to unlock FRP on MOTOROLA Moto E7i? How to remove factory reset protection on MOTOROLA Moto E7i? How to bypass FRP lock on MOTOROLA Moto E7i?
#MotorolaBypass #MotorolaUnclokFRP #MotorolaFRP
Follow us on Instagram ► https://www.instagram.com/hardreset.info
Like us on Facebook ► https://www.facebook.com/hardresetinfo/
Tweet us on Twitter ► https://twitter.com/HardResetI
Support us on TikTok ► https://www.tiktok.com/@hardreset.info
Reset Guides for many popular Apps ► https://www.hardreset.info/apps/apps/
Show More Show Less View Video Transcript
0:00
Welcome, I'm from the Muraula E7i Power and today I'll show you how to bypass the Google
0:13
verification on this device. So obviously you can see that the phone right here is locked. We have
0:18
the verification using Google, we also have this tiny little lock right here. So yeah
0:23
now denying that it's locked. So to get started with the bypass, we want to number one back out
0:28
to the first page, which is the language selection, and choose any kind of language that uses
0:34
a different keyboard. So, scroll down. Basically anything from the last option up to, what is it
0:43
like Greek, I believe, Russian, or well, Cyrillic languages, there's the Greek. I think Greek
0:51
is probably the first one. So select anything down from it. I will mention that one of
0:58
of the Cyrillic languages doesn't actually function correctly so when you select it even
1:02
though it uses a different keyboard it just replaces it instead of adding a new one so if that
1:07
is one of the languages that you picked and you have that problem which i'll point that out later on what
1:12
i mean by that uh then all you need to do is go back and change it to something else so from here we're
1:20
going to basically progress to the setup as we normally do pressing the same buttons as we normally do
1:28
Okay, so we have right now the Google verification right here. And when I was saying about the language not working, when you click on the field to log in
1:43
you should see this little globe icon. If you don't, that means that the language you picked is just bugged, assuming it is using
1:51
different keyboard. But if you see this, all you need to do is basically hold it
1:57
bring up this window for language selection so I'm going to number one switch to QWERTY and then hold it again and go to language settings which is this
2:05
text below and then add a keyboard blue button bottom and select any kind of
2:12
keyboard that does not have an arrow so basically anything like this one here here
2:17
and basically below choose whichever one I want and then select add by this blue
2:22
button again so once you have added any kind of language you can back out again to the first page and switch back to your desired language
2:30
It's for me as English. And again, let's stop on a field right here
2:39
Hold the globe icon, go to language settings, add a keyboard, and this time around you're
2:46
looking for one with an arrow. So as you can see there is one. And once you select it
2:50
you want to click on the three dots and go to help and feedback. And in Describe Your Issue, you want to type in delete or disable
3:04
It comes up as suggested right here, delete or disable apps on Android
3:08
So click on it And then top on the first one right here the do link So top to go to application settings And in here you want to scroll down to YouTube
3:22
And once it's opened, select notifications, select Advanced, and from here, additional settings in the app
3:34
And we're going to select About, and YouTube, of service, which will open up our web browser
3:43
Select accept and continue and no thanks. And from here we're going to navigate to hard reset.info
3:49
So, top right at the top and type that in. Now I'll type it in and you can pause the video if you need a moment to write it down
4:00
So right here, And once the site loads up, tap on those three bars right here
4:15
and go to the download category. And then in download search field right here
4:23
you want to search for Android 7.1.2. And as you can see, it comes up as I suggested right here
4:39
there should be only one of them so bypass uh frp bypass android 712 slash 10 click on download
4:47
again scroll down and click on the download once again okay and this will begin the download
4:56
now this should download fairly quickly from there select open once it's visible
5:04
and before we can actually install it we'll need to go into these settings check the box allow from this
5:09
source and go back. Top on install. From here, select done, once, and then
5:32
and the search bar you now want to search for settings. And again, select download, scroll down, download again
5:46
And this time around, we're going to open, install
6:02
And this time around again, this time we're going to actually open it up
6:07
So once you have opened up the settings application which has just installed, it just opens up settings, as the name would suggest
6:14
So from here you want to select apps and notifications, then see all 35 apps
6:19
And from there connect up on the three dots and select show system on top of that And from here scroll down to Google Play Services
6:35
Okay, there we go. Google Play Services. And once you click on it, you want to select disable
6:41
and then disable up. And then go back and disable Google Play Store
6:52
There we go. now and from here we're going to go back and back once more the settings I'm going to
7:00
scroll down to accounts now before I progress any further I'll mention one little thing
7:06
if you go back too far it will take you back to the web browser and the only way to
7:10
get it back to settings is to basically reinstall the application the settings
7:15
application and once it's finished installing you will again click on open which will
7:18
take you back to the settings that is for the people that went back too far and it brought
7:23
them to the web browser. So anyway, once you have the accounts open you want to click
7:30
on our account choose Google. Select continue. And as you can see it gives us a little
7:42
pop-up right here that it stopped working and I didn't actually click on Google I clicked on something else so quickly fixed that out. There we go Google right here
7:53
So anyway, in the search bar, or not search bar, but the field right here, you can log in with any kind of Google account that you want
8:02
I'll be using my own, but obviously you need to use yours
8:06
If you don't have one, you can create it, and even though there is a button to create a Google account right here
8:10
I wouldn't recommend using it. I have never tried it and don't know how well it works
8:14
Right now we did technically disable Played Services, so I don't even know if that is possible to create it on the device
8:21
So, anyway, I would recommend you to do it on your computer maybe on other device, and then
8:26
once you created the account, use it to simply log in here
8:31
But like I said, I have my own, which is what I'm going to be using
8:37
Now I'll put in the password for it. So I logged in successfully
8:46
So from here, select Agree. Just as a pointer, as you can see, the device is still locked
8:54
So from here, once you have enabled, not enabled, but logged into your Google account
9:01
you want to go back to your apps and notifications, and what we need to do is we enable the
9:06
apps that we have disabled. So can, apps and notifications, CL35, 3 dots, show system, and scroll down
9:20
We have Google Play Services, enable, go back, Google Play Store, enable, go back
9:30
So, once you have enabled these two applications that I have disabled
9:35
we going to now hold the power key and select restart Okay so now that the device put it back up simply go to the setup of it and you will see
9:51
one significant difference going through it. Once you get to the verification page, it will not tell you to
9:56
verify anymore, it will give you a message that account was added and will provide you the info of
10:01
the account that you have logged in with right before the reboot. So what basically happen is we simply
10:07
over it the previous account and now Google thinks that we in a way verified it but that is not the
10:15
case though so even though it will allow us to finish up the setup the device is still locked
10:23
so I will show you once I actually finish up the setup how to fully unlock it so anyway there's
10:29
the message account added that I have I was adding as you can see I'm just going to go to the
10:34
next page As you can see, I am skipping basically everything that I can, that is because it doesn't really matter what I choose right now
10:52
We still need to actually factor reset the device. Now there is a chance of this pop-up that I just had showed up for you earlier, or maybe it will show up later
11:05
that's completely fine it's the first up that we have installed which allowed
11:10
us to actually add the Google account it doesn't matter that it's crashing
11:14
it already allowed us to add a Google account otherwise we wouldn't be
11:19
able to do that at all Select Accept and continue
11:37
Go to the next page, there we go. Next. Allow
11:47
And as you can see, we have now access to home screen. And which you want to do right now is simply navigate to your settings
11:58
And from here, we're going to scroll down to system, advanced, Reset options, erase all data, factory reset, erase all data
12:11
And once you stop on erase all data once more, this will begin the factory reset of the device, fully unlocking it
12:17
So it is basically a required step for the device to be fully unlocked
12:21
Although I'm not going to be going over this on the video, just because, to be honest
12:25
it's going to waste a lot of time and provide you with no additional information. Basically, once you click on that button, it factory reset the device, goes back to the setup screen
12:35
At which point all you need to do is simply go through the setup of the device however you like
12:40
The device will be from there fully unlocked. So anyway, if you found this very helpful, don't forget to head like, subscribe and thanks for watching