Up next in 10

The Unlock FRP Tutorial for LENOVO Tab E7:
https://www.hardreset.info/devices/lenovo/lenovo-tab-e7/faq/bypass-google-verification/lenovo-android-9-google-account-bypass/
In this video you may find out how to easily remove factory reset protection on LENOVO Tab E7. If you forgot the Google account you should find a way to activate LENOVO Tab E7 without Google login. Let's follow our steps and bypass Google verification in LENOVO Tab E7.
How to skip Google verification on LENOVO Tab E7? How to remove factory reset protection in LENOVO Tab E7? Howt o unlock FRP in LENOVO Tab E7? How to bypass Google verification in Lenovo?
How to bypass Google Account protection in LENOVO Tab E7 with Android 8/9 and security patch 01.2020?
#bypassGoogle #unlockFRP #skipGoogle
Follow us on Instagram ► https://www.instagram.com/hardreset.info
Like us on Facebook ► https://www.facebook.com/hardresetinfo/
Tweet us on Twitter ► https://twitter.com/HardResetI
Support us on TikTok ► https://www.tiktok.com/@hardreset.info
Use Reset Guides for many popular Apps ► https://www.hardreset.info/apps/apps/
Show More Show Less View Video Transcript
0:00
Welcome, Enfroly is a Lenovo tab E7 and today I will show you how to bypass the Google
0:12
verification on this phone. Now as you can see the phone in front of me is locked and I could unlock it either using
0:18
a verification pattern or using the Google account. And that's something we don't know either of those
0:25
What we will want to do is go back to the first page. There we go
0:33
And from here, change the language to any kind of other language that uses a different keyboard
0:37
So scroll all the way down, basically anything from here will work
0:41
Now we can go all the way up to, I believe, right somewhere here
0:47
So Turkish and basically anything below should work. So e and continue
0:55
So once you select that language, you want to basically go to the setup again. So just click on whatever I'm clicking on whatever side, assuming you don't know what
1:07
you're actually clicking on. So I'm going to set it up as new
1:14
And there we go. So there is again the verification pattern. Stop on use Google account
1:20
Up on a field. And once it brings up keyboard, you should see a globe icon right here
1:32
So you want to hold that globe icon. This will bring up the language settings
1:36
And from here we can change it back to QWERTY, so our keyboard changes
1:40
And I'll hold the globe icon once more and choose the language settings
1:44
Just the button right here. And then let's select add a keyboard, which is the button at the bottom, and choose any kind
1:52
of language without an arrow. Now that sometimes happens where it just kind of backtracks
1:58
just get back to it again the same way globe settings add keyboard and let's add the first
2:06
one as an example or oh I got the second one so once you select one of them click on
2:11
the add button right over here and you can see that now we have three different ones
2:16
so once that is selected go back to the first page again oops then go back to our desired
2:27
language which for me it's going to be English and again let's get back
2:35
to where we just were Again let stop on a field hold the globe icon language settings had keyboard and this this time around you looking for a keyboard with an arrow So as you can see there is Albanian it selected
3:03
top on a three dots and go to help and feedback. From here and describe your issue, you want to type in use Morse code or
3:16
if you just type in M all, it brings it up as I suggested. you can see use Morse code selected and from here we want to top on the
3:27
share button and it will give you a bunch of options so what we're looking for
3:33
is Google go so click on it this will from here I'm just gonna use without Google account
3:47
now go and it will it. Let's go I guess with English
3:58
Click on Finish and give it a second for it to load. So from here we want to select
4:06
Let's see. Okay, so click on the tree or on the squares icon right here, then go to all apps
4:26
And from here, I'm kind of reading as I go. There we go
4:39
So I think that we just want to access settings instead of the apps right there
4:45
So from here, as you see, I just click on the bars right over here and then go into the privacy policy right over here
4:59
Okay, there we go. So as you see you need to press this weird icon right over here and then go to open in browser
5:13
And then accept and continue. Next, no thanks. We don't want to sign in
5:21
And there we go, we are finally in the web browser. Now this is basically where we wanted to be all along
5:27
in here it was a little bit harder to pull off so from here I just tap on a
5:31
cert bar and navigate to harder reset that info and let stop on the three bars right over here and go to the download category
6:06
So from the download category, I want to tap on a search bar and simply search for Android 8
6:16
There we go. Let's search. There should only be one pop-up right here, as you can see
6:27
So, FRP bypass. Let's just click on the download. Then again, scroll down and click on the download once more
6:36
Let's continue, allow, and download. So from here, we'll start downloading. Once it's finished, we will have this pop-up
6:46
So let's click on Open. And before we can actually install it
6:52
we'll need to go into the settings and select allow from this source. So check this on, go back
6:58
and now we can install it. Now once it's done installing, you want to open it up
7:09
And this looks a little bit weird. Let me see if I flip it over, will it look better
7:15
it doesn't flip over so this is not really well visible right now I don't think this app was designed for such a
7:23
weird aspect ratio but these are two different buttons so we have
7:27
bypassed FRP and then Google Account Manager APK install so we're going to start off with the button
7:35
on this side and we're going to once you tap on it you want to choose that you want to install it for
7:41
version 6.0 And again, let's go into the settings, allow from this source, go back and install
7:55
From here, click on Done, and then choose the other button. And from here, select Browser Sign In
8:05
Once you see this page right here, click on the 3DOTS and go to Browser Sign In
8:10
Just confirm that. This will open up the Google Login page. There we go
8:17
And from here, simply log in with your Google account. Now if you don't have one, you can always create it
8:21
Even though you could do it from here, I would advise you to use your computer or something
8:26
else to create that account. Now, you can also use an existing one
8:30
It completely doesn't matter. It's a normal Google login page here. So I'm going to use my own right here
8:37
Okay and I going to put in a password for it and there we go once I log in it will then go back to the application once it actually signed in
8:53
So from here, let's hold the power key, select restart, and wait for the device to boot
9:00
back up. So from here, again, let's progress through the setup of the phone
9:12
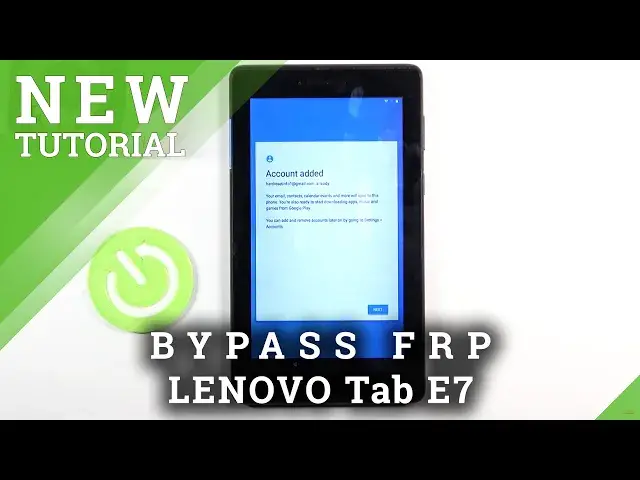
And you should see displayed right over here. So this is previously where we would need to confirm our previous account with the pattern
9:24
or Google account. And now it changed into the account added and provides me with the account that I have added
9:30
right before I rebooted the device. So let's just select next. Now before you go on basically thinking that the process is finished, I will say right now
9:42
It is not yet finished. So at this moment, we want to basically skip
9:49
through most of the setup right here. It doesn't really matter how we set up our device
9:53
at this point, because we still need to basically reset it once more to remove the Google account
9:58
that is still actually present on this device. And as you can see, you should be right now
10:10
on the home screen. So from here, you want to go into the set up. Settings, scroll down to system, reset options, and then select Erase All Data Factory Reset
10:24
As you can see, it will give a message that performing this will basically remove everything from the device, including things like Google Accounts
10:30
Now for the Google account to provide us with the account that we have logged in with, but
10:36
it will also remove the one that is still on the device, just not showing here, the one that
10:40
was ballacking us from actually doing the setup. So once you tap on reset tablet and then erase everything, this will begin the process
10:49
It will bring you again to the setup screen of the device, but once you are on the setup after the erase everything part
10:56
the device will be fully unlocked so you won't have to do any kind of bypassing or anything
11:00
You can just simply skip Wi-Fi connection, skip logging in, do whatever you want, the device will be fully unlocked
11:06
Now just due to the time, I'm just not going to go through it, at least not on a video, because I'll the
11:12
need to do is basically hop on erase everything and then finish up the setup and you're done
11:17
So it's kind of redundant. This is majority of the work as it's supposed to be done. So
11:23
that is how you would bypass your Google verification on this device. And if you found this
11:29
very helpful, don't forget to like, subscribe and thanks for watching. I'm
#Science