0:00
Hello. In easy, I'm going to show you
0:01
all backup methods on Honor Magic 8 Pro.
0:08
Okay, so first let's open up the
0:11
Now scroll down, click on system and
0:17
Go into backup and restore. And let's
0:19
begin with the data backup that is
0:20
above. If you are clicking it for the
0:22
first time, down below you will see
0:24
notifications, and you just need to
0:26
select that you allow for everything.
0:33
Now let's select external storage first.
0:37
And now we need to insert the memory
0:40
card or use the USB storage. I'm about
0:42
to use the USB. So I will insert it.
0:46
Actually it's an adapter for an SD card.
0:49
Uh but it's selected as USB storage. So
0:52
let's select that. And now select
0:53
backup. In here select which things you
0:56
want to backup. In my case, I want
0:58
everything that is currently selected.
1:01
And now, if you have selected everything
1:03
that you want, click on backup. The
1:04
process will begin. In my case, it won't
1:06
take long because I don't have many
1:08
things that I'm backing currently.
1:10
So, that's why we already have 99%.
1:14
So, let's wait a little bit.
1:20
And now our backup is stored on our USB
1:24
storage. Also, if you are
1:27
clicking on external storage for the
1:29
first time, you will have to create a uh
1:32
pass security password.
1:34
Uh don't worry, it is really really
1:36
easy. It it just needs to contain from a
1:38
to 32 characters long. Contains
1:40
uppercase letters and lowerase letters.
1:44
Now, our our backup has been copied and
1:49
created on our USB. So, I'll place it
1:52
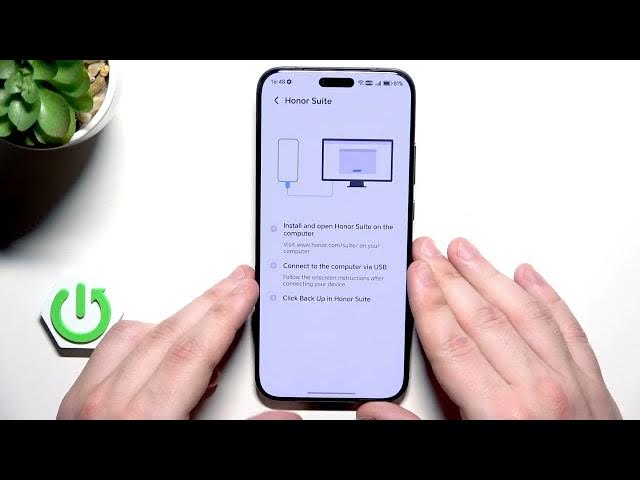
next to me. Then below we can use also
1:55
the owner suit. That's the app that we
1:57
can download on our computer. I will
1:59
show you that as a last method. Uh so
2:02
don't worry. And we also have the Google
2:03
account. You need to make sure that back
2:05
up to Google feature is enabled.
2:09
Then go back in here. You can see your
2:11
Google account that you're currently
2:13
signed into. You need actually you have
2:16
to be connected into some Google
2:18
account. Without it, you won't be able
2:20
to create a backup. Uh, I'm about to use
2:23
this one, but of course if you want, you
2:24
can add another one. And now click on
2:30
in here. In here, you can see your
2:32
Google account. And also, you need to
2:34
remember that if you want to restore a
2:35
backup later in the future, you'll need
2:36
to be signed in into the exact same
2:38
Google account to restore your backup.
2:42
Make sure that backup by Google One is
2:44
enabled. And down below, we can see the
2:46
backup details. Now, to create a backup,
2:48
simply hit this button. also need to
2:50
have some free storage space on your
2:52
account. Okay, we can see this bar right
2:54
in here and it's slowly fulfilling. Now,
2:56
we just need to simply wait until this
2:59
bar disappears. It will mean that
3:00
everything went fine. We'll also see a
3:02
notification on the bottom of the
3:04
screen. So, I'll see you in a second
3:11
Okay, the backup has been successfully
3:13
created. We can also see it right in
3:15
here that it has been created 0 minutes
3:17
ago. So it's confirmation that
3:19
everything went successfully. Also under
3:21
backup details we can see what things
3:23
has been copied. Okay. And now the last
3:26
thing that owner suit that I was talking
3:29
about before. Now I will launch my PC
3:32
and I'll show you further steps.
3:35
Okay. So now we need to download the
3:37
owner suit app. Uh to do it open up your
3:41
browser, type owner suit, open up the
3:43
owner page. We can download it for
3:46
Windows or also for uh the Mac right in
3:49
here. In my case, I I just need to click
3:53
on Windows download. It's already
3:55
downloaded in my case. So, all you need
3:57
to do now is to open up the downloads
4:00
folder, open up the owner suit
4:09
and you need to click on software and
4:12
launch the exaf file.
4:15
Now, if it's installed,
4:18
open up the app. And now, we need to
4:21
connect our phone into our computer
4:30
first click on USB in the app.
4:41
Select USB to transfer file/ Android
4:49
Now we need to open up the developer
4:51
mode. To do it, we need to go back.
4:57
Scroll down about phone.
5:04
until you are a developer. Then go back.
5:07
Go into system and updates developer
5:10
options. Click on next in the app.
5:14
And we'll have to enable the USB
5:17
debugging. Keep scrolling. Select USB
5:20
debugging. Enable that. Click on okay.
5:29
Click on next. Uh in my case, my cable
5:33
is doing some weird things. I don't know
5:38
There's also a chance that
5:52
Okay, now it appeared. Allow USB
5:55
debugging. Click on okay.
5:59
Se select that you allow. Click on okay.
6:03
And I think I have something wrong with
6:05
my cable because it keeps connecting and
6:07
disconnecting all the time. So I'll
6:11
Okay, I have changed the cable. Also
6:13
again USB to transfer files. Now it
6:19
and enable USB debugging.
6:27
Okay, it says that Honor Suit will be
6:28
installed on our phone. So we need to
6:31
wait. Click on more details. Click on
6:34
install. Anyway, select that you agree.
6:38
Allow. Allow. Allow. And allow.
6:41
And now we need to insert that code in
6:58
Okay. Our phone appeared in our program.
7:02
And now click on backup.
7:07
Select what you want to back up
7:10
and hit the button. Again, we need to
7:13
set the password from 8 to 32 characters
7:16
long. It must have uppercase letters and
7:19
lower letters and also digits.
7:30
Okay, the process has started and now
7:34
it's actually finished. Click on done.
7:36
And now our backup is saved on our
7:39
computer thanks to that app. We can
7:45
And we can also close the app.
7:48
All right. And that's all in this video.
7:49
Thank you all for watching. If you found
7:51
this video helpful, please leave a like,
7:52
comment, and subscribe.