Up next in 10

Learn more info about SAMSUNG Galaxy A31: https://www.hardreset.info/devices/samsung/samsung-galaxy-a31/add-face-unlock/
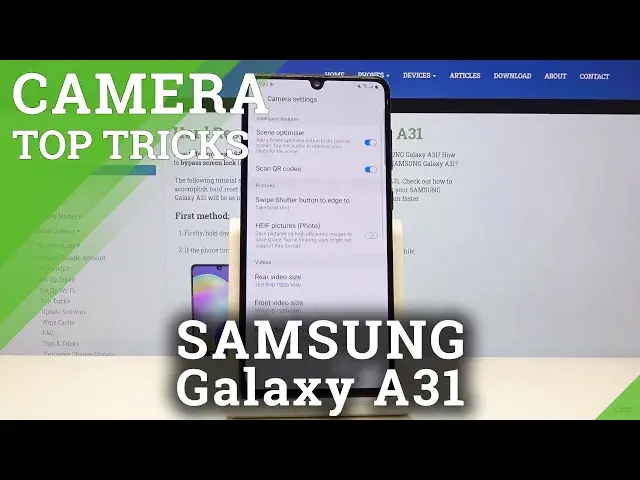
Are you wondering how many hidden camera tricks has your SAMSUNG Galaxy A31? In this video we’d like to show you all known hidden tricks and tips which you can apply on your SAMSUNG Galaxy A31. Let’s watch our video carefully and recreate all trick on your device in order to make the usage of your camera much easier and more comfortable.
How to find camera features in SAMSUNG Galaxy A31? How to use camera features in SAMSUNG Galaxy A31? How to enable camera features in SAMSUNG Galaxy A31? How to find camera best options in SAMSUNG Galaxy A31? How to open camera best features in SAMSUNG Galaxy A31?
Follow us on Instagram ► https://www.instagram.com/hardreset.info
Like us on Facebook ► https://www.facebook.com/hardresetinfo/
Tweet us on Twitter ► https://twitter.com/HardResetI
Show More Show Less View Video Transcript
0:00
Welcome! Here I've got Samsung Galaxy A- saitry1 and I'm going to show the top tricks of the camera
0:10
So at first we have to tap on a camera button here to open it. And as you can see for now we are in the standard photo mode
0:17
So let's start by tapping on the screen anywhere like that. As you can see this ring is appearing
0:22
This is the focusing so here we can focus anywhere we like
0:26
And we have also by doing this access to this slider. This is the exposure compensation
0:31
By using this we can make our picture just more bright or dark as we need
0:35
As you can see, this is how it works here. And now let's focus on these two buttons here
0:40
Here we can change the lenses. As you can see, this from the left is the ultra-white lens
0:46
And this from the right is the white lens. So this is how it works
0:50
Let's have a look now how to zoom. We can do it by using two fingers like that
0:54
And we can get really close to the subject and also go back
0:59
like that we have also here access to this slider so by doing this we get the same effect
1:06
and also as you can see here we have different buttons this is also the zooming so it shows us in
1:11
numbers how close we are so this is how it works here this is really cool i think and now let's
1:19
stay on this and let's have a look at the settings bar as you can see here we can easily
1:25
manage the modes of this camera as here we have live focus photo video video
1:29
and by going to the right to the more we get access to other modes of this device
1:35
So the Pro Panoramic Macro and Food. I suggest you to make an experiment with that and just have a good fun
1:42
And let's go back to the standard photo mode. And now let's focus on this settings bar here and let's start with this button from the right
1:50
By tapping on this we get access to the filters so we can make our picture just more beautiful before we take it
1:56
And as you can see this is how it works. it works and also we have access to this slider with intensity of the filter so by doing this we can manage this like that so this is how it works here
2:11
and for now let me stay on the original one and let move to the next one button here by tapping on this we can change the ratio of our picture we can pick three and four which is now nine and sixteen so this is how it changes it is a little bit longer
2:31
also one and one this is the square one here and full so this is how it looks like also here we have
2:39
access to the best possible quality of this camera which is 48 megapixels with three and four
2:45
right shot so this is how it changes here. For now let me stay on the normal one with 3 and 4
2:52
and let's move to this button at the center by tapping on this we can turn on and turn off the
2:57
camera timer so we can delay taking picture we can pick from 2 5 or 10 seconds let me pick 2 seconds
3:04
to show you how it works and let's take a photo. And as you can see the picture was taken with 2 seconds delay so for now let me turn it off
3:15
And let's move to the next one button. By tapping on this, we get access to the flash, we can turn on the auto flash, turn on flash every time we take a picture and also turn it off here like that
3:28
So this is how it works. And now let's go to this button from the left
3:33
By tapping on this we get access to advanced camera settings and let's for a minute focus on intelligent features
3:40
And with this option, scancare codes by doing this, we can easily turn it off and turn it on like that
3:48
So this is how it works. And this is the easiest way to scan QR codes at this device
3:55
So I suggest you to keep this turn it on because when you have this
3:59
you don't need any other app to scan QR codes. You can do it by just using the camera app
4:05
So this is really cool here and easy. And let's go back here
4:08
And now let's move to the useful features here because this is the most interesting thing here
4:14
And let's start with the grid lines. By tapping on this button we can easily turn it on and turn it off like that
4:22
So this is how it works here. And let me keep this turn it on and let's go back to the camera to show you how it looks like
4:30
As you can see the grid lines are here. These are these lines. This is helpful for example when we want to use the rule of ferdin photography and making experiments with composition So also remember that these lines are not visible at the real picture These are only help lines to help us taking better photos
4:46
So let me take a picture. And let's go here to the left corner at the bottom
4:51
This is the quickest access to the camera, to the gallery. So as you can see, the grid lines are not visible here at this photo
4:59
So this is how it works. And let's go back to the camera and to the settings
5:04
Of course, when we don't need the grid lines, need the grid length we can easily turn it off by going again to the useful features and
5:11
tapping on this button again so for now it's gone as you can see so let's go back to it and let's go
5:18
again to this one and let's focus on the location tags here now by tapping on this button we
5:23
can easily turn off and turn on this option so this helps us to save the location info of our
5:31
photo and also when we really want to save the actual location of our picture the important thing
5:39
is that to make it work correctly we have to be connected with the internet and we have to turn
5:44
on the location of this device so remember about these two parameters and this parameter
5:50
to keep turn at it on to save the location so for now let me keep this turned it and let's go back
5:58
and take a photo to show you how to check the location info and let's go again to the gallery here and to check the location of our picture we
6:07
have to just simply slide a little bit down and as you can see here we have the details with
6:12
the map and location tags so greetings from krakow this is how it works so for now let's go back
6:18
to the camera and let's go back to these settings from the left to the useful features again
6:26
and let's focus on the shooting methods by tapping on this we get access to more advanced
6:31
shooting methods. For example the first one thing I want to show is the volume key. So the volume
6:37
keys are here and they are managing volume in the standard usage with smartphone. But in the
6:45
camera we can use this as a take picture or record video zoom or system volume. So for now let me take
6:52
picture or record video to show you how it works and let go back to the camera And let me try to to use them now And as you can see for now by tapping on these buttons I can easily take a photo So this is really cool here And let go back to shooting methods and let go to
7:10
the floating shooter button. By tapping on this button we can easily turn it on and turn it off
7:16
like that. This is how it works. And this is really cool and easy way to taking pictures when we
7:21
have this option turn it on and when we go back to the camera we have this button. We have this button
7:27
and we can change it anywhere and by tapping on this we can take a photo anywhere at the screen we like like that so we don't need to do it by using this button we can do it like that anywhere so this is really cool
7:40
and let's go back again to this useful features and let's move to the watermark as you can see here we have this button by tapping on this we can manage the watermark
7:52
we can turn it on and turn it off also we have the preview and we have the button and we have this button on the button on the button on the button on the button view and we have the button
7:57
the Samsung quad camera watermark. We can also adjust our own custom watermark so for now
8:03
it's shot with my Galaxy A-31 we can change it for example to shot by hard reset
8:15
And as you can see here in the preview it's changed it and let me keep this turn it on to show
8:21
you how it looks like on the real picture so let's go to take a photo again and let's go to the
8:26
gallery here in the left and as you can see here we have the camera watermark
8:31
Samsung quad camera and shot by her reset so this is really cool of course when we
8:37
don't need it we can easily turn it off by going again to the camera settings
8:42
and tapping on this button here like that so for now when we take another photo
8:47
we can see the watermark on it and after turn it on all of these settings and managing
8:54
this sometimes we want to go back to the auto settings and we can do it by just simply tapping on this option reset settings
9:02
so camera settings will be reset to their default values and reset so that's all thanks for watching
9:10
subscribe by our channel and leave the thumbs up
#Mobile Phones