0:00
Welcome, and for now me is a Motorola G50 and today I'll show you a couple
0:11
tweaks and the tricks you can do on this device. So to get started we're going to begin with the dark mode which can be found in your display
0:19
Now on Motorola they actually added some more useful feature like the ability for you to choose
0:27
right here to have it turn on as a schedule. So that will enable the dark mode, for instance, during the nighttime, and during the daytime
0:37
it will switch back to the light mode, giving you best of both worlds
0:43
Obviously, you can also hard toggle it to be permanently in dark mode or permanently light mode
0:49
as you normally don't majority of the other devices. But personally, I think the scheduled route is way better
0:57
Now moving on to the next option, it's going to be the attentive display, which is actually
1:02
also under the display section right here. So top on advance and you should find it somewhere lower right here
1:08
There we go, attentive display. And once enabled, this will basically keep the screen turned on as long as you're looking at it
1:16
So you don't need to interact with it. The device will basically detect that you are looking at it, maybe reading something
1:22
and it will just keep it on as long as you are looking at it. so even if for instance your timeout is set to like 10 seconds it can be kept for an hour as long as you looking at the display for that one hour So all you need to do is toggle it on
1:39
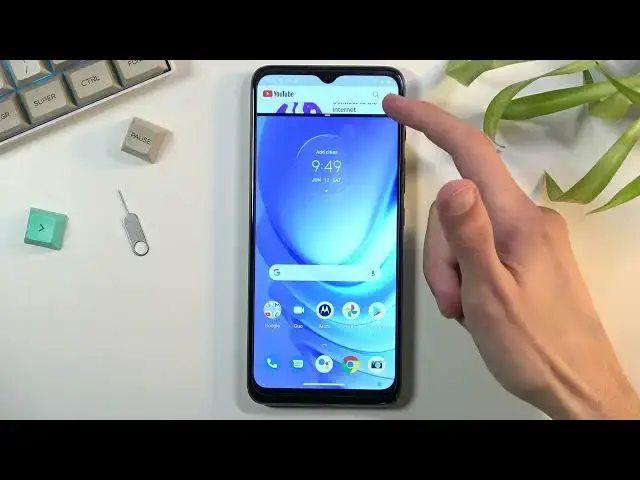
Select allow and turn on. And there we go. Now moving on to the next option, it's going to be the split screen
1:51
Now it's a fairly simple one, but still it gives you some multitasking that people might find useful
1:57
especially if you, for instance, like to browse the web while listening to YouTube
2:01
So for those people, this is just amazing. And to do it, all you need to do is open up YouTube
2:07
I do recommend you to open up YouTube at the top. It basically helps a little bit, and also if you go home, it keeps YouTube open anyways
2:15
So there is our YouTube. Go to Recent, top on a tiny little icon right here of YouTube, and select split screen
2:24
From there, you can navigate home and find a different application that we want. to split screen with so I'm going to select Chrome and there we go we have our two applications
2:31
we can resize this one and play content on the top while browsing the web now I'm not connected
2:36
to networks as you can see it gives me just no connection and stuff like that but obviously it would
2:42
normally work and assuming you want to go home change the application and stuff like that but
2:49
you don't want to really pause YouTube when you go home even though it kind of minimizes a little
2:55
memor this will still keep playing whatever it's playing on YouTube it will not
2:59
pause it so kind of good for in this kind of sense and that also one of the reasons why I advise you to keep YouTube on the top Now obviously when you lock the device it will pause the video
3:11
Or if you close this, it will pause the video. So, yeah
3:17
Now, anyway, moving on to the next option, it's going to be the refresh rate of the device
3:22
By default, it is set to Smart, which is going to be fairly decent for majority of the people out here
3:30
But for the people that prefer prioritizing or prioritize battery life over just a little bit of a smoothness, this option might be for you
3:40
So all need to do is go on to the advanced, scroll down to display refresh rate right here and change it to 60
3:47
Now, as you can see, the auto, which is the default one, uses AI to always show the optimal refresh rate
3:53
Now, I don't believe right here auto changes refresh rates to below 60 hertz, so you won't be getting any kind of like additional battery saving kind of benefits as some other devices do that drop the battery or drop the refresh rate to like two frames per second
4:14
If for instance you're looking at something that doesn't require like high refresh rate as an example
4:20
Picture is a good example of this. when you're looking at pictures you don't need almost any kind of refresh rate
4:27
because it's not a moving image and the moment you need you need high
4:32
refresh rate it will automatically switch to 90 and on this device it set to auto and if I correct it just will switch between 60 and the 90 So it won give you the benefit of dropping
4:44
the refresh rate lower than 60, which will preserve a little bit more battery. So that's a little
4:49
bit of a shame, but like I mentioned, it's a decent option for people that want to have high
4:53
refresh rate when it's needed and still have semi-okay battery life. And for the people that
4:59
prioritize just straight-up battery life, change it to 60. Anyway, moving on to the next one, it's going to be the gestures
5:07
Now, the phone by default comes with them enabled. That's one thing
5:13
If you decided through settings to go or throughout the setup to go with the buttons instead
5:19
you can enable it this way or disable it whichever way you want to do it
5:23
All you need to do is navigate into the settings, the main settings page right here
5:28
and scroll down to system, choose gestures, and then select system navigation
5:32
And in here you have the two options. We have the gestures which I've been using for the entirety of this video
5:38
And we have the three-button navigation, which you can enable, and it gives you the outdated buttons at the bottom
5:44
But some people might find this more useful, easier to use, so you can change it right here
5:51
So anyway, this would conclude all the tweaks and tricks that on to share with you. And if you found this very helpful, don't forget to hit like, subscribe, and thanks for watching