0:00
Welcome. In front of me I have the brand new Samsung Galaxy S-24 and today I'll
0:07
show you how you can apply tempered glass to this phone. So to get started I'm gonna first point out that I'm using some cheap temperate glass and
0:24
you don't have to use the same one. The way I apply it will work for everyone no matter what brand
0:30
go for as long as it's basically flat and doesn't require glue which some
0:36
screen protectors do though for the flat displays that's unheard of it's
0:42
more for like curved displays like this but this ain't curve so we shouldn't have
0:47
that problem so anyway I guess so this will work for basically everyone no
0:51
matter what brand you go with and there's only minute differences between like
0:57
different brands and the biggest difference will probably be in terms of accessories outside of just the tempered glass
1:05
Some manufacturers will include... Just bring one up. We'll include things like additional wipes, additional tempered glasses
1:14
some stickers like these, microfiber cloths and wet wipes. So that's basically the only difference that you will see between different manufacturers
1:24
There is also very rare possibility that you will have some kind of..
1:29
kind of like weird plastic enclosure which is designed to kind of like auto apply the temper glass
1:38
for you and all you need to just pop your phone in there I'll align everything clean it off and
1:43
that's it obviously this one won't be catering towards this kind of contraption this is just
1:49
manual application yourself with basically any kind of mid-range cheap temper glass that just comes
1:55
with glass and couple wipes now that being said with this package
2:00
I do get wet and dry wipe inside as well along with some manual but I am the manual so we
2:06
can eat that out of the way and here we have our wet and dry wipes you can use those they're
2:11
completely fine specifically these ones will be a little bit of a logical size but there are some cheaper brands that just include a quarter of the size of these ones which probably at that point
2:22
you might want to grab something like a microfiber cloth if you have one lying around
2:26
and use that instead. It will give you a much better experience compared to just trying to fiddle around with these
2:32
tiny little wipes. And believe me, even these ones aren't necessarily anything to boast about, so I just won't
2:39
be using them at all. But the general gist of it is if you plan to use them, one, you start off with a wet one
2:46
which is labeled as number one. Once you clean off your display thoroughly, you can then use the dry wipe to clean that off
2:54
So keep in mind these wipes are kind of garbage, so if the wet pipe is saturated, the dry
3:00
wipe will not be good enough to actually wipe the excess moisture from the display
3:04
So you might still want to use a microfiber cloth. Now that being said, like I said, I'm going to be using just the microfiber cloth, so I'm going to clean it off
3:13
I just have smudges, so that's not a problem for me. Just make sure that any kind of smudges on your screen from fingers and any kind of debris, maybe like moisture that has got on it
3:26
as you probably ever experienced if you get some water on here and it dries up, it creates these calcium basically like droplets
3:34
And you want to get rid of those because they could. create an air bubble. So make sure that your display is just perfectly clean as much as you can
3:43
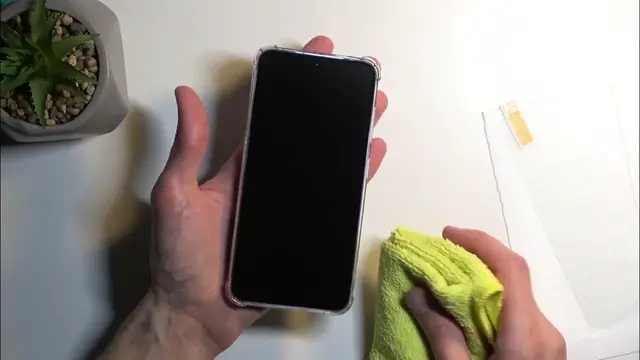
clean it. There we go. Now additional info, if you have a case on your phone, that's fine. You can
3:52
keep it on or take it off. It's up to you. The only difference is when you apply in your tempered
3:56
glass, you could use a case that is on your phone as a bumper to guide the application of the
4:03
glass itself. So you could technically just kind of like plop it to the edge
4:07
this right here and then drop it on though when doing so at least with this case you can see that
4:13
it's way too high and there's a gap left at the bottom so i'm not going to be doing it this way and i
4:19
will actually be fully taking it off and just doing it without it without the case now when it comes on to applying the actual temperate glass once you peel off the sticker where it says number one whatever you holding the sticker that basically what you throw out
4:40
And that will reveal a sticky side on here. So you'll then take that glass and flip it like this and apply it
4:47
Now, the way I apply my temperate glass is number one, I will dry fit it so I can see
4:53
dropping it like this, so I can see how much space I need to leave from each side, top, bottom
4:58
and left and right to have it evenly spaced out all around the basils
5:04
So I just look for symmetry, basically. And this looks to be something about it
5:10
Now, also, one more info. This specific tempered glass that I have has a absolute tiniest little cutout for the little speaker grill right here
5:21
You can kind of see this. There is like a little notch in here
5:25
It's barely visible, but it's there. So obviously that will be your top of the tempered glass
5:32
Now, going to the application once you peel off the layer and you have everything figured out
5:36
you want to start off by having it angled in the tempered glass like this compared to the phone
5:42
This will allow you to maneuver it so it doesn't actually stick to the display right away
5:48
And you want to obviously align it right here at the top. Make sure that it's aligned evenly spaced
5:54
You can do so by pinching the sides and also the sides of the floor. this will give you a pretty good feel of what is the middle of the screen. So you can feel it
6:04
where the scheme even space is from left and right side, if that makes sense. And then lower it
6:13
at the bottom with the same idea, just kind of shift it into place, make sure that it's evenly
6:17
spaced, and then just simply place it down and apply some pressure onto it. And from there
6:22
it will just automatically stick to the display. So now that I explain this entire process, I'm going to give the display one last wipe down
6:32
make sure that there's no dust, and then jump straight to applying it. So, yoink, and..
6:44
There we go, so the top is set. I going to apply a little bit of pressure down here so it won shift too much and then I just lower it down at the bottom because it already evenly spaced as you can probably see and you can see it already starting to stick to the display on its own
7:04
Now if you have a tiny little air bubble like this you can squeeze it out and go and that's it
7:11
give a last wipe down and that's our template. I'm going to the display
7:18
Now I did kind of miss the symmetry a little bit. It's like a millimeter more to the left side
7:26
So there is a little bit more bezel visible on the right side compared to the left side
7:30
If something like that bugsy, you could, though I wouldn't really recommend it
7:35
you could lift it up and just try to shift it. But like it's applied right now, as you can see, there's no air bubbles anywhere
7:43
so it's going to do the job fine. but for people that do want to see this being done, I am going to shift it just to satisfy my
7:54
my autism right here. So I am gently lifting it up with my fingernail
8:06
You can see it's almost completely off. I am going to still put pressure right here so it doesn't
8:11
shift too much. Once it lets it let's there you go and i will just shift it a little bit more to the other side
8:30
you can see it didn't affect the glass at all there is no damage rate here uh whatsoever
8:36
and i did shift it just a little bit to make it a little bit more symmetrical so there we go um
8:42
not that's off but in any case you can see that it is applied pretty well so there it is
8:51
now if you found this video helpful don't forget to hit like subscribe and thanks for watching