0:00
Welcome. In front of me I have the Samsung Galaxy S23 Ultra and today I will show you how can I apply a lens protection to this phone
0:12
Now I already did a video on how to apply the tempered glass. For this specific device it's a little bit more complicated than just you know peeling off a layer and popping it on and calling it a day because
0:23
it is a little bit curved so it uses glue and the UV light to harden the glue itself. So you drop
0:29
it on there, pop in the glass, if you're interested into in seeing how you apply this, you can
0:35
check out a video I did on it. I will be honest, I did have a little bit of an oopsie there
0:41
where this table that I'm recording on is a little bit slanted, so when I dropped the glue
0:46
it started to grip a little bit, but I did salvage the situation, and the video is still
0:50
solid with a little bit of, I guess, just fiddling around with trying to basically fix the
0:59
little mistake of the table and then fixing everything that happened because of it
1:03
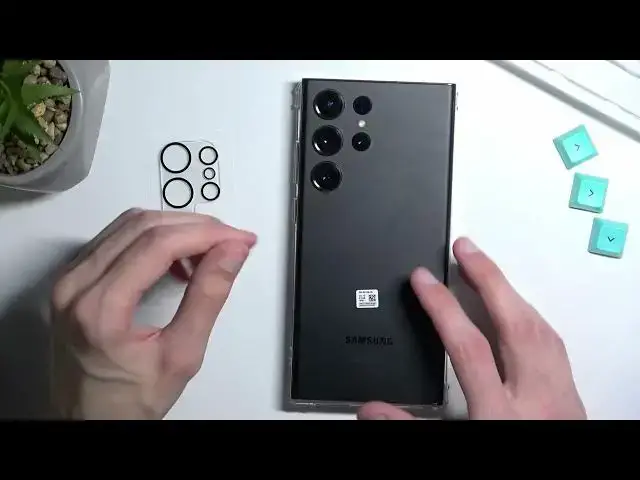
It's a little bit fun too. But anyway, this one strictly focuses on the little lens protection that comes in the package
1:12
with this packaging right here. So this glass that I have right here, it's not sponsored by them, but I honestly have
1:19
used it for all the three different Samsung's that, the new galaxies that Samsung has released
1:24
all from the same manufacturer. And the great thing about them is they include actually two different
1:29
tempered glasses in all the cases. This one for the Ultra has well the curved one like I mentioned
1:36
with the glue and UV light so this is going to be the most complicated one to apply. But luckily
1:41
they do include two of them as well. So if you make mistake you can always fix it up and do it again
1:48
Now one thing that I didn't mention that video if you get the same package and you're watching
1:53
this luckily maybe has the first video as I didn't mention to be careful about
1:59
things like the volume rackers and for instance your speakers and stuff like that
2:02
because this glue will clog up basically everything. If you do it correctly, it shouldn't really be a problem
2:08
because the glue shouldn't go anywhere outside of it. But on the video you will probably see if you check it out that I did have a little bit of a drip on the side
2:19
Did it just wipe up? If that was on the other side and started dripping onto the volume rockers and I left it
2:25
it would actually completely mess up the device where the buttons would basically become sealed and wouldn be pressable anymore So yeah Anyway let just jump straight to this one Now one thing to mention is I am using a case right now on this phone
2:40
and with this applied I will not be able to have this case on
2:44
The reason for that is the case actually goes around the cutouts right here
2:48
and if I show you this little thing right here, it adds additional bulk
2:55
which this this is basically strictly designed for the camera array that it has right now
3:03
if I add this it will not be able to go on fully on there
3:07
so the lens protector will be pushing up the case so if you have a case like this
3:14
I guess you will have to pick either the case or the lens protection but honestly
3:19
with the case like this this kind of becomes useless because the case
3:23
already protect the lenses itself as you can see. Maybe not as well because this one literally covers the lenses with glass
3:32
But obviously I think it's better to have a case like this on rather than just lenses protected
3:38
and nothing else. So anyway, now in the package we should have had a couple different things
3:47
I'm going to show you in a different one. How it normally looks like
3:55
So you'd have the wet wipes, you would have the microfiber cloth, and you'd have the stickers
4:02
Now I did use the microfiber to actually wipe up the excess glue in the previous video
4:07
So I don't have that right here, I do have the stickers. And I should have somewhere at least one of the wet wipes
4:15
I don't know where it disappeared. It should be somewhere here, but it's not
4:22
But yeah, as you can see even in this one, there is two of them. I'm pretty sure I only used one, maybe two, I don't know
4:30
But the reason I'm mentioning this is because you probably want to use one of these wipes
4:34
to wipe off the lenses, but more importantly, wipe off the glass around the lenses
4:41
Now, the reason I'm saying more importantly the glass is because... Let's just grab some foam maybe
4:50
No foam around here. So, yeah, the reason I'm saying it is because once you..
4:55
peel this off the only place that this sticks is basically around here so it only sticks to the glass on the the phone not the lenses itself And you want to clean those off from any kind of like finger oils
5:11
that you might have put on the device by just, you know, using it because it might degrade how well this actually adheses
5:19
to the actual glass right here. So yeah, clean that off as much as you can
5:25
And from there, you can just go straight to applying it. Oblocation is really simple. I'm just going to clean it off
5:57
Now one thing that you will want to also keep in mind is to look for any kind of dust that might settle
6:10
You don't want any kind of dust on your lens. Obviously it might affect the quality of the photos that the camera will be taking
6:17
So just make sure that there's nothing on there. What you can actually do is just kind of place this over it for now
6:24
So this will obviously protect it a little bit from just dust and get yourself ready to apply it
6:30
So all you do is just peel that off and then slap it on now I'll
6:34
Before I actually peel it off just so there's no like nothing settling on it
6:38
I quickly mention once you're going to be popping it on there just put it on try to like align the little rings right here with the cameras
6:46
You need to wiggle all around so it actually fits over because by default it is pretty closely like cut
6:54
So there is very little room for the cameras. So just like wiggle it around so it falls down in place
7:01
And it obviously will try to stick to the lenses as well a little bit. There's a little bit more adhesive even like on the edges
7:07
So just try to like wiggle around and push it down. So anyway, just up this off
7:15
Obviously you don't want to touch the... this side right here. there we go and from there once it on you want to push it on As you can see it starts to stick right here
7:46
Now once it's on, it actually has a much darker color, as you can see
7:50
once it sticks to the actual frosted glass. So that's completely normal
7:56
And there we go. Now, chances are it won't ever stick perfectly on there
8:09
As you can see around, you have this weird, a white, kind of like fuzziness to it
8:16
It's just locations where the adhesive isn't catching fully on. I'm not sure if there's just air pressure that is preventing it from doing so
8:27
Every time I press it, as you can see, if I press it down herejunct here, it appears right here
8:31
if I do the same right here, it just reappears on the other side. So yeah, from what I've seen, because I applied a bunch of these
8:40
it's usually the case. I haven't actually ever managed, so I think have it like fully on there
8:45
But obviously this will not affect the quality of the photos. It's just aesthetics, a little bit of an aesthetic
8:51
I have a little bit of an OCD right here, so it does bother me a bit
8:55
But in terms of camera quality, how the photos will be coming out, it should have zero impact
9:01
So there we go. And like I mentioned because of how this is designed, the case will no longer fit properly on
9:10
As you can see, it just kind of like pushes it out. So yeah
9:15
So either maybe try to find a different case that has a bigger cat out right here to accommodate
9:19
for such a thing or don't use this or don't use a case
9:24
Whichever one works for you. So yeah, here we go. And obviously your camera is now protected
9:30
This is actual glass right here. So it should be resistant to scratches for the most part
9:38
Obviously if you have some like just unluckiness it might still scratch the glass right here
9:44
But this is a protector so obviously you can replace it if that becomes scratched to the point
9:49
that it's affecting the quality of your photos. But anyway, so if you found this very helpful, don't forget to hit like, subscribe and thanks