Up next in 10

Find out more about Samsung Galaxy S23+:
https://www.hardreset.info/devices/samsung/samsung-galaxy-s23-plus/tutorials/
Hi, all. Let us show you today how to install Safety Glass on your Samsung Galaxy S23+. A specialist from our company will guide you step by step on how to apply tempered glass properly. Watch our video until the end and try to do it yourself. If you want to know more about your Samsung Galaxy S23+, visit our YouTube channel.
How to apply tempered glass on Samsung Galaxy S23+? How to protect a screen with tempered glass on Samsung Galaxy S23+? How to install a safety glass on Samsung Galaxy S23+?
#TemperedGlass #SafetyGlass #SamsungGalaxyS23Plus
Follow us on Instagram ► https://www.instagram.com/hardreset.info
Like us on Facebook ► https://www.facebook.com/hardresetinfo/
Tweet us on Twitter ► https://twitter.com/HardResetI
Support us on TikTok ► https://www.tiktok.com/@hardreset.info
Use Reset Guides for many popular Apps ► https://www.hardreset.info/apps/apps/
Show More Show Less View Video Transcript
0:00
Welcome. And follow me, I have the brand new Samsung Galaxy S-23 Plus, and today I'll
0:06
demonstrate how you can apply a tempered glass to this device. Now the glass that I have right here also supposedly comes with a camera protection
0:19
which I'll be applying in a separate video if you're interested in that
0:25
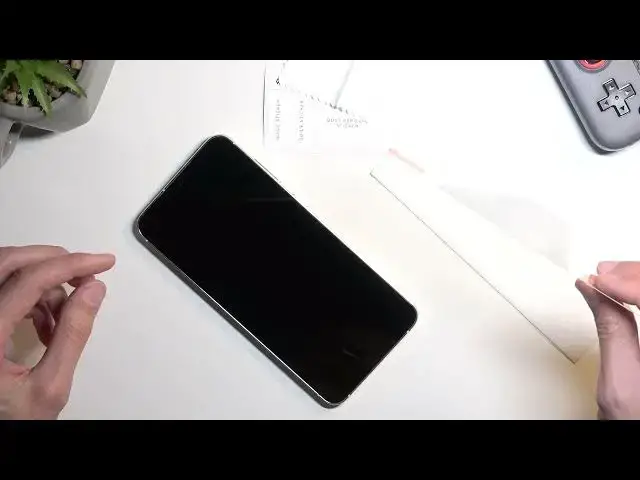
So I haven't even seen this, let's look at this. Nothing in here
0:34
Yep, so there we go. We can see it right over here. So I'll be applying this in a separate video
0:40
Now, interestingly enough, we actually have two different tempered glasses right here
0:45
So it looks like if you mess up one, you have a spare one just to fix your mistakes
0:50
Hopefully we don't need to use the second one. We can just deal with one. And also in here we have our wipes, just rip that apart
1:00
Whoops. There we go. Oh, come on, clumsy me. So there we go, we have also a couple wipes
1:13
Oh, we have a little microfiber cloth. That's nice. And we also have stickers
1:21
Wait, we also have more stickers. Is that all? Yep, that's all
1:28
So, you can use those if you want to. You can use those if you want to later on. So you have some guide stickers
1:34
These I kind of find useless. The way you do it is you will just stick them onto the display
1:39
And when you're placing on the tempered glass, you then lift up the stickers to get the temper glass up if it's incorrectly placed
1:47
I don't really use those. I do have a way to place the tempered glass on the display the way or in a place that I want exactly
1:56
so these are kind of useless to me and I'll show you how we can do this
2:00
so you don't need to utilize these little stickers but these ones will actually come in handy
2:05
so this little sticker I mean technically could use both of them
2:08
for the same thing but this one will be used to get rid of any kind of dust that might settle
2:12
on our display once we have the display clean and prepped for application so
2:18
now I'm going to just take one of these put the other one to the side have our little wet wipes so we have two of them as you can see for both of the tempered glasses So I just going to put the other one away
2:35
Stick with just one. I'm also going to put one of these away
2:41
And then we're basically good to go. Now, I did have, like, a crappy little tempered glass applied right here for the time being
2:46
before the actual S-23-plus glass came in. So I'm going to take that off
2:53
This was just for protection, so it's not needed anymore. And I actually have one that is specifically designed for this phone
3:02
As you can see, it does have a little bit of a whole punch, not whole punch, but like a cutout right here
3:07
Really small. There we go. I'm just going to dry fit it, see how it fits on here
3:16
Okay, so you can see pretty nicely. Now, I'm going to... quickly go into method of applying a tempered glass before I start cleaning off the display
3:30
just because when I start showing you how to do it I'll most likely mess up the cleaniness
3:36
of the display anyway so we'll need to clean it up again so yeah so anyway starting off the
3:43
specific brand that I have right here has only one side to peel off as you can see so number
3:47
one some tempered glasses might also have another one on the other side but you will always start
3:53
with number one. When you peel off number one this will reveal a sticky side of the glass
3:59
itself right here so once I just like ripped that off it will be a sticky side and you would
4:04
then place it like this on the display. So now that that's out of the way once your display is clean
4:11
and ready you will peel that off and the way I apply it is at an angle so just to kind of showcase
4:16
this so it will be kind of like this and I start I will always start off
4:23
with the top of the phone just because right here I have a camera and this will easily
4:27
allow me to just position the tempered glass correctly from like top, bottom and left and
4:33
right side and I pinch the glass from both sides and while pinching the glass I'll also start
4:41
to try to pinch the bezels of the phone this will then allow me to get the glass basically
4:47
smack in the middle of the display once it is I'll apply a little bit more pressure so it won't
4:52
shifts too much and just lower down the bottom side But before I drop it on here I just make sure that it is aligned correctly So I do the same thing as I did at the top which is just by feeling the bezels of the phone
5:05
and the glass itself along the sides, and then drop it. As you can see, it is basically smack in the middle
5:13
So there we go. That is the way I applied. Now, that is also one of the reasons I don't need the guiding stickers
5:18
just because I can use the bezels of the phone as the guiding while I'm holding the
5:23
pepper glass from both edges and this just allows me to always have it smack in the middle
5:28
So that's why it's not needed. The only thing you need to worry about when applying it is so it is
5:34
far enough to the top or bottom depending on how you tend to do it. So if you push it too far, obviously
5:42
as you can see, this would be too far. So it would be cutting out too early at the bottom and well
5:47
too much of it would be protruding from the top. So just dry-fitted like I am right now just to see
5:52
where the middle part is, which it looks like it's about here. You can see minimum bezel
6:01
minimum like space here is visible and also here. Once you have that ready, or once you have
6:06
that like visualized how far you need to put it when you're going to be applying it. So
6:12
roughly about like right here should be good enough. Then keep that in mind and you can then
6:18
safely apply it. Anyway, Now one more thing that I'll mention is this glass that I have right here is very thin compared to other glasses
6:28
so you might want to be careful. I did mention to apply a little bit of pressure right here
6:35
I'm not exactly sure if that might be the best actual case or best solution right here
6:40
I usually do it but usually I have a little bit of a thicker glass
6:45
Just to kind of bring that into perspective. I believe the old one that I had on here is very much
6:52
basically double thickness than this one. The reason for this is is the fingerprint sensor
6:59
So with this glass I assume the fingerprint sensor will still work while the previous one it did not
7:06
Okay, so now let's clean off our display. I'm actually not going to use the wet wipes
7:11
just because the display is pretty clean already, so I just have a little bit of smudges on the edges
7:17
So that's what I'm going to get rid of with the little wipe that I got. There we go And it perfect Now as you can see there is a little bit of dust so you can use those stickers Also use this little wipe to get rid of it
7:34
Actually that's not dust. Okay, so right now it's perfect
7:54
So I'm going to jump straight to applying the glass just because there is no dust on the display
8:06
And there we go
8:15
As you can see it's evenly placed and it's already just glowing itself
8:21
I didn't want to put any pressure on here. Perfect. That went super well
8:30
Now last little thing I'm going to give it a little bit of wipe just to get rid of all
8:36
the fingerprints. And as you can see, this is perfect as you can get it. There we go
8:46
Now I'm going to check one more thing. I'm going to go into settings. Oops, not flashlight
8:55
settings and I'm just going to add a fingerprint to the phone. A lock screen, lock type
9:06
Where is the fingerprint sensor? Oh, come on. Continue, register finger finger. Done
9:32
And yep, it works just fine now, so that's great. So there we go
9:40
Now, if you found this very helpful, don't forget to hit like, subscribe, and thanks for watching
#Gadgets & Portable Electronics
#Other