live_tv
Livestream Starting Soon
00
Hours
:
00
Minutes
:
00
Seconds
Up next in 10

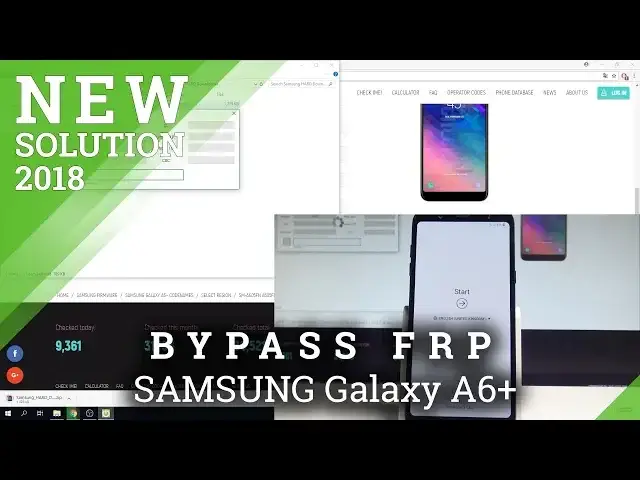
How to Bypass Google Verfication in SAMSUNG Galaxy A6+ - Unlock FRP |HardReset.Info
May 25, 2024
The Unlock FRP: https://www.hardreset.info/devices/samsung/samsung-galaxy-a6-plus/faq/bypass-google-verification/
In this tutorial you can check out how to bypass Google verification in SAMSUNG Galaxy A6+. By doing this instructions you can remove factory reset protection from your phone. If you forgot your Google Account you can bypass Google Verification and activate your device.
How to unlock FRP in SAMSUNG Galaxy A6+? How to bypass Google Verification in SAMSUNG Galaxy A6+? How to remove Google protection in SAMSUNG Galaxy A6+? How to remove Factory Reset Protection in SAMSUNG Galaxy A6+? How to bypass Factory Reset Protection in SAMSUNG Galaxy A6+? How to unlock Factory Reset Protection in SAMSUNG Galaxy A6+? How to skip Google Verification in SAMSUNG Galaxy A6+?
Read More:
https://www.hardreset.info/devices/samsung/samsung-galaxy-a6-plus/hardreset/first-method/
Show More Show Less View Video Transcript
0:00
Here I have Samsung Galaxy A6 Plus and let me show you how to bypass Google verification
0:10
on the following device. So basically let me show you how to unlock the factory reset protection
0:16
So at the very beginning we need to download a couple of things that you will need to use
0:21
So at the very beginning the USB drivers, let's use our link, Samsung Godin software
0:26
mini ADB and fastboot. Let's also use all the links to these files from our tutorial, the link will be under
0:35
the video. Then you need to download the Samsung combination firmware right here
0:41
So let's use our upload from the following year. As you can see here you need to find your model, this is your model and let's download
0:54
this combination firmware. Before you do it it's good to check out if this is your version of your combination firmware
1:01
so let's choose power off and tap power off again. Now you need to press together power key and volume up, keep holding both keys
1:14
Let's release both keys as soon as Samsung Galaxy A6 Plus logo pops up
1:21
And as you can see here you got the information about your firmware
1:25
So in my case it's U1 R2 so this is like the end of the firmware and I've got this combination
1:33
firmware prepared. So if you also have this type of the combination firmware let's use our link
1:42
On my device let me press power key to reboot the device
1:49
Let's just tap download right here
2:01
And let's wait for the mega upload, afterwards you will be able to download this thing
2:09
Then you have to have the Samsung firmware. So in order to have the Samsung firmware to your device it's good to use this website
2:17
email.info download firmware. Here let's enter the model of your device so the Galaxy A6 Plus
2:29
Tap search
2:47
Alright here you've got your model, let's choose it. Let's choose your exact code name, in my case it's the following one
2:56
Then you need to choose your country and your carrier. Let's just wait a few seconds and here in my case let me choose Poland
3:05
Open without the carrier. Let's just tap open right here
3:16
Choose download. And afterwards you will have the packed file. Let's unpack the following Samsung card downloader and then you will be able to open this up
3:32
Tap yes. And then all you need to do is wait a couple of seconds
3:53
And just choose download to download your firmware. Let's select the place
4:01
For example in my case it could be the download folder. Tap save
4:06
And then you need to just wait until the downloading will be completed
4:10
I've got this thing done so I can choose pause. So when the download will be completed all you need to do is unpack the firmware
4:22
So here I have my firmware. Then if you have unpacked the firmware you will be able to use the following files
4:32
So afterwards let's put your device into a download mode. So let me press power key
4:41
Choose power off and tap power off again. Then let's connect your micro USB cable to your PC
4:49
Here I have such a cable. And then let's start holding together the volume down and volume up
4:56
So let's keep holding together those two keys right here. And while holding those keys let's connect your device by using micro USB cable
5:07
As you can see the warning message pops up. Now let's press volume up
5:13
And the device is in a download mode. That's what we need
5:18
So afterwards let's open the Odin. And here I have Odin. Of course it's obvious that before you do all of the steps you need to install the drivers
5:30
to your Samsung, the ADB drivers as well. And then let's unpack the Odin
5:37
Afterwards you will be able to use the Odin. Here I have my Odin software. Alright
5:48
And as you can see here I've got the information that the device connected
5:54
Now let's use the combination firmware. So in order to use the combination firmware you need to also check out which file you
6:07
need to upload. So to combination firmware you need to just into the AP section choose the appropriate file
6:21
So let's choose AP. Let's choose download the unpacked combination firmware and let's just load this firmware
6:30
into the AP
6:52
Alright the AP is loaded. Now let's choose option. Make sure that you've got selected auto reboot and factory reset time and just tap start
7:01
So the device is flashing itself. You have to wait until the whole process will be completed
7:27
Alright the flashing is done. The device is restarting so you can disconnect your phone from your cable and let's just
7:35
wait until you will be able to use your device. As you can see the factory binary is loading
7:46
That's what we need. combination firmware
8:02
Alright and here you need to open the settings. So let me try to find the settings
8:10
Let me choose here for example. Sorry this is the hardware test mode
8:18
Let me go back. Let me tap apps. Here I have apps and select settings
8:25
So then you need to scroll down, choose system, select about phone and let's tap a couple
8:32
of times on build number. As you can see you are now a developer. So we can go back and right here let's open developer options
8:41
Let's under system tap choose developer options and let's enable OEM unlocking
8:48
So as you can see here we got the warning. Let's tap enable. Let's go back and then you need to perform the hard reset operation
8:55
So choose reset, select factory data reset, tap reset phone and choose erase everything
9:02
So the device is performing the hard reset. Let's wait a couple of seconds until the operation will be done
9:31
Alright so the hard reset is done. Now let's press power key to switch off the device
9:39
Then let's prepare the micro USB cable one more time and let's enter the download mode
9:46
So let's hold on together volume down and volume up for a couple of seconds and connect
9:52
your phone by using the micro USB cable. Keep holding both keys, release them as soon as warning pops up, press volume up to confirm it
10:01
So as you can see right now you are in a download mode. So let's go to your Odin one more time
10:06
Let's choose reset and now let's flash your device with the normal firmware that you just
10:11
previously downloaded. So let's choose BL. So of course let's open the folder with your firmware right here, select BL file, choose
10:24
AP right here
10:38
You should wait a few seconds, maybe even a few minutes, AP file is the largest one
10:57
Alright the AP is ready
11:12
Now let's use the CP file right here. Here I have the CP
11:20
Choose CSC file. So here I have CSC file
11:31
Alright now choose options, make sure that you've got auto reboot and factory reset time
11:36
Select it and choose start. So the device is flashing itself. Let's wait until the whole process will be done
12:10
Alright, the flashing is done
12:34
Now let me disconnect my device from my micro USB cable. Let's wait until the phone shows you the welcome panel
13:02
Alright, the home screen pops up, the welcome panel
13:23
Let's choose your desired language. In my case it will be English, tab OK
13:29
Let's go next. Let me quickly go through the activation setup process
13:36
Let me even skip the connecting to a WiFi, it's a good sign that you can skip it
13:40
Let me just check out if I can activate my device without the Google account
13:45
Tab next, no thank you and choose skip, skip anyway. Tab more, agree
13:56
Let me also skip connecting to a Samsung account. Tab finish. And as you may notice the phone is loading the home screen
14:09
Everything is done. So now you can use your device in normal mode
14:16
So everything went well. Thank you for watching, please subscribe our channel, leave thumbs up under the video