Up next in 10

XIAOMI 12T Pro Tutorials:
https://www.hardreset.info/devices/xiaomi/xiaomi-12t-pro/tutorials/
Watch the list of the best tricks for XIAOMI 12T Pro. Especially for you we peak the top tips for XIAOMI 12T Pro. Use the advanced settings, hidden features, and other amazing options. Become a pro user of XIAOMI 12T Pro. You just need to try these hacks in XIAOMI 12T Pro.
#XIAOMI12TPro #TricksPixel #TipsPixel
Follow us on Instagram ► https://www.instagram.com/hardreset.info
Like us on Facebook ► https://www.facebook.com/hardresetinfo/
Tweet us on Twitter ► https://twitter.com/HardResetI
Support us on TikTok ► https://www.tiktok.com/@hardreset.info
Use Reset Guides for many popular Apps ► https://www.hardreset.info/apps/apps/
Show More Show Less View Video Transcript
0:00
Welcome. Infoomone is a
0:01
Xiaomi 12T Pro and today I'll show you a couple tweaks and tricks you can do on this phone
0:10
So anyway let's just get straight into it, open up settings, and navigate to our display where we'll have a couple of things that want to show you
0:19
Number one would be the dark mode so you can switch obviously between light and dark
0:24
just like a permanent switch but also you can set it up to be on the schedule so you can have it set so during the night time it's in dark mode and during the daytime it's in light mode
0:34
so during the day you can actually see your display and during night you don't have to have your eyeballs synched out out of your skull
0:39
now moving on to the next one which i'm going to switch it back on the video i believe it looks better in light mode
0:45
we can move over to the next one which is color scheme now by default it is said to be vivid
0:52
so if for you this is a little bit too saturated i can change it to
0:57
something else. Now under advanced we will have apparently color calibrated options like p3 or SRGB. Now I'm not exactly sure how accurate these are so take it
1:14
with a grain of salt. You also have the original and saturated as an option as well
1:21
in here though original I guess is the least saturated one while saturated and vivid are
1:26
almost the same. Now moving on to the next thing it's going to be the refresh rate which is set to
1:33
default. Now default actually here is the mixture of the 120 and also 60. So it switches between whatever it needs to
1:45
So if an image is in motion like here because we have this jumping little ball it will be utilizing 120 but if an image is stationary like this page right here where nothing is moving on a screen then it switches to 60 or maybe even below
2:02
Now we have also an option to set it custom, meaning you can hardcop it to a specific refresh rate
2:07
Either 60 or 120. Now, I don't recommend hard copying it to 120 just because that will be consuming more of your battery life
2:16
But 60 will be a decent option if you're just planning to straight up preserve as much power as you possibly
2:21
can but in general for the most people if you're planning to have a decent
2:28
battery life and also that smooth motion then default recommended is the
2:32
go-to option now moving on to the next thing we have some AI image engine so
2:40
we do have a couple options like super resolution so it enhances the image as you
2:47
can see it gives you kind of like a blurry example I haven't tested it out how
2:51
well this actually affects the images on here on this example it does improve it in some way
3:01
I'm not exactly sure how it's doing it but you can enable it and hopefully it will in certain cases improve your image quality just by being enabled
3:11
now we also have some AI HDR enhancement so just I guess fakes an HDR
3:18
process of video using HDR effects to bring up so it basically
3:21
an HDR effect on your image. But to be completely honest, I believe if it's faking in HDR
3:31
it's probably just a mixture of exposure and brightness editing on whatever image you will be viewing or video
3:41
You can enable it and see how it affects your footage, whatever you will be watching
3:46
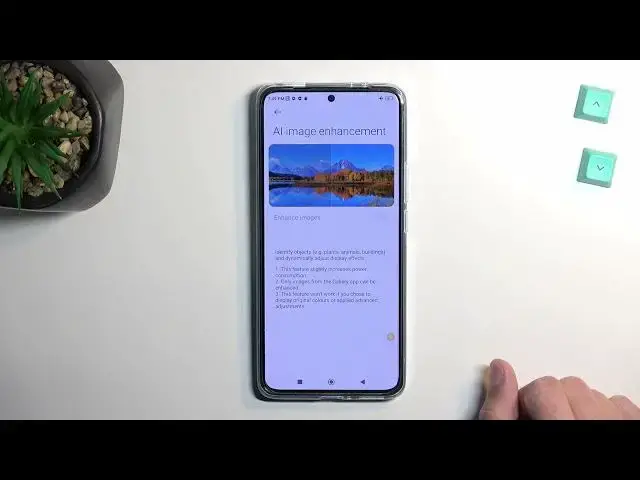
and maybe you will like it. It completely preferential so if you don like how it affecting it and turn it off We have some also AI image enhancers so this just It gives us the same thing as the previous ADR just for images
4:05
where, as I would assume, just brings, in this case, as you can see
4:09
brings up the saturation and shadows. So yeah, it looks better, but obviously just a simple image editing
4:18
which is done by the phone automatically. So for some people it might be nice to have
4:24
Anyway, let's move over to the next thing, which is the gestures
4:29
So we can navigate to the system, not system, additional settings, right
4:38
Let me quickly locate this. There we go. So it was here. Additional settings. Gesture. I'm just blind
4:58
Now in here you'll have gesture shortcuts and we have a couple different things. So one of the ones that I would like to use is the turn on torch. I'm not exactly sure
5:06
why everybody, why every phone calls it torch? Like what are we living in Great Britain
5:12
It's a flashlight from as far as I've been learning. So anyway, we can do it
5:18
and this will allow us to double press the power button to enable our flashlight
5:23
I do need to do it quickly. There we go. Just to kind of showcase this
5:33
It's a pretty nice way. A bunch of phones have this, but not every. I do like to enable this
5:40
Though keep in mind, there are some other options in here that could utilize the double
5:44
press of a power button to launch something else For instance I believe camera has it but but Xiaomi actually went out of the way to also give you a substitute for it so you can launch your camera using either the double on the power button or using volume
5:57
down some phones that basically have option for camera and flashlight just give you
6:03
use either one or the other with the power button and if you like to use both to
6:07
too freaking bad so here we have actually a benefit of having additional way of
6:13
launching it anyway we've also couple things like screenshots uh google assistant so if you want to get back the power button or technically
6:21
you do have it but if you want to not have the assistant show up when you just hold the power button
6:26
for a brief moment like this and just turn it off which is what i would like to do just because i never
6:33
use the assistant so for me to me it's completely useless and moving on to the last thing that i
6:39
want to show you it's going to be the as it's called right here the full screen display i think
6:45
I can actually locate it. So we can find it in additional settings in the blue text
6:52
So full screen display. And this is just a different way of calling gesture navigation
6:57
Now it's called gestures right here. Not exactly sure why they're calling it full screen display
7:02
It's kind of stupid. Every phone uses gestures as a default method of just naming it
7:10
But anyway, let's enable it. Now, the first time it does give you an option to learn it or not
7:15
If you already have used gesture navigation before, you don't have to. They all work the same way
7:21
So you swipe up to go home, swipe up and hold to go to recent and swipe from either side to
7:25
go back. Pretty simple. And also pretty intuitive way of navigating to your device
7:30
Now with that being said, this would conclude all the tweaks and tricks that don't to show you, and if you found this very helpful, don't forget to hit like, subscribe, and thanks for watching
7:45
Thank you
#Consumer Electronics
#Skins, Themes & Wallpapers
#Gadgets & Portable Electronics
#Other