live_tv
Livestream Starting Soon
00
Hours
:
00
Minutes
:
00
Seconds
Up next in 10

Read more info about SAMSUNG Galaxy Note 10:
https://www.hardreset.info/devices/samsung/samsung-galaxy-note10-sd855/
If you would like to find out the best apps that you can use on your Galaxy Note 10, then find presented video to learn how to activate super features in few easy steps. In the above tutorial, you will be able to find the best apps that you can use to make your life easier. Let’s follow our tutorial and use top trick every time when you need it.
How to enable secret options in SAMSUNG Galaxy Note 10? How to activate super feature in SAMSUNG Galaxy Note 10? Where to find the best apps in SAMSUNG Galaxy Note 10? How to enable hidden options in SAMSUNG Galaxy Note 10?
Follow us on Instagram ► https://www.instagram.com/hardreset.info
Like us on Facebook ► https://www.facebook.com/hardresetinfo/
Tweet us on Twitter ► https://twitter.com/HardResetI
Show More Show Less View Video Transcript
0:00
Welcome. In front of me is a Samsung Galaxy Note 10 and today I'll show a couple more
0:11
tweaks and tricks that I can do on this device. So we're going to start off with video
0:15
enhancement which will basically improve the video quality of every app that is supported
0:19
by this and to enable it you want to go into the settings and from settings go into
0:25
advanced feature which is somewhere on the bottom. I think or not. All right this
0:29
and right here there should be video enhancer right there and you can tap on it and you
0:38
all see available app so it's supported by the video player YouTube and Netflix
0:42
now there is nothing else really installed on here and when you enable it
0:47
will get a little visual view of how it will change the video so it makes the
0:53
shadows a little bit less dark adds a little bit more brightness and also such
0:59
makes a little bit more vibrant overally. So that's the first one
1:07
Now moving on we're going to go into the adaptive sound, which will be in the sun settings
1:12
and what it will allow you to do is create your own kind of sound signature
1:16
that works, for instance, with your specific hearing. And the way it works, I mean, it only works with headphones
1:23
and the way you set it up is you put on the headphones
1:27
you will then get to set up up the sound. So I will start playing you super quiet noises that you select if you hear it or not
1:38
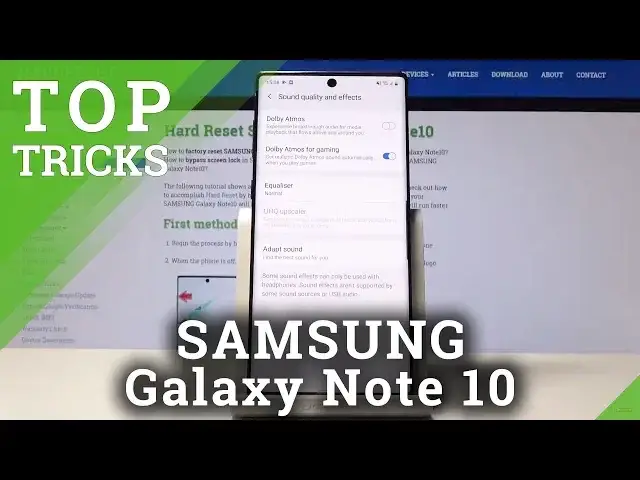
and judging by that it will create your personalized EQ for just for you. So we would go into
1:45
I think it's advanced sound settings right here then sound quality and effects and you have it
1:52
right here. Adapt sound now by default it's you need to download it so let's see I have
1:58
internet you can just tap on it then you guess I won't be able to launch it because
2:08
I don't have headphones plugged in so mind you that you actually need
2:15
headphones I'm gonna try again and see maybe it's changed it's not like I'm downloading but yeah basically go in here
2:26
and then you have a bunch of presets and inside. You can show it on the other device
2:32
But you have basically a bunch of presets based on an age. And you also have at the bottom to create your custom one
2:40
And once you create it it will just start playing the super faint sounds that you just like I said select if you can hear it or not So let see if it here
2:52
Okay. So, yeah. Now, moving on, we're going to go into the screen recording, which will just simply allow you to record your screen
3:02
So once you pull down the notification panel and find it, which is coming right here, you can top on it, and it will count down from
3:10
3 to 0 and start recording. And before you actually start recording, you can also hold it
3:18
And we'll go to the settings where you get to customize all the settings of the recording
3:23
Now, this is basically the default setup. So it's a file video size is basically on the middle
3:32
Video quality is 1080p and sound is only the media sound. Now you can add sound and microphone
3:40
and I wouldn't really change it to have video quality considering it's at the highest
3:45
there is no higher quality, unfortunately. And then you can also boost up the file size and that will most likely also improve the quality
3:57
of the video. Even though it's an ADP, it will most likely reduce artifacts and unwanted stuff if you
4:04
want to record something in a higher quality. So let's just keep it as it is now
4:10
And then just go back to it, tap on it, just tap on allow, so it actually you can access it
4:16
and start recording. And you can see countdown. And once it starts recording, you have this little bar right here
4:24
And mind you, it's not visible on the recording, it's just for you to quickly have an access
4:28
to stop it. And whatever I do from now on is basically being recorded
4:33
And if I close it now, so recording saved, I can go into the gallery and find it in here
4:39
and I'm sure if I have it set to play media so it's gonna mute it and you can see that it's playing right now
4:49
so that's basically all the movements that I have done on the screen now this also works with
4:55
games and stuff like that so you can use it to record games videos now I believe it will be
5:01
blocked in Netflix and programs that are most like used for video streaming because
5:09
of reasons I guess so keep that in mind it will not work every single
5:15
apps and apps tend to block it okay and moving on we're gonna go into the one of
5:23
the more useful changes which if you not an advocate user of Pixby and you try to turn off the phone it will actually right now it opens it like it supposed to be because I changed it but let actually go back into to it and
5:40
I'm gonna set it up as it's supposed to be so by default it's sets to whatever it's right now
5:45
so you hold it and it opens up the beloved Bigsby button that no one or Bigsby
5:53
don't talk yeah so it opens it up and start it's being annoying whenever you're trying to shut off the phone or restart it or do whatever
6:03
Now also you have to access the boot menu from basically the panel or by holding power and volume
6:12
down which I found out later on. So you get this the same but that is kind of a little bit more
6:18
inconvenient. You have to both-handedly do it because it's hard to press volume down and power key with
6:25
single finger so yeah but basically you can change it so you go back to the boot settings you
6:34
will have here side key settings they call the power key side key for no reason really and from here
6:41
you can just tap on power off menu and now I can actually hold it and it will give you normal
6:50
many for deep boot like every other device has it. And also in there you will find double-pressing features
7:01
So by default is set to quick launch camera. And that is actually a fairly good one
7:07
I wouldn't really change it. But if you really want to, you always can. And as an example, if I double-press it
7:16
there we go. It launches camera, as you can see. And even though the device is basically lock
7:24
so I will need to use a fingerprint to unlock it or pattern, it will allow you to launch the camera
7:29
which is not the case if you change it. So if we leave this, it will go back to the lag screen
7:36
But let's go back to the settings, and you can use Biggsby if you like to
7:42
so you can just tap on it. We can tap on Open App and then select a particular app
7:46
that you would like, so for instance, I can set it to settings. And now if I double press the power key, it will open up settings
7:54
Now keep in mind, like I said, if you have the phone locked and you try this
7:59
it will not work with a specific app. So it will always tell you that you need to unlock because it needs to gain the access to the home screen
8:07
It basically double press for a camera works when the device has a lock screen
8:14
Otherwise you will always have to unlock it to open the app But that would conclude or not yet There is one last thing which is the edge lighting that I wanted to show
8:25
And as the device has no LED notification, this is the only way to really get kind of like a lighting indication
8:33
that you get a notification. And to quickly enable it, all you will need to do is go into the display
8:39
So settings, display, and then you can't. and then scroll down to edge screen right here and then add lighting now make sure it's
8:53
enabled and from here you have a couple options that can modify so edge lighting style
8:59
you can choose how it looks like so effect and you can change it basically different little
9:05
animation as you can see right here it changes it depending on what you choose now it
9:12
The changes aren't really drastic, so keep that in mind. And you can also choose the color of it, so you can change it to something different
9:23
Transparency can set it to be completely not transparent, a little bit more visible
9:29
Then width, if you want it to be basically thicker like so
9:33
As you can see, the line is now a little bit thicker. Now if I change it back, it's super faint and small because of how narrow it is
9:42
and you also have duration which can also crank up and now this effect will last a little bit longer
9:51
and once you satisfy you can just apply and done and you're basically set now here you have also some
9:57
interactions that you can see can enable it or disable it and that's about it
10:05
and then at the bottom you have managed notifications now what this will allow you here is to add
10:12
which app is shown into the, can use the edge lighting. And by default, this is basically all the default settings
10:20
so Messages is the only app that has its enabled by default. But for instance, if you're using something like a messenger from Facebook or WhatsApp
10:29
you would have to add it manually right here. Now, I don't really have any of these
10:33
but it's an example. All you would do is check it like so. And then when you get a notification from this app
10:39
it will light up just as it would be. for the message itself
10:45
So that's how you would set it up. And now that would conclude basically everything that I wanted to share with you
10:50
And if you found this very helpful, don't forget to head like, subscribe, and thanks for watching
#Gadgets & Portable Electronics