Up next in 10

More tutorials about ASUS Rog Phone 5:
https://www.hardreset.info/devices/asus/asus-rog-phone-5/
In this video you can find the list of the best tips for ASUS Rog Phone 5. Find the hidden Android functions and the best features for your phone. Let's become a pro user of ASUS Rog Phone 5.
Follow us on Instagram ► https://www.instagram.com/hardreset.info
Like us on Facebook ► https://www.facebook.com/hardresetinfo/
Tweet us on Twitter ► https://twitter.com/HardResetI
Support us on TikTok ► https://www.tiktok.com/@hardreset.info
Reset Guides for many popular Apps ► https://www.hardreset.info/apps/apps/
Show More Show Less View Video Transcript
0:00
Welcome, in front of me is an Asus ROG Phone 5 and today I'll show you a couple of tweaks
0:11
and tricks you can do on this phone. So we're going to begin with basically the entire list that is in the display section
0:23
So let's just open up settings and jump straight down there. So display and start off with the refresh rate
0:32
You do have 120 or 144 and 60 along with the automatic which probably will be the best
0:39
option here. Automatic meaning that it will define when you need to have more frames and when you
0:45
need to have less. Which you could set it up to the highest one and call it a day but your battery will suffer
0:52
because of this. So automatic will basically drop the frame rate whenever it can, whenever it's not needed
0:58
and thus also preserve your battery life because of it. Now moving further, it's going to be the system color scheme right here which is just the
1:09
dark or light mode for your entire phone. As you can see right now it's in light mode
1:13
If I change it to dark it basically changes it into dark as you would expect
1:18
Now that also includes default apps as you can see. Now apart from this looking a little bit more sleek I would say and less annoying to the
1:30
eye during night, it also has a little bit of a benefit which isn't really said anywhere
1:35
but it will reduce your battery strain also a tiny bit. That is just because the phone uses an AMOLED display meaning that every pixel that you
1:47
can see right here is self lit. So anything that is fully black like the background in between those toggles, for instance
1:54
if we also go into the settings, basically the entire backdrop of the settings is fully
1:59
black meaning that those pixels being self lit don't need to light up at all
2:04
They're basically turned off right now meaning that the battery doesn't need to do anything
2:08
extra as it does for the text that is in white color
2:12
So this will give you a little bit of a battery jump but like I said just a little bit
2:18
You don't expect that you will go from running the device for instance two days to running
2:22
it for three or something like that. That's not the way it's going to work
2:26
You might get like an hour probably at tops of battery life but it's still an hour of
2:31
extra battery life. So moving on to the next one, that's going to be the refresh rate
2:37
So let's go with, what am I saying refresh rate, I already went over that
2:42
Where is it? The system navigation, there we go. So by default, if I remember correctly, when you go to the setup, it might give you the
2:52
option to set it up to the gestures or it might not, I don't exactly recall
2:58
But no matter what you chose, you can change it later on and here in the system navigation
3:02
under display. So I right now have the buttons, navigation bar, but I can change it to gestures which
3:09
will completely remove those and give me this tiny little bar right here that I can swipe
3:14
up on, swipe up and hold to go to recent and swipe from the sides to go back, there
3:21
we go. With also a nice haptic feedback behind it, so yeah
3:28
I do recommend the gesture navigation honestly. To me it's one of the best ways of navigating for the device and I personally just love it
3:35
But I will also add that some people might struggle with using the gesture navigation
3:42
So to all those people, if you're struggling with it, what I can recommend you is when
3:47
you're trying to go home, instead of trying to grab that bar and sliding it up, which
3:51
will ensure that you're doing it wrong and you won't be able to go home all the time
3:59
So to combat this, what you want to do is, as you can see, you do have a bezel right here
4:05
Start the back or home gesture on the bezel and when you swipe up, you are basically guaranteed
4:12
to get it correctly all the time. So just a little bit of a tip to make the gesture navigation a little bit easier to
4:20
use if you never used them before, because sometimes it might be a little bit confusing
4:25
So anyway, let's go now into the animation speed, which should be somewhere here
4:31
There we go, it was above. So animation speed. So in here, these animation speeds are straight up pull out of the developer mode
4:43
So we can tap on them and all these, the window animation scale, transition animation scale
4:47
and animation duration scale correspond to different kind of animations for different things
4:54
Window animation scale normally, I would be, actually, we do have an animation of what
4:58
it is. So when you tap on it, this shows up a little window and that is, this will basically correspond
5:05
to how quick the window is animated. So if you set it to off, that window will basically pop instantaneously on
5:13
While if you set it to times 10, it will just be almost slow motion like
5:18
Now personally, I would recommend you to set it to 0.5, which is basically best of both
5:23
worlds, still having animation, but reducing the animation speed or animation duration
5:28
by half. So those animations will fly by way quicker than they used to
5:34
So you can do that for all of the three different animation types
5:38
And yeah, that will basically make it look and feel a little bit better overall in the
5:44
use of the entire device. Everything will open up quicker and close and be animated quicker
5:49
Now in all honesty, the device will run basically the same way that it ran before, but the animation
5:57
speed will make it feel like it's going quicker because you will be actually opening up apps quicker
6:02
You will be animated faster, so you will have the content fully open on your screen before
6:10
when it was on the one. So anyway, let's again go back and now touch upon one of the things that I personally really
6:17
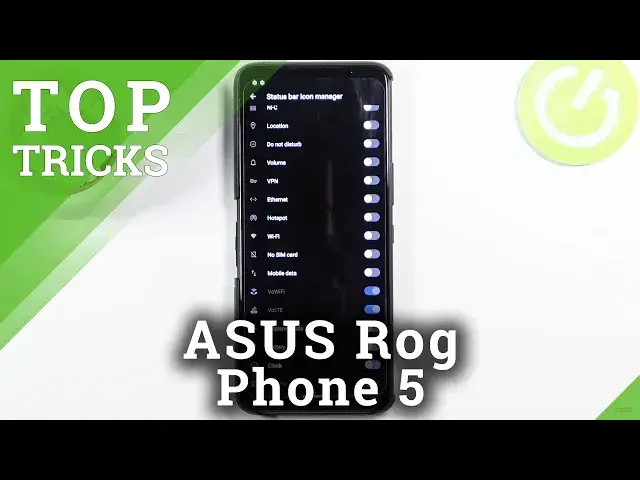
like, which is the status bar icons right here. So it's a fairly simple one and I don't know why I like it so much, but it just adds you
6:27
the ability to remove all the toggles visible from the status bar
6:32
And I basically have open a lot of toggles, so Bluetooth, Wi-Fi, mobile, things like that
6:41
NFC location, and normally they would be all visible in the status bar, which personally
6:48
for instance, if you set up an alarm clock, you don't need to see it all the time
6:52
It's just an alarm clock. We all are aware that it's open. So in here you can actually remove it from showing up
6:57
Now it will still be open or set and running, but it just won't show up in the notification
7:04
right there. So you could go a little bit insane here and turn it all off if you wanted to, but some
7:11
things I would say might be worth keeping if you want to
7:15
So just pick and choose wisely which one you want to keep on and which one you just want
7:19
to completely remove from showing up. And basically if I start toggling them off, I'm going to go the insane route
7:30
And there we go. And as you can see, the only thing that I have left in the taskbar right now is just
7:36
two notifications. And notifications are going to show up always unless you interact with them and remove them
7:43
So that's why there's two gear icons. That's because one is for the finishing up the setup and one is for finishing up search engine
7:52
Oh well, whatever. But yeah, both of them are system related as a notification
7:57
And you can't really remove notifications like that. But yeah, other than that, as you can see, you can remove clocks and battery if you don't
8:05
want it. Although I'll probably keep both of those just because they are useful in my opinion
8:12
So yeah, so it helps you out, clean up your display. As you can see, it looks way better than it did before
8:21
Now moving on to the next option. It's going to be the air triggers
8:25
And we're finally moving out of the display section. So let's go back into the settings
8:29
But this time around, we're going to go into advanced. So scroll down into advanced
8:35
There we go. And we have the air triggers. You can enable them
8:39
And when you tap on it, it will show you up. We do have these triggers right on the top and the bottom of the bezel
8:48
That is primarily used for gaming. But you can also set it up to do additional functions outside of it
8:53
So short squeeze, Google Assistant, long squeeze, X mode. I actually don't know what that is, but yeah, let's do it
9:03
So I'm not exactly sure if I have to grab it. Yep
9:14
As you can see, it just launched the Google Assistant. Now the way you do have to squeeze it is not just the trigger itself, which is right here
9:23
Hopefully you can see it. But it's just the entire phone. Like you grab it from both bezels and you squeeze it
9:28
You will hear, or not hear, but feel a vibration. And it will open up whatever it is set to
9:34
So this is one. I guess it's not really launching X mode, whatever that is
9:45
Oh well. But as you can see, that is how you do it. You can also change the squeeze level
9:52
So meaning you don't have to squeeze it as hard. Or you can make it be squeezable harder, however that is pronounced correctly
10:01
So as you can see, now I set it to 2 instead of 6. So I can just kind of like gently do it and it will launch it
10:09
Which is a really nice option. You can basically change the levels of how hard you need to basically press these gestures
10:17
or however you want to classify this as. Now moving on further, we're going to go into something that usually is not very glamorous
10:27
which is just a screen recorder. But here, Asus decided to take that into a new height
10:36
Let's just find the screen recorder toggle, which is somewhere. There we go
10:42
Right here. So once you find it, you can hold it and this will take you to the settings
10:46
And as you can see in here, we do have typical options as you probably are used to
10:53
So orientations, frame rates and stuff like that. Whatever, right? But when you go into it, apart from the resolution, because this device I believe only has like
11:01
1080p resolution, we do have quality. We do have frame rate, which right here is just a completely 360 difference and turnaround
11:12
from basically every other screen recorder. It supports 120 Hertz of 120 frames, meaning that this right here, the screen recorder
11:24
right here, I believe is the best one I have ever seen. It will produce the smoothest footage you can possibly imagine from a phone
11:32
Because every other phone I believe records, at least at the moment of recording this
11:36
that I've tested. Every phone that I have tested this with only supported 60
11:41
And that was the best. Some devices didn't even go to 60, but just stopped at 30
11:48
So as you can see, this is just significantly above everything else
11:53
Now you also have the option to change the recording storage, although I'm not exactly sure why
12:00
Because this doesn't have an SD slot, I guess you could plug in an external storage and
12:04
save it to it, but that's just a little bit annoying in my opinion and cumbersome
12:08
But hey, it's actually nice that it's here. We have also recording audio, which nothing really here additionally screams quality
12:19
but just the frame rate and the option for you to record at 120, basically blows away
12:27
any kind of other competition in terms of recording the on-screen, whatever is on-screen
12:33
So yeah. Now moving on to another option, which is as well not very glamorous in majority of
12:41
the devices, but in here it just, Asus decided to take it into however they can
12:50
So it is the battery. Now I know that's saying that probably makes you be really confused how the battery can
12:59
be a decent tweak or whatever. But once I open it up, go to the system mode and you see this advanced option
13:10
Now let's be honest, most of the time when you see advanced on a phone, it's not
13:16
But in here, yeah, you do have things like thermal limits, CPU performance, GPU performance
13:26
RAM performance, and so on. As you can see, this literally allows you to tweak how the device runs on a temperature
13:36
and well, the overclocking performance of it, which is honestly one of the most ridiculous
13:42
things I have seen on a phone. I can virtually can overclock this device in the battery section, which sounds kind
13:50
of nuts, but if someone wants it, it's here and it is really nice
13:56
It's very detailed as you can see what you can do. Now I would probably like to see more of a number scale rather than thermal limits, low
14:06
medium, high, because I have no clue what low, medium or high is or CPU performance
14:12
low, medium, high. I know what the CPU performance should be here in terms of gigahertz
14:18
So I would like to see just actual numbers just so I would know exactly what I'm changing
14:23
and how far I'm changing it. But apart from that gripe that I have with it, as you can see, this is way better than
14:30
any other phone I have seen on the market. You can change the 5 gigahertz antennas, refresh rates
14:39
This basically acts as a power saving mode in a way, but you can set it up to be also
14:45
an overclocking mode if you wanted to. So yeah. And moving on to the last option, it's just going to be the simple app right here, the
14:56
Harmor Crate, which isn't necessarily the best name for it, I would say
15:00
It makes me feel like it's a cheesy microtransaction option right here
15:07
But yeah, and here I can launch games from this. It will show you most of the time, majority of the games that you already have installed
15:15
If you can't see them, you can simply add them on by checking them on from here
15:21
But outside of that, you being able to add them on and launch them from here, you can
15:25
also launch them from the home screen, I know. But the benefit right here is you can apply additional settings to the app
15:32
So notification restrictions, boosts in your performance of the device, and just how it
15:38
overall allows you to run the game, which is something that I would consider really nice
15:43
And also if I remember correctly, if you launch any game from here, it does give you the access
15:48
to this little thing. So if I move it to the side, as you can see, the game doesn't really matter
15:55
It just matters that you launch it through here. And as you can see, you have the game engine
16:00
And in here, you have all the things that are already set. So we can quickly toggle things on and off, get a really detailed overview of how the
16:08
device is performing in terms of thermals, frame rates, stuff like that
16:12
So right now, we're running at 30 frames. Device is at 35C, Celsius
16:20
We are at 845MHz on CPU, I believe. And yeah, apart from that, as I said, we have the no calling, so I can disable people
16:33
from being able to call me. I can change the refresh rate from the high one from 120 or 144 to 60 as an example, even
16:43
though it looks like right now it's running at 30. So let me see if I can change it
16:49
Nope, not what I want. I will be honest, I don't really play this, so I have no idea how to access settings in here
17:00
There we go. So yeah, it looks like it's by default set to 30
17:10
That's why it's showing us right here, 30. So apparently, we cannot set it higher for some awkward reason
17:28
Great, so apparently we're locked to 30
17:38
So probably this wasn't the best option for me to show you, considering in terms of frame
17:44
rate, this is locked to 30 max. Not sure why. But yeah, you can see anything else that it can do in here
17:52
You can set up air triggers. In terms of a shooter, air triggers are an amazing thing
17:59
They basically will allow you to, let me quickly show you. So as you can see, we have the left and right air trigger
18:06
The blue highlight is just so you know where the actual trigger is. So right here and here
18:13
And what you want to do is grab this little circle. Let's see
18:19
Nope, not what I wanted. There we go
18:28
So as you can see right now, we have the left and right set up
18:37
And they are fairly sensitive at the moment. That's because I did lower the sensitivity too, if you remember
18:43
But you can also see these two little L and left and right one
18:46
So what you want to do with these, I would say preferably for most of them, is put them
18:51
on things like shooting a gun or scoping in. And shooters, right
18:56
Which then, when you hold it, you scope in with one, you shoot with the other
19:00
So just a nice way for you to do something like that
19:05
And you can move those around, set specific macros or, I'm not sure if macro is the correct
19:10
word, but make them be specifically placed in each individual game. So this will be remembered for this game
19:17
If I leave it like that, and next time I launch it, I used to use air triggers, they will
19:20
be stuck in right here. So I'd have to probably align them correctly for this to actually work
19:26
But you get the point. So yeah. Now that being said, this was the gaming mode, I would call it
19:35
And also, this would be the conclusion of the video. So if you found it helpful, don't forget to hit like, subscribe, and thanks for watching
#Computer Peripherals
#Consumer Electronics
#TV & Video Equipment
#Software
#Gadgets & Portable Electronics