Up next in 10

Check out more info about SAMSUNG Galaxy Z Fold 2: https://www.hardreset.info/devices/samsung/samsung-galaxy-z-fold-2/
We would like to present the tutorial, where we teach you how to successfully set up SAMSUNG Galaxy Z Fold 2. If you are looking for a way to successfully accomplish the activation process on SAMSUNG Galaxy Z Fold 2, find out uploaded tutorial and smoothly add network connection, change language, create Google account, choose Google service and more to fully configure SAMSUNG Galaxy Z Fold 2. Visit our HardReset.info YT channel to get more useful tutorial for your Samsung smartphone.
How to configure SAMSUNG Galaxy Z Fold 2? How to activate SAMSUNG Galaxy Z Fold 2? How to set up SAMSUNG Galaxy Z Fold 2? How to accomplish the initialization process SAMSUNG Galaxy Z Fold 2? How to initialize SAMSUNG Galaxy Z Fold 2?
Follow us on Instagram ► https://www.instagram.com/hardreset.info
Like us on Facebook ► https://www.facebook.com/hardresetinfo/
Tweet us on Twitter ► https://twitter.com/HardResetI
Show More Show Less View Video Transcript
0:00
Welcome
0:07
Everyone is a Samsung Galaxy Fold 2 and today I'll show you how to go through the setup process of the device
0:14
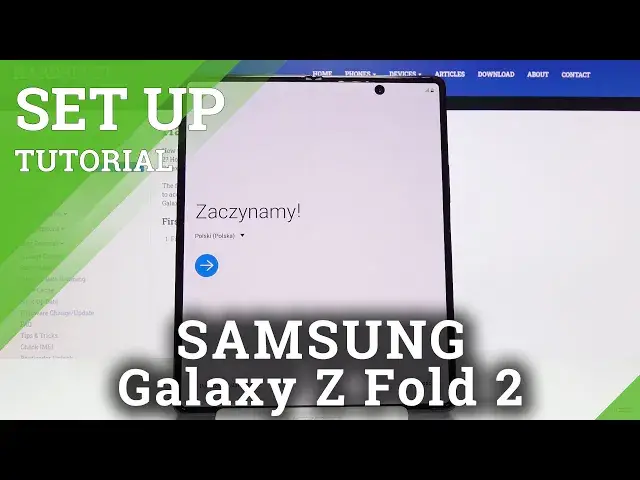
So when you boot it up for the first time you'll be presented with this screen right here
0:19
so simply start off by selecting your language. For me it's going to be English
0:25
There we go. tap on okay and then stop on the arrow now we have ability to connect to our
0:36
mobile network this is done by simply inserting a SIM card as well without
0:40
it well we can't really connect to it but for now I'm just gonna simply skip it
0:45
the moment you insert it you can either it will be on or you can access it to
0:51
the notification panel and turn on LTE or whatever it is or 5G then we have
0:57
check out some info to get started. So we have end user license agreement, sending of diagnostic data, and stuff
1:06
like that now. At the bottom, we have an option to agree to all of them. But in all honesty, we
1:12
only have to agree to the first one, which is user agreement right at the top. As you can see
1:16
this is the only one that doesn't have the optional option. Everything like with the optional
1:21
in parentheses at the end is, well, optional, so you don't have to actually agree to it
1:26
From there, tap on next And then you can connect to your Wi-Fi
1:32
Now, if you don't have a Wi-Fi, you can completely skip this by tapping the skip
1:36
If you do, once you connect to it, you will also have the ability to then log into your
1:40
Google account later on throughout the setup process. Now, if you choose to skip this, you can still
1:46
connect to your Google account later on. It will basically be in a different place
1:51
so if you choose to skip it, you will find it in the settings under like accounts
1:56
I'm going to skip it honestly. Then we have copy apps and data
2:03
So obviously it allows you to restore all the device to this one
2:09
and get all the data from your old device here. I'm going to set it up as new so don't copy
2:14
Then we have data and time. Now if it's set correctly, just disregard and go further
2:21
If you connect Wi-Fi, it certainly should be set correctly. And if it's not you can tap right over here and change it to be like it as right now
2:36
And from there we can, or we have the Google Services, so we have things like use location
2:43
allow scanning and send user in diagnostic data. Now you can tap on the drop-down and read exactly what it does, but the general, like just
2:53
of it is that use location, uses a GPS, allows apps to use it
2:58
So for instance, Google Maps uses it, so it gives you a correct route when you're using
3:03
it as a, in your car, for instance, to get location and drive somewhere
3:09
Then allow scanning allows apps and services to scan for Wi networks and nearby devices at any time So basically what it here So you can turn it on or off
3:23
As you can see you can disable both of them. And then you have send user and diagnostic data
3:29
Again, you can expand this to have a bit more of a comprehensive overview of what it does
3:33
But it seems a little bit self-explanatory. Send user and diagnostic data
3:37
Basically, gather data on what you're doing on your device, send it to Google, to quotation marks, so they can
3:43
improve the usability of the device. So you can also disagree to it if you don't want Google spying on you
3:53
So let's stop on accept. And then we have protect your phone
3:59
So we have a couple of different ways of doing so. Face recognition, fingerprint, pin pattern, password
4:04
Now if you want to choose either one of the two top ones, you will still be required to select either pin pattern or password
4:11
You cannot have a face or fingerprint without any physical way of unlocking the device
4:19
So I'm going to go with a fingerprint and when you choose one of them you will see that it automatically prompts you here
4:25
Now you'll also mention that you can set up pin pattern or password and not set up the fingerprint or face recognition if you don't want to
4:35
So I'll actually go back and as you can see it allows me just to set it up without adding anything else
4:41
So let's continue, pattern. I'm gonna draw the pattern, continue, confirm, and I think I went for the face recognition
4:54
Do you wear glasses? Not at the moment, but normally I do
4:58
I'm gonna select no anyway. Continue. And let me just kind of move it out of the way
5:06
Give me a sec. there we go so it basically starts scanning your face
5:17
which is 100% and moves on on itself so here we have stay on lock screen
5:25
when you unlock with face recognition stay on the lag screen so I think I'm going to disable this
5:34
so if I'm correct yep so if you disable this when you unlock the device
5:38
it automatically goes to your home screen. If you have this on and it recognizes your face, it still stays on
5:44
lock screen, which in my opinion is kind of counterproductive to this option. So I just
5:50
prefer to have it off. Useful features, face recognition, faster recognition. Okay
5:56
so we have some options right here. So face recognition basically allows you to, if you
6:03
have added it, this option will otherwise not appear. So faster recognition improves speed
6:07
but reduces the security. So if you want this, you can enable it
6:13
It will recognize your face faster, but reduce the security of it
6:18
So it might be easier to, in a way, break it or trick it
6:23
So if you want it, you can enable it. If you don't, then disable it. Requires open eye or eyes
6:30
So if you have closed eyes it will not work Again you can select this on or off Completely up to you Brightened screen that is so it easier for you to unlock the device during night
6:41
So when you're on your lock screen at night you will basically try to unlock it
6:47
and it will brighten up the screen so it lights up your face so the camera has an easier way of actually unlocking
6:53
So again if you don't want for instance this I understand that might be a little bit annoying
6:58
especially during night when you get blasted with light. So I would probably disable this
7:04
But that's just my personal taste right here. And then we have signed into our Samsung account
7:09
Now this step again is completely optional. If you choose to skip it like so
7:13
I will give you a message that doing so will basically will miss out on things like Samsung Cloud, Bigsby
7:20
Galaxy themes, Find My Mobile, Samsung Pass, Galaxy Store and Secure folder
7:24
honestly almost all of them apart from maybe galaxy themes is completely useless to me
7:31
another question is what do you want from your device the device still has google services
7:37
so things like uh fixby is uh well it's kind of worse than for instance google so you can still
7:48
use google services and uh what i mean is basically a google assistant uh galaxy store
7:54
We have Play Store, so Galaxy Store is absolutely in my opinion. Secure, secure folder
8:01
I'm pretty sure there is still different ways of securing the device here without actually having the account
8:06
Find out mobile, again, Google Services, you have that already here. Samsung Cloud, Google Cloud
8:15
Like I said, basically this continues the pattern that we have basically everything here already
8:20
without needing the Samsung account, so that's why I'm going to skip it. And all done, so let's stop on next, and we get this amazing little, before you get started
8:30
Now, I didn't get started. I started setting up the device, so a little bit late on that one, but I guess the thought counts here
8:39
So don't press the screen or the front camera. Lens with a hard or sharp object, such as pen or fingernails
8:47
Didn't know that my fingernails are hard objects, but I guess we learn something every day
8:52
doing so could cause damage such as scratches or dense yeah honestly there is way little less
9:00
force needed to cause those and it doesn't require fingernails honestly so yeah now moving on
9:08
to prevent scratching our screen damage make sure there is nothing in the middle when you fold your
9:15
phone such as cards coins or keys so basically when you close your device like so make sure that
9:22
there is nothing between. This most certainly will cause some damage. The display here is
9:28
fairly soft, almost, not really sure how to describe it. So putting something in there and
9:34
also putting that in the pocket will most certainly do some harm to your device, so I try to keep
9:40
stuff away from it. And then this phone isn't dust, proof or waterproof, exposure to water
9:46
or other liquids or small particles such as sand may cause damage such as scratches or dense on the screen Honestly I not sure how water can cause scratches or dense and sand also
10:04
but probably if you're playing to go to the beach, I would most certainly not take this phone with me
10:11
The hinges don't really want to cooperate with sand when it's in there
10:15
And you may be really careful, but just like the... dust from the sand almost can make this device a complete nightmare to use when you're trying
10:24
to open it up and to have this grinding sand sound from the hinges
10:30
It is just obnoxiously annoying and I would highly recommend to try to stay away from that one
10:36
And obviously the device isn't waterproof, which is a bit of a shame for a device that costs $2,000
10:43
So, yeah, keep it away from water. try not to get your tears in here when a screen gets scratched
10:50
because that may further cause damage to it and then don't remove the screen protection film
10:57
don't apply other films or stickers doing so may cause damage to your phone
11:02
there's a lot of things that can cause damage to this device apparently but if you're wondering about the sticker you can kind of see it right here
11:09
so where the camera is you can see that there is this kind of like a U-shaped
11:13
that is the cutout on the sticker It does have like a protective film on here
11:18
Now it does say it's advised not to remove it, so I'm not sure if you can or cannot
11:24
So I quickly unlock it with my face. There we go. So actually, my bad
11:31
Here it's actually don't remove it. On the sticker that you have when you unbox the device, it says it's recommended not to remove it
11:38
At least in my case it was. So there is a little bit of discrepancy here, but okay, my guess, don't remove it
11:45
and then keep your phone away from credit cards, medical devices and other objects that call can be affected by magnets
11:54
So probably other things that they should have mentioned, probably that more of us will have
12:02
is a hard drive. Now magnets and hard drives don't really go well together. So try not to place your phone anywhere near a computer if you have a hard drive somewhere on the top of the case or something like that or on your laptop
12:15
if it's using, well, an old HDD kind of hard drive, the spinning one
12:19
because that will cause damage to it. If you have an SSD, then that doesn't really matter
12:24
But yeah, hard drives damage, medical equipment, less of us have, but I guess also don't keep it close to you if you do
12:31
which kind of, if you have like a pacemaker, whatever they're called, I guess that phone isn't even for you in this case
12:38
Not exactly sure. But yeah, it can cause damage because it has magnets
12:43
So once we are aware of being, before we get started we can click on done and there we go we're now in our glorious
12:49
device so that is how you would go through the setup process and also get accustomed
12:55
to some of the things that you shouldn't do with it and if you found this very helpful then forget like subscribe and thanks for watching
#Other