Up next in 10

How to Skip Factory Reset Protection in XIAOMI Redmi 7 – Bypass Google Verification
May 16, 2024
Learn more info about XIAOMI Redmi 7: https://www.hardreset.info/devices/xiaomi/xiaomi-redmi-7/
We are presenting the video guide, where we show you how to skip FRP in XIAOMI Redmi 7. If you are looking for the best method to bypass Google verification in your Xiaomi device, stay with us to learn how to unlock XIAOMI Redmi 7 smoothly. Let’s follow the best way to skip Google verification in your Android device and set it up as a new one.
How to Bypass Google Verification in XIAOMI Redmi 7? How to skip FRP in XIAOMI Redmi 7? How to skip Google Verification in XIAOMI Redmi 7? How to Bypass FRP in XIAOMI Redmi 7? How to unlock XIAOMI Redmi 7?
Follow us on Instagram ► https://www.instagram.com/hardreset.info
Like us on Facebook ► https://www.facebook.com/hardresetinfo/
Tweet us on Twitter ► https://twitter.com/HardResetI
Show More Show Less View Video Transcript
0:00
Welcome
0:05
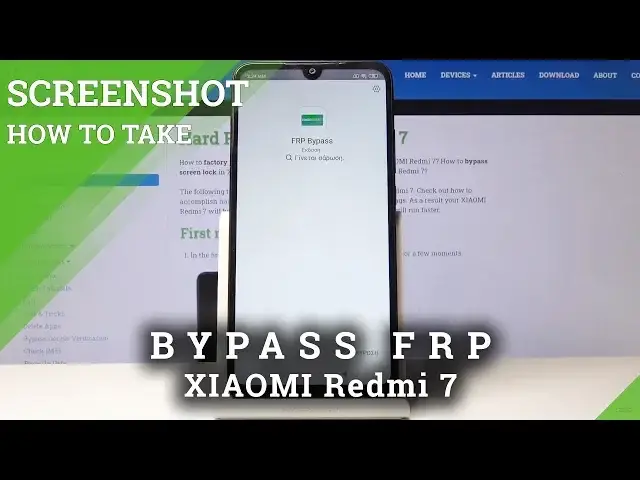
Infanomysa, Xiaomi, Redemy 7. And today I will show you how to bypass the Google Verification Screen
0:11
So as you will soon see, this device is locked. Just let me get to that point
0:18
Okay, so there is draw a pattern or use a Google account, whichever one can use to verify
0:25
But assuming you don't know, we can progress by just completely bypassing this
0:29
So you want to start off by number one going to the beginning where you get to choose the language
0:38
So from here you want to change the language to any other language that has just a different keyboard
0:44
So for instance, Greek, Turkey, Russian, stuff like that will work. So it doesn't really matter as long as you have an option to change the keyboard
0:54
Now I chose Greek for this example. It doesn't only matter. Now, region doesn't matter
1:06
And from here, you want to actually connect to a network, so I already am connected, as you will
1:11
see right here, to the hard reset that info. Now connect to whatever you have at your home or whatever it is
1:18
And then once you connect it, if it proceeds further, you want to go back to the network connection
1:22
and tap right here to add additional or add a custom one, basically
1:26
and just tap on the SSID field and it will pop up a keyboard
1:31
So you want to hold spacebar. And after you hold it for about one or two seconds, it pops up with this
1:38
So it allows you to change the keyboards. So as you can see, this is the Greek one and you can change it to the normal query
1:44
Hold it once more. And now tap on the bottom one right here
1:49
It will take you to this page. So right here, tap on the bottom, blue button
1:56
And from here I choose whichever one I guess that has an arrow I think
2:01
Let's just check. Okay, this keyboard doesn't actually count so right here
2:07
So basically what you're looking for is any kind of page which the three dots you will have help and feedback which is just right here the bottom one
2:15
So top on it and from here we're now and we're now in help and feedback stop on the search field and search for Morris and all over
2:26
use Morse code there it is so tap on that that's why we also needed a network so we
2:33
can actually load this stop on the play button it loads it up and you want to top on three
2:38
dots and choose watch later which is the clock stop on okay and then double top on the
2:46
browser there we go accept and from here you want to top on the search field and navigate
2:53
into hard reset that info website. There it is, so that's what we want
3:07
Once you on here you want to top on the three bars right here go to the mini and choose download In a download field search for Android 8
3:24
Now, disregard the fact that this is, we're searching for Android 8. The same software works for this phone, even though, if I'm correct, this is on Android 9
3:33
It still works. I already tested it. So once you search for it, you'll come across this
3:40
Now Google account, Android 8 application, bypass. Stop on the download. Again, scroll down
3:47
Download once more. Confirm that you want to download. So you need to allow Chrome to access your storage
3:55
And then tap on OK. It begins download. And soon after, it should come up with a little pop-up right there
4:01
Tap on it. and you will see there is the app that we have downloaded so tap on it once more
4:07
I need to grant permission again so you want to tap right here any kind of option
4:14
located on the right side is basically a confirming option while the one on the left
4:18
is a denial so once you that you want to check this on go back and now again on the
4:24
right side to install starts the install finishes I just again accept on the right
4:30
side and then top on open which is this button and from here choose Google Account
4:37
Manager APK install for version 6.0 and again the same process allow check this on
4:45
go back and install and there it is so now let's go back and now choose the other
4:56
option which is the bypass FRP choose browser sign-in From here, tap on a 3.D
5:02
And let's go to Browser Sign-in right here. Confirm it. And here you have the Google Login
5:12
So here you can use whatever account you wish to use. It doesn't really matter
5:17
If you don't have one, you can create a new one on a different device just so it's easier
5:23
And once you create it, you can then use it to log in here. Now I already have one, so I'm going to use that one
5:30
So, and then tap on next. And I'm going to put in the password
5:39
And then again, tap on the blue button to log in
5:51
You'll see this. Hello. Come on. There we go. So it automatically logs in and comes back here
5:57
Now I'm not sure how much you've seen of that considering the screen. when the dim for some reason
6:02
But yeah, that's basically, once you are back in the FRP Bypass app
6:07
all you need to do now is hold the power key. Choose reboot, the circular arrow
6:14
Top on it once more. Wait for the device to actually boot back up And once it back in we going to progress to the setup process of the device once more Now you want to go back to the first page and at this moment to change the language
6:48
We don't need to we don't need the option for additional keyboard anymore. so we can now choose a desired language which I'm going to select English there
6:57
Stop on next next. Stop on next again. Agree. Skip this
7:21
Don't copy. As you will see right now, account added
7:35
So there is the account that we have provided in a previous step, and it recognizes it as the added account
7:41
So let's just upon next. And more and more, accept. Next more no thanks
7:56
Now, thanks You primarily want to skip most of this We'll perform another hard reset of the advice in a moment
8:07
Just to get rid of any kind of leftovers from the previous account so keep that in mind
8:12
So it doesn't really matter what we choose at this stage Okay, so as you can see, we're now on the home screen
8:38
From here you want to go into the settings and just perform the reset of the device
8:42
so let's go all the way down to additional settings, I think it is
8:46
And where is it? I guess not here. I'm just going to search for it so
8:59
backup and reset right here and then erase all data factory reset
9:14
Stop on that. Reset phone. You need to wait a couple seconds
9:20
to confirm it to pull next and once more 10 seconds
9:36
okay and now the process will begin and removing all data So that also includes the current and the previous account
9:47
And once it's finished, then we can go again through the setup process of the device, but
9:50
this time around there will be no verification of any sorts and you can just skip connecting
9:56
to network and just set it up as however you like this. As you can see now the process is finished so I'm just going to skip through most
10:43
of this just for a quick setup let's choose a language now number
11:04
number one you can already skip network connection it doesn't prompt you to do that anymore
11:34
and we're basically done once it loads into the home screen
12:04
And as you can see now the process is finished
12:18
So the device is now fully unlocked and, as you can see now the process is finished
12:32
so the device is now fully unlocked and you can use it the fullest i guess so yeah if you found
12:39
this video helpful don't forget to hit like subscribe and thanks for watching
#Hacking & Cracking
#Science