live_tv
Livestream Starting Soon
00
Hours
:
00
Minutes
:
00
Seconds
Up next in 10

Find out more info about MOTOROLA Moto G13:
https://www.hardreset.info/devices/motorola/motorola-moto-g13/tutorials/
Hi! Here's how to install tempered glass on MOTOROLA Moto G13. You'll learn how to use the dust remover stickers to remove dust from your screen, and then how to perfectly stick tempered glass to your phone. Visit our YouTube channel if you want to know more about MOTOROLA Moto G13.
How to install tempered glass on MOTOROLA Moto G13? How to apply tempered glass on MOTOROLA Moto G13?
#InstallTemperedGlass #ApplyTemperedGlass #MOTOROLAMotoG13
Follow us on Instagram ► https://www.instagram.com/hardreset.info
Like us on Facebook ► https://www.facebook.com/hardresetinfo/
Tweet us on Twitter ► https://twitter.com/HardResetI
Support us on TikTok ► https://www.tiktok.com/@hardreset.info
Use Reset Guides for many popular Apps ► https://www.hardreset.info/apps/apps/
Show More Show Less View Video Transcript
0:00
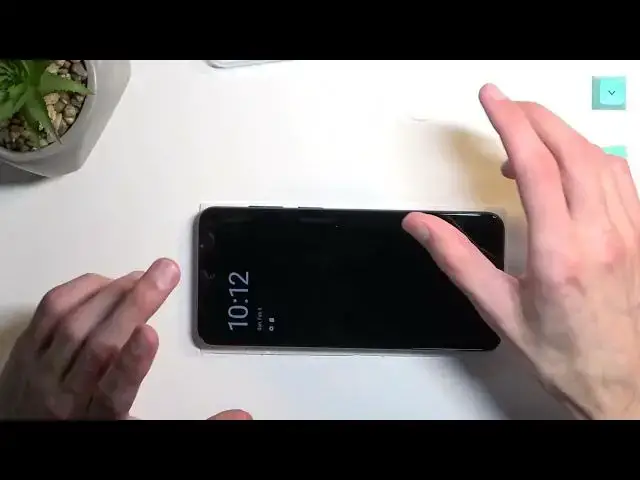
Welcome. And for me is a Motorola MotoG-G-13 and today I'll show you how you can apply
0:05
tempered glass to this phone. Now I'll be using tempered glass not necessarily designed for this specific device but because
0:17
the screens are basically the same, this glass fits perfectly over and just to kind of showcase this
0:24
As you can see there we go. It's literally perfect so there we go. So there we go. So there we go
0:30
That's what I will be using. Now chances are if you have a temperglass design specifically for this device
0:34
you might have a hole-punched camera for this, obviously, camera that you have right here
0:40
Though I am not exactly certain about that. It could be that it looks exactly like this without any kind of cutouts
0:47
Whatever the case is, I'm going to just touch upon both of them, how you apply
0:51
no matter if you have a hole, a clear one like this one
0:56
or maybe just like a teardrop cut-out. So, yeah, I'll just touch upon all of them
1:03
Now, additional thing to mention is I have a case on my phone
1:12
You can apply tempered glass with the case or without it. Without it might be a little bit harder because you need to be a little bit more precise
1:20
With it if you make a mistake, the temper glass will not settle in place correctly so you
1:24
can just lift it up and align it to actually drop into place
1:30
Additionally, when applying it with the case, if you are really uncertain if you're going
1:36
to get it correctly or you can do it right, you could just kind of use the case itself
1:44
as a bumper. As you can see, just align it so it's in the middle right here
1:49
Using your fingers you can just push up to the bezel. So you can feel that it is in the middle and just use the actual like bezel of the case as a stopper
1:59
for the temper glass and then just start lowering it. It might not be the prettiest way
2:06
but it obviously will be probably the safest that the glass will settle into place
2:12
without needing to be repositioned or the case of the phone gets in the way
2:19
Now the reason why it's probably not going to be the prettiest is because your temper glass will be slightly more
2:25
to whichever side you chose as a bumper. So in this case when I was pushing it like this
2:32
obviously it would be super close to the right side, but the left side on the other hand side
2:37
would have a little bit of a gap right here because of it You could do it at the bottom as well So just align it like this and do the same drop it
2:47
This might be a little bit cleaner just because the bezels that are visible right here are significantly smaller
2:55
So it might just come out a little bit better. But this is a last kind of resort that I would suggest if you are really like sketched out about applying your tempered glass
3:04
And you're not sure if you can do it correctly. you can do it like this. Otherwise I would just recommend doing it the more traditional way
3:11
without the case itself. Now this is how I will be applying it so I'm going to take it off
3:18
anyway. And I'm also going to take out this little foam. It serves like it as a good way to
3:26
have your phone on something soft. And without the case I would apply it at an angle. So just to
3:36
kind of showcase this from my side. That's kind of how it would be applying it. So the glass is
3:40
lifted up at the bottom while it's touching the display at the top. And while pinching it from both
3:46
sides like this, I would start pinching the display, the device bezels. So it gives me a nice
3:54
idea of if it's like evenly spaced out from left and right. And I can just, you know
3:59
shift my finger just a little bit to shift it from left to right. And then with my second hand
4:03
I can pull it or push it to give it enough space from the top
4:08
And like I mentioned, if you have a hole punched camera or cut out one, you want to focus
4:13
around that, make sure that it is positioned where it needs to be. Specifically, you have a hole punched for it
4:20
This will allow you to position it just really nicely. It actually makes it a lot easier because you just want to make it the smack in the middle
4:29
of the cutout. And from there, you just apply the same logic
4:33
the bottom start feeling the bezzels of the phone and just simply drop it in when you feel
4:37
that it is spaced out correctly or evenly from both sides and that's about it so anyway now i'm
4:46
going to go into applying the temper glass actually one more thing that i'll mention i do recommend
4:51
if you're not applying it with the case i recommend the dry fitting it just so we can see how
4:58
much space you can have from top and bottom so um just how much bezel is visible
5:06
And the reason you want to just have a look at this is because if you apply it a little bit too high
5:12
and the tempered glass is just like perfect, when you're putting on back the case
5:17
it might then cause it to lift up. And obviously this will make the air go under and it not something that you want You can fix it up if that happens to you by just lifting it up again and repositioning it selling it a little bit lower
5:30
It will still work. It shouldn't have any kind of damage, so it's possible
5:36
But obviously, it's better just to get a look at the very start and try to do it correctly the first time around
5:42
So for me, it would be somewhere around how it's positioned right now
5:47
So barely any bezel visible from both ends. Now, when it comes on to the next portion of this, which is cleaning
5:56
I do have a wet and dry wipe. And if you have ones that look exactly like these ones, throw them out
6:05
The reason I'm saying to throw them out is because they're absolutely garbage. If you have a microfiber cloth, use that instead
6:10
It's a significantly better alternative. Most of the times, at least for me, these wipes are dry, so
6:17
I'm going to open up a wet one just so we can see if that is the case right here as well
6:23
And yep, it's completely dry. Just to kind of showcase this. No moisture on it whatsoever
6:31
So this wet one, just so you can see this is the wet one that I opened
6:36
is completely dry. So they're absolutely horrendous. And additional problem with them actually is the size of them
6:44
Like this, the size of this wipe is just pitiful. I'm pretty sure it wouldn't cost them much more to make it double the size
6:53
but it would make it in terms of usability much better. And additionally, the solution that they have, if it's moist, which mine isn't
7:00
it's garbage too, so it creates smudges, and I just hate using them
7:04
So if you have one that look exactly like these ones, I would recommend, from personal experience
7:10
to use something else like a microfiber cloth, and even if you don't have that
7:14
I think a T-shirt might be a better alternative over those wipes. Now, that being said, I wouldn't use a paper towel
7:25
So if you're thinking about using that, which in logical stint of point, could be a good option
7:30
I don't recommend using paper towels just because paper towels leave this white stuff from them
7:36
And if you have one, if you have this white garbage that paper towel leaves on the display
7:42
it might create air bubbles under your display or tempered glass, which is
7:47
obviously something that you might, or that you not might, but you most certainly don't want to have under your tempered glass
7:53
So, yeah. Now, when it comes on to cleaning the display, just wipe it off off of any kind of dirt
8:01
Once you wipe it off and it clean obviously if you have some scratches that fine You can really wipe those off Once it clean just make sure that there is no dust
8:12
settling on the display. If you have some kind of dust particles settle on your display
8:17
before you apply the temporary glass, take your microfiber cloth, wipe them off
8:22
just so it's completely clean. Once it is, I recommend just jumping straight into applying it
8:28
Start off with number one. So peel it off. and then go straight to applying the tempered glass
8:34
Now at the moment it's not really glowing itself, so I'm going to apply a little bit of pressure
8:49
And there we go. So as you can see it's perfectly on there now. now
9:01
I'm going to clean it off. Oh, actually it's not perfectly on
9:07
There is a little bit of air, as you can see at the top right here
9:13
There's no trash under it, so that one just disappeared on its own
9:17
So I'm going to lift it up myself and push it out using a finger, and there we go
9:24
It's now completely gone. As you can see. Pretty simple. Now this tempered glass appears to have come with a scratch on it right here
9:35
See, that's on the other side. This was already there. I actually know about this when I was applying it
9:41
I thought that it's on this side, that I'll all be touching, but I don't feel it
9:45
So this actually came the damage straight from the box. And it looks like it's on the other side, which is where the glue is
9:54
So I cannot really fix it. I don't think this is, I mean, I sound like I don't think
9:59
I know that this isn't trash. It's just a little bit of a hiccup when it, I guess, was being produced
10:05
which I guess I get what I paid for, which is the cheapest temperate glass
10:09
So, as expected. Now, as said, mentioning one more thing, peel off number one
10:19
I want to also add that if you have number two, you can peel that off right now when the tempered glass is already stuck to your display
10:26
You peel that off and that will just reveal the actual glass. that you'll be touching to interact with your device so that's about it now if you
10:35
found this very helpful don't forget to hit like subscribe and thanks for watching
#Consumer Electronics