Up next in 10

We invite you to visit our website and find out more: https://www.hardreset.info
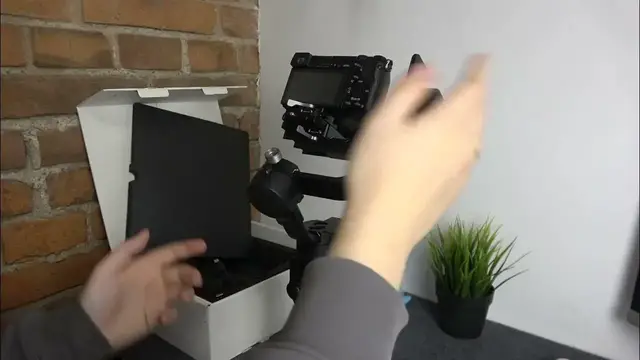
Achieve perfect balance for your DJI RSC 2 gimbal with our comprehensive tutorial! In this video, we detail the step-by-step process of balancing the gimbal with your camera mounted, covering all three motors. Watch now for an in-depth guide to ensure optimal stability and smooth operation for your filmmaking. Master the art of balancing with the DJI RSC 2 and capture professional-grade footage effortlessly.
How to balance out the DJI RSC 2 gimbal? How to balance all 3 axis on DJI RSC 2? How to balance all motors on DJI RSC 2? How to set up the DJI RSC 2 gimbal?
#DJIRSC2 #Gimbal #Balance
Follow us on Instagram ► https://www.instagram.com/hardreset.info
Like us on Facebook ► https://www.facebook.com/hardresetinfo/
Tweet us on Twitter ► https://twitter.com/HardResetI
Support us on TikTok ► https://www.tiktok.com/@hardreset.info
Use Reset Guides for many popular Apps ► https://www.hardreset.info/apps/apps/
Show More Show Less View Video Transcript
0:00
We are glad to welcome you on the Hard Reset YouTube channel and today I will show how you can balance this DJI RC2 gimbal
0:14
So to start you obviously need to mount the camera that you are going to, well, work with
0:20
We have the whole separate video on it, so if you have any issues on that step, check the video out
0:27
So practically what you need to do in order to balance your gimbal is to align the center of mass of your camera
0:35
with the center of mass of the tilt axis, roll axis and pan axis
0:43
One by one we'll go from top to bottom starting with the tilting axis
0:48
So in order to start balancing it you need to unlock the motor by moving the toggle here to the unlocked position
0:59
Actually unbalance it so it will be more apparent. And once you can see, if I were to unlock it, it will fall that way, that means that the tilt axis is poorly balanced
1:11
So to begin, move the camera to the same position like that, unscrew this knob
1:17
and counteract the camera movement. What I mean by that is that if your camera leans against you, that means that you need to push this plate in the opposite direction
1:31
so towards you. Right now the camera is falling towards me, so I need to get this plate out a little
1:39
until the camera will be able to remain stationary, or somewhat stationary at least
1:46
So yep, now it can stay that way, which means that this plate has been somewhat regulated successfully
1:57
so we can screw the knob in. Now as you can see, if we were to put it like that, it will fall to the bottom
2:06
which means that it requires more fine tuning, which we'll do by moving the mounting plate
2:12
so unlock it by unlocking this lever here, so move it to the unlocked position
2:18
and now we can move the whole plate back and forth until we'll feel the balance here
2:25
So the way you can tell that it is well balanced, regardless of which position you put the camera in
2:31
it should not bounce back like that, it should stay in whatever position you put it in
2:37
So as far as I can see, my camera's center of mass is leaned towards it
2:45
in alignment with this motor of course, everything is relative, Einstein discovered that in the first half of the 20th century, but still
2:57
So basically if it leans against me, that means that I need to move the plate towards me just a tiny bit
3:02
all your adjustments should be very conservative and fine, do not rush, be patient, and believe me, eventually you will get the hang of it
3:13
It just takes practice, it's not really hard, as long as you understand and are able to grasp the general concept
3:20
that is that first regarding the tilting axis, you need to balance this plate
3:26
then balance that plate that the camera is mounted on. So if I were to put it this way, it bounces back clearly, but all other position seems almost stable
3:44
that means that it leans towards me, so I need to make a slight and tiny push against me
3:53
just move this plate a couple of nanometers away from me, all your movements should be fine and very conservative as I've already mentioned
4:03
So now let's see whether we've managed to balance it out, well it looks a tiny bit better, but it's still not really well balanced to be perfectly honest
4:14
Probably I will need to unscrew the snub again and move the plate towards me just a tiny bit, like that
4:22
Let's see. Yeah, now the camera is almost perfectly stable, there are some points at which it falls
4:34
that is this point here, right? Or somewhere here, probably. No, actually it doesn't. It did fall before. Oh, here it is
4:43
That means that the camera is just a tiny slight bit, the camera's center of mass is just a tiny bit
4:51
to the front, I mean leans towards in relation to this corner of course
4:57
so I gotta push it towards myself just a fraction of a centimeter
5:01
Now it's... wow. Once again it still has a few points of instability, or..
5:24
Actually that's good, that's perfectly fine, you can leave it at that. So the tilt axis is dealt with successfully, moving on to the next motor, that is this one
5:34
or the rolling axis calibration, so let's unlock this, or balancing rather
5:40
So let's unlock this motor. As you can see my balance is all the way to the right, so I need to move this plate to the left
5:48
so let's unscrew this knob and move it to the left until the camera remains stable
5:57
Yeah, that should do. You can also fine-tune the rolling axis, not by moving this plate through this knob
6:11
you can also just unlock this lever here and move the camera left and right here
6:19
Make sure not to, well, make the balance worse of course. So if you need any fine-tuning, do that, or if you think you need any fine-tuning, rather do that
6:32
Yep, so this looks somewhat balanced actually. Yeah, kind of, will do
6:41
So now let's move on to the last axis, that is the pan axis, so let's unscrew this knob
6:47
and the way you check how balanced it is in your particular case, is by unlocking it here
6:55
or actually screw the knob back, just unlock the motor first, and lean it like that, lean the whole gimbal like that
7:06
and as you can see my gimbal wants to move to the left, which means that I need to counteract it
7:12
and push this thing towards myself, or, well, just like that I guess
7:20
So let's screw it back in and check again. Now it leans towards the right slightly, so I've exaggerated the tune
7:31
so let me push it against myself now, just to make it, well, just to reduce this
7:38
right swingle, yeah, now it looks perfectly balanced actually. What is next for us to do on the agenda, what is next on the agenda
7:49
is to also make an, or rather start an automatic tuning. So the way you do that is unlock all the motors
7:58
so unlock all of them, all three of them to be exact
8:02
unlock all the motors, so unlock all of them, all three of them to be exact
8:10
pray that your gimbal does not fall apart of course, so if you balanced it right it should, even once you unlock all motors it should stay like that
8:21
Now activate the gimbal by long pressing the power button at the side
8:26
I would assume that by now you have already connected the gimbal to your phone
8:30
through the DJI running app, if you didn't we have a separate video
8:35
on how to get this app and connect the gimbal with your phone, so check that, I will not mention it in this video since today we are going to balance it
8:43
So to begin we gotta auto-tune it, so go into the motor parameters here in the app
8:52
so motor parameters and tap at the auto-tune button. So it says that the gimbal is locked or unbalanced, which is not true
9:06
all three motors are... oh I forgot to... oh, actually I accidentally locked the panning axis
9:13
Now it's better, now it should work. It didn't recognize the fact that I've unlocked it or what
9:30
Let's try... give me a sec here... let's try to auto-tune it now, well... it doesn't work
9:42
Oh, let's connect to gimbal first, I forgot to do that, so that's my bad, excuse me guys
9:47
So now we can go into balance test, or the motor parameters rather
9:52
tap at the auto-tune, ok, and now let's wait for the process to finish
9:58
It will shake like that, it will check the balance and adjust the motor stiffness accordingly
10:10
So auto-tune has been completed successfully. Now the last thing that I recommend you do is that you perform the balance test
10:18
making extra sure, this way making extra sure that you've balanced everything correctly
10:24
and you can begin using the gimbal the way it is designed to be used. In order to do that, you gotta take your gimbal into your hand
10:32
then make the following tilt, here you'll see the angle, so make sure that your angle stays between 15 to like 45 degrees, and then begin the test
10:42
And well, hold your gimbal this way until the test finishes. So, as you can clearly see, all three axes have been balanced successfully
11:08
and the app has gotten back to us with the balance test results, all three axes are excellently balanced, literally
11:14
So, I guess that'll be it, so thanks for watching, thanks for your attention
11:22
and bye bye! www.microsoft.com www.microsoft.com www.microsoft.com www.microsoft.com
#Camera & Photo Equipment
#Drones & RC Aircraft
#Outdoors
#Radio Control & Modeling