Up next in 10

Learn more info about MOTOROLA Moto G7: https://www.hardreset.info/devices/motorola/motorola-moto-g7/
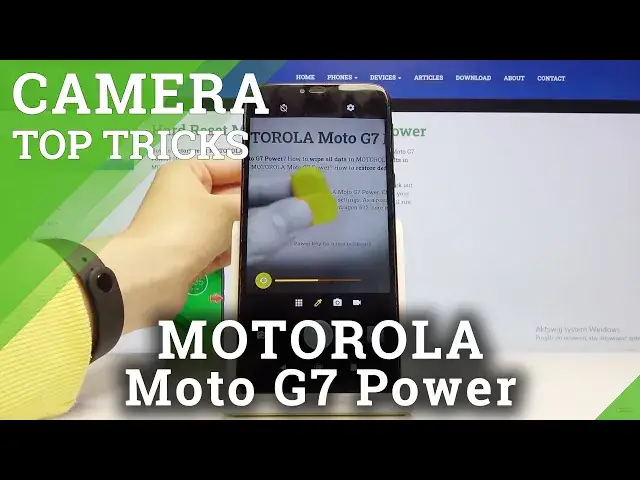
The camera on the MOTOROLA Moto G7 has many features that you may not have heard of. That is why we are here for you and show you the best and most useful options that you can use to take amazing photos!
How to use Camera in MOTORLA Moto G7? How to find the best options of Camera in MOTORLA Moto G7? How to make usage of Camera in MOTORLA Moto G7? How to open Camera settings in MOTORLA Moto G7? How to use tricks for MOTORLA Moto G7 Camera?
Follow us on Instagram ► https://www.instagram.com/hardreset.info
Like us on Facebook ► https://www.facebook.com/hardresetinfo/
Tweet us on Twitter ► https://twitter.com/HardResetI
Show More Show Less View Video Transcript
0:00
Welcome here I've got Motorola MotoG7 power and I'm going to show the top tricks of its camera
0:11
So at first we have to click on a camera button here. And for now as you can see we are in the standard photo mode so let's see what we've got here
0:19
We start with the left corner here this button is the HDR so here we can turn off HDR, turn it on every time you take a picture and turn on the auto HDR
0:29
on the auto HDR so the HDR helps to improve the details in the brightest and darkest areas of our
0:35
picture and it really helps to make our picture just more beautiful. I recommend you to keep turning it on
0:41
on the auto. The next button here is the flash so here we can turn it off, turn it on every time
0:49
we take a picture and turn on the auto flash here also. So for now I'm going to turn it off
0:54
because I don't need it right now and let's go to the next button. This is the camera timer
0:59
So here we can change the delay of taking picture. We can pick from 3 and 10 seconds
1:04
For now I'm going to pick 3 seconds to show you how it works. And let me take a picture
1:11
And as you can see the picture was taken with 3 seconds delay. So for now I'm going to turn it off
1:17
And let's move to the next button. Here we can turn on and off the active photos and also pick the auto active photos
1:25
This is useful because active photos generates us. generates us the picture and a short video at the same time
1:32
For now let's go to the next button. Here we can change the modes from the auto to the manual mode
1:38
So this is the access to the pro mode here. And for now I going to go back to the auto mode And now let take a look how to zoom When we use the fingers we can easily get closer to our subject and also go back
1:54
So this is how it works. And the other useful thing is that when we tap on the screen, we have a ring with the focusing like that
2:03
And also we get access to this slider. And this is the exposure compensation
2:08
So by using this, we can make our picture. more bright or more dark as we need this is how it works here so by tapping on this
2:18
we get access to it and now let's look at this settings bar here so here we can change the
2:24
photo mode to the video mode and also by tapping on this we get access to more advanced
2:29
modes we can be from photo modes and video modes as you can see one of my favorite is the spot
2:35
color so I'm going to show you how it works here we can tap a color and
2:42
keep it on the picture so I'm going to show you like that so when we tap on this all
2:49
of this is black and white and this color stays so this is how it works I think
2:55
this is really cool here and now let's go back to this photo standard mode and let's go
3:02
back to the more advanced settings about this camera which are here in the right
3:05
corner by tapping on this button we get access to it and as you can see we can
3:11
pick the photo size here and this is connected with the quality we have three ratios four
3:17
and three 16 and 9 and also 19 and 9 and this is connected with the quality we can pick from the 12 9 and 4
3:29
megapix 7 and 9 megapix and lower 8 6 or 5 megapix so i going to show you how to looks like this ratio this is the 19 and 9 this is the full screen ratio the next one here is the 16 and 9 this is how it looks like
3:46
and also the standard is the 4 and 3 ratio so this is how it looks like
3:53
and now let's go to the capture settings here we can pick this option tab and
4:00
to capture. So this is the easiest way to take a picture. So when we tap on the screen
4:06
anywhere, we get photo. So this is how it works. And let's go again to the capture settings
4:15
Here we can turn off and turn on the camera shooter sound. So this is also button. This is
4:21
how it works. And the other one here is the assistive grid. So here we can turn on and off the grid lines
4:27
so for now I'm going to turn it on to show you how it looks like on the picture on the standard camera view so it generates as these lines and this is useful when we want to use the rule of furze in photography and also helps to improve our composition skills so let's go back to these settings here the next one here is the camera leveler so by tapping on this we can also turn it on and also we can turn on off the grid lines
4:57
for now to show you how it looks the leveler so it generates this line and this is
5:04
useful when you want to keep our photographic topic straight on the picture and our hands are
5:10
shaking or something like that and let go back to this of course we can turn it off like that by using this and the last one button in the capture settings here is the camera watermark so here by tapping on this we get access to it we can turn it on and
5:28
we can turn on the watermark of this device so shot on Moto G7 power this is the
5:34
preview here and also we can add our own signature so for example by
5:42
cassia and now let's take a picture and see what it looks like
5:50
And let's go to the preview now. So this is the camera automark
5:55
It appears in the left corner shot on Moto G7 power by Kasa
6:01
And let's go back to the camera and to the capture settings
6:05
When we want to, of course, turn it off with up on this again and tap on this like that
6:11
So this is how it works. And let's go to the safe settings
6:16
we have this safe location button here so by turn it on and off we can save location of our picture
6:22
and also when we really want to save our location the important information is that to make it work correctly
6:29
we have to be connected with the internet for example the Wi-Fi and with the location of this device
6:34
so for now I'm going to take a picture to show you how it works and let's go to the preview
6:40
and this is our picture when we tap on this icon with I letter we get access to the
6:46
the details about it and when we slide down we have the locations so greetings from
6:50
krakow and these are the top tricks of this camera that's so thanks for watching
6:55
subscribe our channel and leave the thumbs up