0:00
Welcome, Enfonomy is a real me, GT Neo 3 and today I'll show you how you can go through
0:14
the setup of this phone. So to get started, once you turn on the device, you should be presented with this screen right
0:21
over here with a hello and obviously a single button visible. Press on it and then find your desired language from the list
0:29
Now for me, it already selected the one that I want to use so I don't need to change anything
0:34
Then moving on to the next page, we can select our region
0:41
And moving on to the next one, we have some legal information
0:45
So we have the user agreement, we have some privacy policy and a couple additional ones
0:51
but we don't need to worry about the two below that because they are optional
0:55
So the only thing that you do need to worry about is the first one, which is user agreement and privacy policy, which you can tap on the little eye icon just to go to it and
1:05
actually read what you're agreeing to. But at the end of the day, you do need to agree to them
1:10
Without it, you won't be able to finish up the setup. Now here, we can connect to some kind of Wi-Fi network if you have access to one right now
1:20
If you don't, don't worry, you can simply skip this by tapping right over here
1:24
And this will bring us to Google services. So we have three different services right here
1:29
We have the location scanning and sending user and diagnostic data. And to quickly go into all three of them, the location is just a GPS tracking for the
1:38
phone so apps like Google Maps can give you an accurate route to your destination
1:43
Allow scanning allows apps and services phone to access things like Wi-Fi networks, Bluetooth
1:49
and so on. And then we have send user and diagnostic data, which allows the device to gather and
1:57
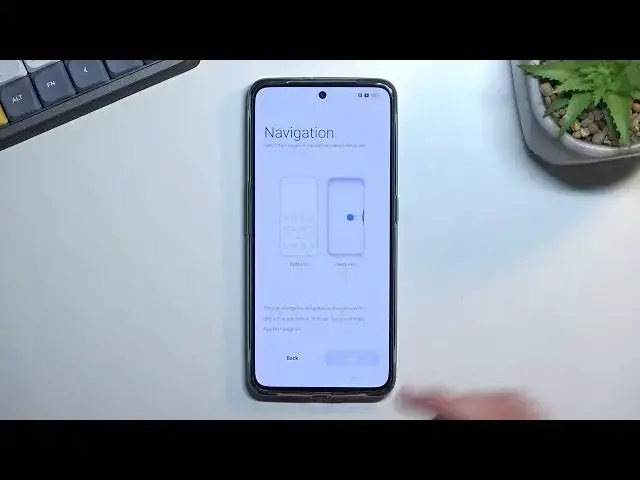
send data to Google. So aka spy on you. From there, we can go to the next page, which will allow us to set our desired navigation style
2:13
So we have the buttons, which is that kind of like what you can see right here just with
2:18
one button. Normally there would be three of them. Once you finish up the setup, or you can switch to gestures, which, as you can see, there
2:27
is an animation for them, shows you how to use them, removes the buttons and just substitute
2:33
them for gestures on the screen. Personally, I do prefer this one
2:36
So that's what I'm going to stick with. And from here, we can go to the next page, which will allow us to set up some kind of
2:43
protection to our phone. So we have several different methods of going about it
2:47
We have fingerprint face recognition, and then also pin pattern and password
2:51
And if you're planning to set up either fingerprint or face recognition, or maybe both, you will
2:56
always be also required to set up a physical way of unlocking the device that we pin pattern
3:01
and password. The reason for that is if something would happen to the sensors on the phone, or maybe
3:06
your finger or your face, you still have some way of unlocking the device
3:12
And obviously, there's also the margin of error where you try to, for instance, scan
3:15
your fingerprint and it just doesn't recognize it because maybe it's just dirty
3:19
So having a physical way of unlocking the device removes that variable and allows you
3:25
to always be able to access your phone. Now you can also skip this if you don't want to set up any kind of protection to your device
3:34
which I wouldn't recommend. So I'm actually going to set up a pattern right here
3:46
And there we go. And this will automatically take us to the next page, which is recommended, and only
3:52
one option right here, auto-update overnight. So if you check this on, the device will just simply automatically update when it's nighttime
4:01
if there is an update, obviously. If there isn't, it's just not going to do anything
4:06
And this will finish up the setup. So let's click on done and then get started, which will take us to our home screen
4:13
So if you found this video helpful, don't forget to hit like, subscribe, and thanks