Up next in 10

Find out more about OnePlus Nord 3:
https://www.hardreset.info/devices/oneplus/oneplus-nord-3/tutorials/
Hello, everyone! Today, we're excited to reveal some fantastic tricks and secret abilities you can try out on your OnePlus Nord 3 smartphone. Prepare to discover awesome things and enhance your phone experience. So, get comfortable, relax, and enjoy this really cool video where we dive into all the enjoyable features of your OnePlus Nord 3! If you want to know more about your OnePlus Nord 3, visit our YouTube channel.
What are the greatest hidden functions in the OnePlus Nord 3? What are the best tips & tricks for OnePlus Nord 3? What kind of hidden features you can use in the OnePlus Nord 3?
#TopTricks #HiddenFeatures #OnePlusNord3
Follow us on Instagram ► https://www.instagram.com/hardreset.info
Like us on Facebook ► https://www.facebook.com/hardresetinfo/
Tweet us on Twitter ► https://twitter.com/HardResetI
Support us on TikTok ► https://www.tiktok.com/@hardreset.info
Use Reset Guides for many popular Apps ► https://www.hardreset.info/apps/apps/
Show More Show Less View Video Transcript
0:00
Welcome. Infanami is a one plus Nord3, and today I'll show you a couple tweaks and tricks you can do on this device
0:11
So, let's just get started by opening up our settings right over here
0:16
And I'm going to start off with the section right here, home screen and long screen
0:20
I have a couple of things here. So number one, we have the home screen mode and home screen layout, so mode will allow you to switch between the two, different modes
0:30
so iPhone-like and the typical Android with the shelf, which is the default option right here, the shelf one
0:36
But if you want to have all your applications smack in the middle of your home screen and just create folders on your home screen
0:41
then you can go with the standard one. Now moving on to the next one, the home screen layout just allows you to fit more applications
0:47
on a single page, making them a little bit smaller and just tightening them up a little bit more
0:52
so they're closer together. I personally like the default ones, so I'm going to stay with a 5-5
0:57
Now we also have an icon pull-down gesture, so this is just a I would call it a one-handed mode
1:06
It might be useful for some people, though I personally find it hard to activate it sometimes
1:11
So just to demonstrate it, what you do is this. As you can see
1:21
So it looks like we have to literally swipe on the kind of like the bezel of the device on the bottom
1:27
and it will work. Now this obviously works significantly better if you have way more applications
1:34
on your home screen rather than like three apps and a folder. Obviously these are all easily
1:41
accessible with my thumb without like needing to reshift my hand. But obviously if you have
1:45
some apps like right here, this will shift them all down. So it might be useful for some people
1:51
and it's an option that you can enable and just keep it running in the background, have it
1:55
enabled it and use it when you actually need it. Now going back, another thing, we have the animation speed right here
2:04
So there's only two options. We have the fast and medium animation speed for just opening, closing, stuff like that
2:10
Now we do have option to increase it even further or remove animation altogether
2:14
but this would be done through developer options. So if you want to, you could just enable developer options and go in there
2:22
and you will find the setting, three different settings. called animation transition scale animation transition uh there's animation speed scale and transition
2:32
something so there's three of them and they should all be set to one x by default i believe no matter
2:40
what you even select right here so if you want to i can completely reduce it by like half uh half of the
2:46
animation speed so it would basically be twice as fast or you can completely remove those animations
2:51
all together so from there when you're doing some like opening and closing like this one you wouldn't have
2:56
this animation of window just kind of disappearing the moment it triggers a close it just kind of poofs
3:01
out of existence so it might look a little bit jarring but obviously will be a faster the fastest
3:08
kind of animation or lag there off to be more precise now going back to the settings and sticking
3:14
still with the home screen and lag screen we also have the option right here swipe down on home screen
3:19
This is set to shelf. Personally, I prefer notification drawer because it allows you to get the notification
3:26
by just swiping down from the bottom of your home screen and it pulls down the entire notification
3:31
and can just extend it. It makes it a little bit easier to access it. You don't have to like reposition your entire hand
3:38
to the top of the display, which is something that I personally like
3:41
and use every time I can on any device. Because I'll be honest
3:47
not every device actually supports this. Now moving further on there is one little thing that I want to search for because I didn actually prepare this one but I remember that One Plus has it which is the or at least used to the ability to hide toggles from your status bar so let see Status bar so it under notification and status bar and yes we can
4:15
So right here you can find a decent list of toggles that you have
4:21
Obviously, if you use things like NFC, Bluetooth, and so on, it will be just permanently visible in here
4:26
But if, for instance, you're just like me and you have Wi-Fi always on, and Bluetooth
4:32
always on you don't really freaking care about seeing this little icon in there it just
4:36
clutters your status bar so what you can do is just turn it off boom it's gone now
4:42
the NFC is still enabled just to clarify this as you can see it's still on it's just
4:47
not appearing in your status bar anymore giving you a much cleaner look for your
4:51
device now let's see another one blue shoes where is it might be aligned oh
4:57
there we go yes I am so you can turn that off obviously can turn off basically
5:01
everything if you wanted to. You can also turn off time and battery percentage. Battery
5:11
style so you can remove battery if you want to you can change it to something different like
5:15
a circle for instance. Notification icons we can change how the notifications right here are
5:21
being displayed so by default it's the first one show icons so it shows notification for
5:25
each application with the app icon but you can for instance accumulate it to a number of
5:30
notifications that you have. And at that point, you just know you have three notifications
5:34
but you don't know from what apps until you pull down your notification tray just to check it out
5:41
And obviously you can also just completely turn it off if you don't want it. Now, moving on, we're going to go into the display section. So I'm going to close this, cancel
5:54
swipe to display and brightness. And right here we have the light and dark mode. We have the typical
6:00
just switch. But below that we have a schedule light and dark mode. So when enabled, you can
6:05
have it set either to sunset through, from sunset to sunrise or on a custom timer. So we can
6:11
select the start and then time. So light mode has from 6am till 10 p.m. I would find the device
6:17
will switch to dark mode at 10 p.m. Which obviously will give you without consider best of both
6:24
worlds. Having light mode during the daytime, especially now during the summer, it will be much
6:28
easier to see the display with a light mode being enabled in direct sunlight. Well, dark mode
6:32
will be significantly nicer at nighttime so you don't get flashbanked by your own device. And
6:37
this device can get pretty bright, so obviously might be something that you would be interested
6:43
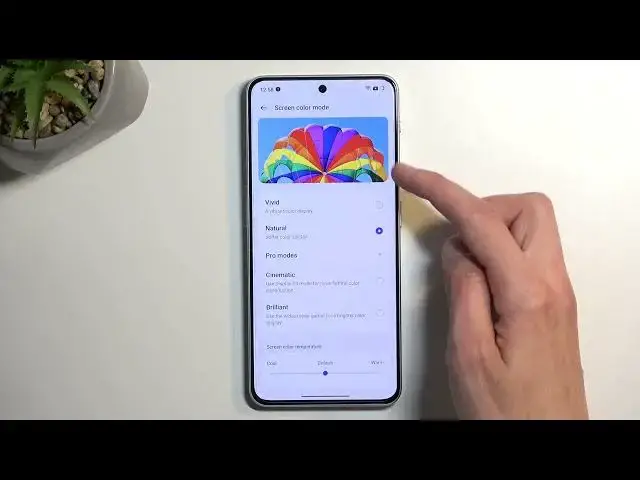
Now going a little bit further down here, we have the screen, screen color mode. And by default
6:52
almost every device sets it to vivid. Personally, I'm not a fan of vivid mode. Find it a little bit too
6:58
overdone the colors being a little bit too vibrant so I personally like
7:02
natural but you can select it to be anything else like pro mode so cinematic
7:07
and brilliant cinematic basically uses the display p3 mode which supposed to be
7:13
color accurate to some extent now I have no tools to check it out how accurate
7:18
this is but okay yeah let's uh
7:28
I wouldn't say that this is accurate, but okay. From Natural, which tends to be, I think, the more reasonable one
7:38
the cinematic, I guess, lives up to its name by completely overdoing the orangeish and red color
7:47
As you can see, those are the primary colors that literally start to radiate a light from it
7:54
So I think I will stick with the natural. that is what I personally like
7:59
But here you can choose whichever mode you want, whichever one you feel looks best to you
8:05
I also have at the bottom a color temperature, so no matter which one you choose
8:09
you can also change it to be more cold or warm Warm meaning more orange stones in general on everything even the white So as an example you can see that becomes significantly warmer and cold more bluish
8:24
So just select whichever one you want. There we go. And moving on to see the..
8:36
We have three different options right here. so we have video sharpener or image sharpener video color boost and bright hdr video mode
8:43
so basically bright hdr mode might be one that you might be interested in it is i believe an amulad
8:50
display right here on all lead or whatever case uh what this will do is when you are playing back
8:56
hdr content it will boost the brightness of the device a little bit harder uh to basically give you a
9:03
more um faithful representation uh i guess I could call it like that
9:10
So obviously what should be bright will be now brighter, possibly to the brightness that it should be
9:18
while dark scenes will stay still dark. So it might be something that you're interested in
9:27
We do have a little bit of a caveat, so just to read this in, increased screen brightness when playing HDR videos
9:33
this will consume more power and can cause your phone to heat up. So presumably this might be using some like processing to also define
9:46
what should be brighter because this is not necessarily going off of the HDR content itself. It's just
9:53
trying to edit it itself. So that's why your device might heat up a little bit more. Now in terms
9:59
of video color boost it's just a color mode that makes it more vibrant. We do this as the shadows
10:06
so yeah if you're interested you can check it out it will only work
10:11
with video apps that device considers us video apps things like YouTube
10:15
video players and a couple other things Netflix and so on and in terms of image sharpener just
10:21
tries to enhance the image so it's basically scales up the resolution
10:28
so enhance the clarity of low quality images and videos battery usage
10:33
will be increased now the reason for the battery increase will be that it is using your processor power
10:39
to basically upscale an image. And just to bring this up a little bit closer
10:44
so you can see because from probably this far away it looks like the same image side by side
10:49
but if I were to bring it up significantly closer, you can probably see on the B
10:56
that it's kind of like blocky a little bit. Hopefully it's visible
11:02
You can probably do it differently. I'm not sure if I got it correctly, but we're going to see
11:10
So I'm going to go in here. There's my screenshot and... And yeah, you can now see it
11:17
So you can see pixelated B right here, and it's kind of removing these pixels
11:22
pixelation on the side. Now, this is a template image, so the results might not be this good
11:29
because this is a pretty good result, I would argue. So just keep that in mind
11:36
Now, let's go back to our settings. And next thing I'm going to touch upon is the screen refresh rate right over here
11:44
Now we have a couple different modes. We have the how to select high and standard
11:49
Now, this device is capable of running this display at 120 frames per second
11:54
giving you a battery smooth animation and like scrolling look to it
11:58
So it's pretty nice. Now, if you're planning to utilize this screen
12:03
and it's 420.4. frames per second glory, I would recommend sticking with the auto
12:10
This will give you a better battery life while still retaining the benefits of this display
12:14
High just gives you a bigger drawback of your power so your battery will last shorter while still providing you with everything that the auto mode does minus the benefits of the auto mode like I said auto mode will
12:33
lower the refresh rate down when it doesn't need to run at 120 so as an example right here
12:40
this display wouldn't need to be run at 120 hertz so it will drop i believe even below 60
12:47
this out right now. So I'm going to go into the about device and find the build number
12:52
version. There we go. So I enable developer options and additional settings, developer options
13:03
And what I'm looking for in here is the frame rate toggle
13:13
There we go. Show refresh rate. Come on. You're not supposed to run on 120 right now
13:27
Or are you? Let's see. Refresh with... yeah, it's auto-select, so it should be lowering it down
13:34
You can see if I select standard, it automatically switches to 60. 120 permanent, that's supposed to be permanent
13:40
not supposed to be permanently 120. This is not supposed to be permanently 120
13:45
Yeah, oh there we go. So it takes a moment to drop it down
13:54
So there we go. As you can see, on this device, unlike some other one pluses
14:00
one pluses I think at the lowest drop down to like one frame per second
14:04
Here we only get to 60, which is a little bit of a drawback
14:09
Obviously the lower the frame rate can go, the better your battery life will be
14:13
and this only applies to screen on time. I want to mention this
14:19
Now to finish this section off with the refresh rate, if you're planning to preserve your battery life
14:25
stick with the standard. It won't give you this nice look to your device
14:29
that a 120 does when you're scrolling up and down with everything being battery smooth
14:34
but it will give you a better screen on time in terms of battery life
14:39
While if you're planning to have this nice look to it, I just stick with the auto and under no circumstances would I recommend changing it to high
14:46
because it gives you no benefit over the auto. Anyway, moving on to the last option
14:55
it's going to be the side panel, which you can find right here. Now, it is called a smart sidebar
15:00
if you're wanting to turn it off. That's what you would be searching for
15:05
And by default, it gives you couple tagles and applications in here. Now we can select edit
15:09
and we can add more tagels and more apps in here so you can quickly access them whatever you are because this panel is similar to like
15:18
Samsung ones accessible anywhere you are so should be able to get it in here you can also take out
15:28
the application should be at least unless settings is not one of those that can split
15:36
screen let's try There we go. So as you can see, once you pull out the panel, you can easily split screen between apps
15:54
So let's just grab something else, maybe like contacts, and I'm going to replace it with
15:58
the browser. There we go. Obviously you can just move this around if you want to, and you have easy access to two different
16:05
apps at the same time. So pretty nice option. I'll highly recommend utilizing this
16:11
Anyway, with this being said, this would conclude my list of tweaks and tricks for this device
16:15
So if you found this very helpful, then forget to hit like, subscribe, and thanks for watching
#Online Media
#Consumer Electronics
#Skins, Themes & Wallpapers
#Other