Up next in 10

Learn more info about HUAWEI P30 Pro:
https://www.hardreset.info/devices/huawei/huawei-p30-pro/
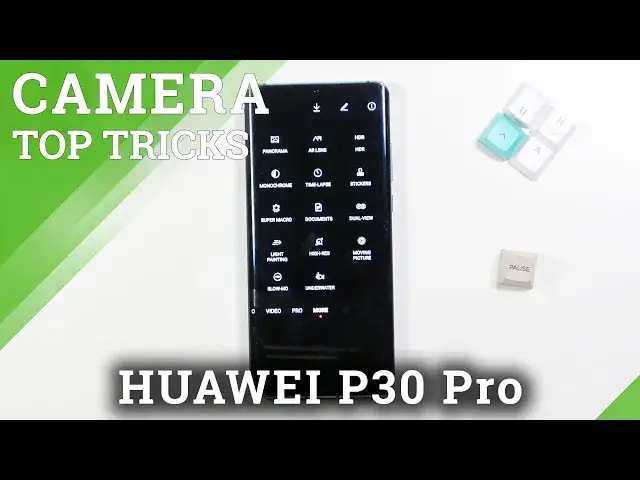
Would you like to check the best camera features and tricks which you can perform on HUAWEI P30 Pro? On this video we’d like to share with you how easily you can use possible options to improve the usage of this camera app. Thanks to this you’ll be able to make better photos by using those tricks. So let’s follow all shown steps and successfully use camera top trick to improve photos.
How to find camera features in HUAWEI P30 Pro? How to use camera features in HUAWEI P30 Pro? How to enable camera features in HUAWEI P30 Pro? How to find camera best options in HUAWEI P30 Pro? How to open camera best features in HUAWEI P30 Pro?
#CameraTopTricks #TopTricks #HUAWEIP30Pro
Follow us on Instagram ► https://www.instagram.com/hardreset.info
Like us on Facebook ► https://www.facebook.com/hardresetinfo/
Tweet us on Twitter ► https://twitter.com/HardResetI
Support us on TikTok ► https://www.tiktok.com/@hardreset.info
Use Reset Guides for many popular Apps ► https://www.hardreset.info/apps/apps/
Show More Show Less View Video Transcript
0:00
Welcome. In front of me I have Huawei P-30 Pro and I will show a couple camera tricks
0:11
At the first I will talk about the best features that you can find in the settings and after that about the modes that we have here and also about additional modes that you can find in the more modes
0:21
So let's start and let's open the settings and at the first we can activate or deactivate the audio control
0:29
So when you go here and then we can use say word like cheese or speak loudly
0:36
Let's maybe pick the first one, say keyword. So let's say, let's go for the photo mode and right now we can say cheese
0:45
And as you can see, the photo was taken. So let's try another time. Cheese
0:52
And the photo was taken again. So as you can see, that's a very great option
0:57
that will definitely help you to take photo. Let's turn it off
1:01
And here we can also capture a smile, so we'll automatically take photo when people smile
1:06
So let's try to use it. And let's see if it works on the front camera
1:14
As you can see, the photo was taken. And there it is
1:19
Let's turn it off. And we can also find here the frame rate of the videos
1:26
so we can quickly increase to 60 frames per second so that's very useful thing
1:31
we can also enable the assistive grid lines so right now when we make it
1:36
on the screen we'll find the help grid lines that help us to take better composition on the photos
1:42
so for example if you want to put something in the middle on the photo like maybe these buttons
1:46
we are able to make it definitely definitely easier with that grid lines
1:53
we can also enable horizontal level as you can see take look on this line we can add camera timer to 5 or 10 seconds
2:11
let's speak for example for the 2 times and right now when you press shutter button
2:15
after 2 seconds the photo will be taken let me just turn it off here we can also add the water
2:26
So when we enable this option and take photo just like that
2:31
On the left bottom corner we can find the photo was taken with Huawei P-40 Pro with Leika Quad Camera
2:41
We can also add location tax so when you enable this switcher and turn on location on your smartphone just like that
2:48
Let's take a photo. And when you go for the details of that photo, we will find the exact location
2:55
find the exact location where the photo was taken. Okay, it's not, it not appears here, so let me just turn off the camera and open it again
3:05
Let's turn on and turn off location. Let's see if it works right now
3:15
Honestly, still not location here on the information. So let's try to enable this option through the settings
3:27
We have to go probably for the apps. Find camera here. Let's find camera
3:36
And I think it will work when we enable it from this place
3:40
So let's check permissions. Okay, so location is allowed. So let's turn it on, let's make it in a dark time
3:52
Okay, there is the location tag. Okay, as you can see, unfortunately, this
4:17
this option is not working here Honestly I don know why Maybe you can also check the details from the gallery Let take a look Okay right now the location appears here But it just location of the photo
4:29
So unfortunately the location, the location tag is not working. Okay, let's focus on the other things
4:37
Now we can also take the ultra snapshot, so when you double press the volume button
4:41
when the screen is turned off, we can take quick photo, take a look
4:45
as you can see, the photo was taken. Just like that
4:58
We can also add the floating shutter button to the camera. It's right here
5:03
So we can press this one and this one. You can also remove it by going through the settings and then turn it off just like that
5:12
Okay, and right now I will talk about the modes that we can. have here. So there we got the aperture and as you can see here we can change the
5:21
aperture and basically the wide aperture mode let us blur the background of the
5:25
photos to make objects in the foreground stand out. So for the best results we can
5:31
keep the camera within two meters of the subject. Let's try maybe I'll show
5:37
you how it looks so okay just like that. No, it's not that far away
5:53
So maybe it will be not the good example, but let's try
5:58
With 13 and with 1. Okay, let's see that we can spot the difference
6:08
Honestly, not really. Maybe here a little bit. No, so unfortunately I cannot show you the difference because I don't have enough space to stand the two meters between the object that I want to take photo
6:23
But if you make it in the real life, you will definitely see that the blur around the object appears on the screen
6:33
Okay, we can also find the night mode so we can capture better photos in the low light conditions
6:39
We can also adjust the exposure and the light sensitivity right here
6:43
it's some kind of the pro mode but without the few options
6:48
but let's turn it on automatically it's the better okay and the portrait mode
6:55
we can take the leika quality portrait with optional beauty and the bulky background blur
7:00
so here we are we can adjust them we can turn them on
7:05
just like that we can test all of them and then take a look
7:09
how it looks in the photo mode there's you know the camera
7:13
automatically adjust exposure and the color for the best results so there's the
7:20
normal the standard camera mode in the video mode it's also the same like the photo
7:26
the standard video mode the camera automatically adjust exposure and color so yeah
7:32
in the pro mode we can find and design basically our individual shooting needs
7:39
so as you can see here we can adjust the ISO shutter speed
7:43
EV manual focusing wide balance and other advanced settings for example right here or
7:49
right here and you can adjust all of these settings manually it's very simple and if
7:55
you don't know what is going on here in this in this option you can tap here on
7:59
the information icon and here you get the the tutorial basically of a very
8:05
feature but also we can check our other video on the channel where we present
8:09
the promo so that that will be definitely useful for you if you don't know how to use it
8:16
When we are going to go for the more modes, we can also find panorama mode where we can create
8:21
a vertical or horizontal panoramas of this scenario around us. So take a look
8:28
I'm going to show you you have to press the shutter and then move for the right side or the
8:34
left side and then press shutter button again and the panorama mode looks like that
8:39
So we can definitely catch more objects than even using the ultra lens Okay let go here There we have the AR lens So we apply colorful and fun effects to the photos
8:52
So let's try. And there is. We can take maybe a photo like that
9:00
Okay, it's basically the video that we can also capture. So let's go back
9:09
Oh, we can also turn off the background, as you can see. And we can also record video, and the video recorded with that mode looks like that
9:17
Okay, it's basically the video that we can also capture. Yeah, that's fun
9:23
Oh, let's see what we got more here in the modes. Now, we got the HDR so we can create high-contrast photos
9:31
by combining multiple exposures to ensure that maximum highlight and shadow details are preserved
9:39
That's useful, but when you are outside and you got the sunlight, the outside
9:48
So that's the most useful feature. We can find the monochrome. So in the monochros, we can take photo with a classic and the subtle black and the white effect
9:59
So we can also here, as you can see, the pro mode, the portrait mode or the aperture that we were talking about
10:06
A few moments ago. so let's take this one and there it is
10:13
okay let's take this one and this one when you go back to the
10:19
the more modes we can also find the time lapse and the time lapse are recorded
10:24
I mean we can record videos in that mode that appears to be spira
10:30
so we can basically try to record clouds we can also try to record
10:37
like slow-moving insects and other things. So you basically tap on the shutter
10:44
and then when you move the hand or objects around the camera
10:50
it looks like that. It goes very fast, so it's definitely good to put your phone in the one place
10:57
and then capture, for example, clouds or plants or whatever you want
11:05
Okay, let's go back. And here we can also find the stickers
11:10
Oh, wait a minute. Okay, my phone just turned off. I don't know why. But as you can see, we need it up here
11:15
We can find the different stickers. So we can place it anywhere in the image
11:22
Like, we can make something like that. And then take photo. Bang
11:29
So there's some kind of the Instagram stickers that we can find
11:35
Okay. and we can also find there's a lot of modes in the smartphone as you can see
11:40
here we got the super macro mode so we can basically take extremely close-up with the
11:46
real camera and capture the vivid details of around us so we can for example take
11:52
super macro photo of this plant and we can call close like that
12:02
and take photo from the ultra wide lens so we have to remember
12:06
remember that and it looks like that not that bad right honestly it's one of the
12:12
best macro camera that you can find its smartphones okay what we can find more
12:19
here we have I was about the super macro right so we get also documents that we can
12:28
scan documents and reshape them as a flat so let me show you maybe I
12:36
can scan something like the data, the text from this SD card
12:46
Or I'm not able, honestly. Okay, I am. So right now when you click on the shutter
12:52
as you can see, it just cut off the other part of the photo and only focus on the document, so basically
12:59
on the captions words Okay another option will be probably dual view yeah it dual view and in the dual view we can capture two different perspectives at once by filming on the two cameras instead of the one
13:15
So take a look. We can use the ultra wide and the normal camera and when we double top we can also
13:26
switch the cameras. Let's turn it off. And let's find out. There we got the light painting so we can play with light in four distinct
13:37
Mods like traffic trails. Take look. Here we got the traffic trace
13:43
There is the light graffiti, silky water, and the last one is stair trace
13:50
And for sure, the camera app tripod is recommended to use that mode. The same like on the..
13:56
Wait a minute, I forgot about that. Above the time. Okay. Here we got the high resolution we can capture sharper and more detailed photos with high pixel count
14:06
In this smartphone we got 40 megapixel sensor. So let's take a photo and let's see if we have any difference
14:15
So I'm going to take photo of this object around, I'm in front of me, with high resolution and then without high resolution
14:24
Okay, so let's take a look on the first one. It was taken with the normal mode. There's some kind of the hair
14:28
I'm going to remove it. and the photo looks like that so we can basically spot few details in the place but let's
14:35
switch to another one and let's see here as you can see right now we can spot more details
14:40
and we can definitely zoom a little bit closer take a look again
14:50
especially we can take a look on this place oh wait a minute oh come on
14:59
I just make it too faster so here we got definitely more details okay
15:07
and the next option will be sorry guys we were on the
15:13
high resolution so we can go for the moving picture and in the moving
15:17
picture we can capture the action before and after we take a shot
15:21
so we can bring a movement to our photos and grab hold of exciting moments
15:26
so it's some kind of the live photo on the iPhone. So take a look
15:33
when I'm going to take a photo if it looks like a small video
15:41
And we have to tap here to get it, to play it
15:48
Okay, and the next one will be slow motion. So in the slow motion
15:53
we can record in the slow motion video with no length, limit
15:58
and there it is we can change also the speed of that video as you can see and then
16:06
you get also the notification that wait a minute and the full HD is not supported at a
16:13
30 32 times so yeah now let's let's see how it works and this one is super slow
16:26
motion for the 90 and 60 frames per second and as you can see that's how it looks and we
16:36
can also shot the normal slow motion when we change the speed just like that so there's
16:54
difference and basically that's all I think that's that's a big tutorial for the
17:01
camera I mean it was the top tricks but at the end I just turn it to some kind
17:06
of the tutorial oh my god devin the phone is hit so it's time to finish that
17:12
video if you'll find it useful remember to like comment and subscribe
17:24
You know
#Consumer Electronics
#Camera & Photo Equipment
#Photo & Image Sharing
#Event & Studio Photography