0:00
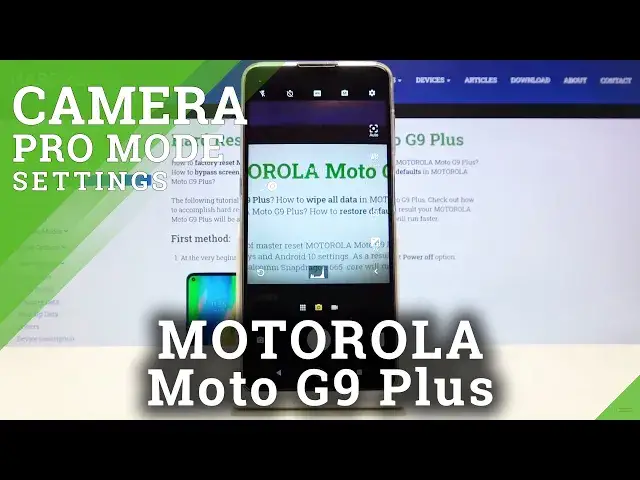
Welcome here I've got Motorola MotoG9 Plus and I'm going to show you how to use the camera pro mode at this device
0:12
So at first we have to tap on a camera button to open it and for now we are in the standard photo mode
0:18
Now let's move to this button here. When we tap on this we can change the auto settings to the manual settings
0:24
So when we pick this we have access to kind of pro mode here and this mode gives us possibilities to choose
0:30
shooting parameters by ourselves. This is useful when we want to learn photographic skills and making experiments
0:36
So let me start with this settings bar here and let's go from the beginning
0:40
The first one button here allow us to control the focusing so we can change autofocus to the manual focus
0:46
by using this slider as you can see this is how it works
0:50
And when we want to go back to the autofocus we just simply have to slide this on the beginning here from the left
0:58
and now the focusing is again on the auto settings. Now let's move to the next one button here we have the wide balance
1:06
so we can control the camera temperature and the temperature of our picture exactly By using the slider we can manage it in calvin degrees and also we have this small icons here that suggest us which light should be good for which conditions we are
1:24
where we take a picture so we have the tungsten light then white fluorescent light here
1:29
daylight and the cloudy light so as you can see by going to the right we can make our photo just more warm
1:36
and by going to the left we can make it more cold and of course the auto light balance is at the beginning here
1:42
at the left. Now let's go to the next one button. Here we have shooter speeds so we can manage the
1:48
time of taking picture and also we can adjust this easily by using this slider. We can pick from
1:55
one and six thousands of seconds so this is really short time of taking picture. This should be
2:00
better to objects that are in move to frozen them. When we go to the right by using this slider
2:06
we make our time much longer and we can pick to 32 seconds so this is really why we're
2:12
spectrum and this should be better to objects that are stable and of course we have
2:18
the auto settings at the beginning here from the left the next one button here
2:23
allow us to control the iso so we can control the camera's sensitivity to light
2:28
when we tap on this we have also access to the slider we can pick from one hundred of iso so we can make it less sensitive or we can make it more sensitive to 3 and 2 of it
2:41
So this is how it works here and of course the auto ISO we have at the beginning here
2:46
And now let's go to this button here. This is the exposure compensation
2:51
So here we can also manage the light of the picture and by using the slider we can make it more bright by going to the right or by going to the left we can make it
3:01
more dark so this is how it works and here the auto-experator compensation is on the zero at the center
3:07
and now let's move to this button here this is really cool option by using this we can see all
3:13
of the siders at the same time so we can adjust this just at once so this is really cool option
3:21
and this is a thing i like really in the motorlas cameras and also with this is connected this
3:28
button here which appears in the left corner. One extra button so you don't have to go back to
3:36
separately to auto settings in all of the sliders by tapping on this you can just go back easily
3:42
at all of this at the same time So just one tap to go back to the auto settings here So this is really cool And now let move to this settings bar A lot of the settings is also in standard photo mode but one button here at the center is extra When we tap on this
4:01
we can change the format of our picture. Now it's JPEC. We can change it to the RAF or we can also
4:09
pick RAF plus JPEC. So this is really pro and the RAF format is a format used by professional
4:16
photographers to saving pictures in more details and post-producting them in graphic
4:21
programs so this is really cool in this camera for now let me stay on the
4:26
rough and let me take a picture for example let's change the focusing the
4:33
white balance maybe to the cloudy shooter speed here iso maybe this one and the
4:46
compensation stays so let me take a photo now and let's move here to the right
4:52
corner at the bottom this is the quick access to the gallery in this camera and this is how this picture looks like so that's all thanks for watching
5:00
subscribe by our channel and leave the thumbs up