Up next in 10

Learn more info about OnePlus Nord:
https://www.hardreset.info/devices/oneplus/oneplus-nord/
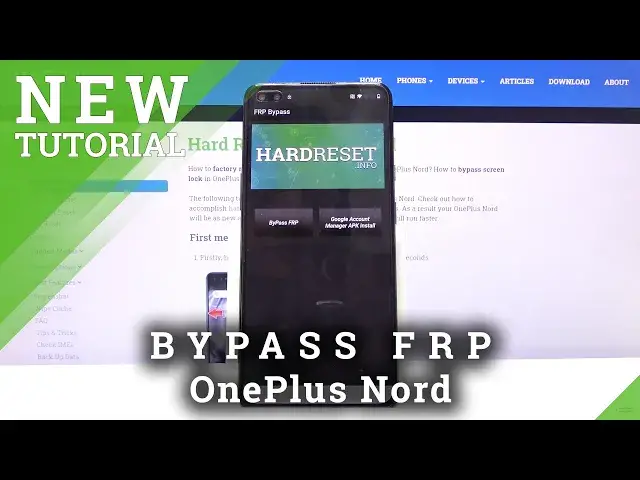
Would you like to skip Google verification in your OnePlus Nord but you’re not sure how to do it? In this video we’d like to show you how easily you can bypass FRP with few quick steps. Follow all shown steps and successfully bypass Google verification in your OnePlus device.
How to unlock FRP in OnePlus Nord? How to bypass Google Verification in OnePlus Nord? How to remove Google protection in OnePlus Nord? How to remove Factory Reset Protection in OnePlus Nord?
Follow us on Instagram ► https://www.instagram.com/hardreset.info
Like us on Facebook ► https://www.facebook.com/hardresetinfo/
Tweet us on Twitter ► https://twitter.com/HardResetI
Show More Show Less View Video Transcript
0:00
Welcome, in front of me is a OnePlus Nord and today I'll show you how to bypass the
0:11
Google verification. Now as you can see the phone in front of me is locked so we're going to begin the process
0:17
by going back to the first page. Now before we actually begin you do need to be connected to Wi-Fi so make sure you are
0:25
which you can see right here I am connected. So from there go back to the first page, change the language to any kind of language that
0:35
uses a different kind of keyboard, Greek, Russian, stuff like that will work just fine
0:41
and from there again we're going to progress through the setup till we get to the part
0:46
where we need to verify the account. Let's skip this and go to Google verification
1:03
From here tap on a field and it will pop up the keyboard and as you can see there is a globe icon, you want to hold that, this will bring up the keyboard options
1:12
So from here let's switch it to query, hold it again and then tap on the language selected
1:18
at the bottom which is the third option, then add the blue text right here and choose any
1:23
option with an arrow. Once you do tap on the three dots and go to help and feedback which is the second option
1:29
in the drop down. And in the bar right there above you want to type in Morse code or just Morse, as you
1:39
can see it will pop up with the suggested use Morse code, choose that, tap on the video
1:45
and once it reloads we'll have the three dot option for watch later which is the option
1:50
with the clock, tap on it, this will open up the web browser
1:56
So choose to confirm the terms of service and you don't want to log in
2:00
And from here tap on the search bar and go to how do we set that info website
2:06
Like so. And from the site you want to tap on the three bars right here and go to the download category
2:18
and tap on the search bar right here and type in Apex
2:26
And this will show up the Apex launcher so you want to tap on the download, scroll down
2:30
and once more but this time you want to hold the download option and choose open incognito
2:36
tab which is the second one here, as you can see this one
2:41
Now we do it this way so it prevents a problem with the download, sometimes it occurs where
2:48
it just doesn't want to download and from here tap on the open button, once it's done
2:53
downloading and we need to grant permission to for Chrome to be able to install so choose
2:58
the option on the right, check this on, go back and install
3:05
Now every confirming act on here will be located on the right side while anything that
3:13
denies any kind of action will be on the left one. So once it's done installing you want to open it up which is again on the right
3:22
Now let's go to next, ok, as you can see we're now on the home screen but this is the Apex
3:28
launcher so number one we need to go to the settings so tap on the, as you can see, the
3:35
middle right here and go to the settings which is the gear icon and from here scroll
3:42
down, we need to change the language which hopefully won't be difficult so I'm going
3:48
to go to the settings right here or general and yep it's right here
3:53
So as you can see it's the gear icon again right over here, tap on it and then again
3:58
the globe icon and from here I can already see the Greek right here so tap on the first
4:05
option then tap on the plus and choose your language. I'm going to go with English and once you add it you want to drag it over to the top
4:14
and this will change the language of the entire phone. From here I'm going to go back, back, back again
4:22
Now make sure you don't go too far back otherwise you'll have to reinstall Apex launcher to
4:26
get back into it. Once you have changed the language you want to go back to Chrome and from here, no thanks
4:36
we want to go back once and from here slide up and you will have the download search bar
4:44
so this time around you want to look for FRP Bypass Android 6 GAM and I kind of messed
5:03
it up, Android 6, there we go. There was also some auto correct that happened
5:30
So as you can see FRP Bypass Android 6 GAM and it shows up only with one option again
5:36
again tap on the download, scroll down, hold it, open in incognito tab and OK
5:45
Once it's done you want to open it up, install and click on done
5:52
Then go back once more and this time around we're going to be searching for Android 8
6:15
So there we go, it took a little bit longer to find it for some reason but there it is
6:23
So again this is the Bypass app for Android 8 and also 10 so let's go to download, again
6:30
same thing, scroll down, hold it and open in incognito. And let's wait for it, open it up and install
6:53
And once it's done installing you want to open it up, continue, OK
7:00
And from here we're going to start off by going to Bypass FRP, select browser sign in
7:11
tap on it, three dots, browser sign in, OK. And in here simply log in with the Google account, now if you don't have one you can
7:29
always create it, it's completely free. I advise you to do it on a computer though
7:34
even though you have the Create account right here. And once you have one you can simply log in. I have my account so that's what I'm going to use
7:51
And now I'm going to put in the password. Tap on next and you will see that it's signing in
8:04
And once it's done signing in it goes straight back to the app. So from here we need to hold power key and select restart
8:29
And as you can see we're now back in the setup screen so let's progress through it
8:50
as we did before. Now at this moment it doesn't really matter what we set up, the process is still not fully
9:11
finished. As you can see once we get to the verification screen it tells us that the account was added and it should give you the email address for
9:19
the account that we have added right before the reboot of the device
9:22
From here tap on next and simply finish the setup process without actually setting up
9:27
anything specifically. It doesn't really matter at the moment what we choose. We will need to perform a reset of the device
9:34
once more. So I'm skipping everything I can. Can I just skip this somehow? Apparently I can't
10:14
There we go. So I'm going to go back to the setup screen
10:28
so from here once we are done with the setup you want to go into the settings again and
10:34
from here scroll down to system, reset options and erase all data, factory reset and choose
10:47
delete all data, confirm, delete all data and simply wait for the process to finish
10:57
There we go. And as you can see now the process is finished so we can set up the device as however we
11:41
like. Now once more I will go through this as quickly as I can but you can set it up as however you like adding all the Google accounts, protection
11:52
and all that stuff and everything will be working just fine. The device is now at this point fully unlocked. There is no leftovers from the previous account
12:03
whatsoever. And you can already see that I basically skipped the WiFi connection. There was no need to verify anything
12:13
And we're almost done with the setup. And there we go. That's it
12:24
So if you found this video helpful don't forget to hit like, subscribe and thanks for watching
#Hacking & Cracking
#Other