Up next in 10

How to Unlock FRP in BLACKVIEW BL6000 Pro - Bypass Google Account Verification / Skip Google Lock
Jul 27, 2024
BLACKVIEW BL6000 Pro Remove Factory Reset Protection:
https://www.hardreset.info/devices/blackview/blackview-bl6000-pro/faq/bypass-google-verification/moto-android-12-google-account-bypass/
In this video, we'll be discussing how to unlock the Factory Reset Protection (FRP) on your BLACKVIEW BL6000 Pro smartphone. This is also known as bypassing the Google Account Verification or skipping the Google lock. This is a necessary step when you've reset your device or changed the Google account on your device and you're now being asked to verify the previous Google account.
How to unlock the FRP on your BLACKVIEW BL6000 Pro smartphone?
How do I bypass the Google Account Verification on my BLACKVIEW BL6000 Pro smartphone? How can I skip the Google lock on my BLACKVIEW BL6000 Pro?
#blackviewbl6000pro #unlockFRP #BlackviewBypass
Follow us on Instagram ► https://www.instagram.com/hardreset.info
Like us on Facebook ► https://www.facebook.com/hardresetinfo/
Tweet us on Twitter ► https://twitter.com/HardResetI
Support us on TikTok ► https://www.tiktok.com/@hardreset.info
Use Reset Guides for many popular Apps ► https://www.hardreset.info/apps/apps/
Show More Show Less View Video Transcript
0:00
Welcome. And for that I'm in a Blackview BL6,000 Pro
0:05
And today I'll show you how you can bypass the Google verification on this phone
0:13
Now, obviously, you can see that the phone I have right here is locked, and I can unlock it either using the previously used pattern or using Google account
0:21
And additionally, you can also see this little lock icon right here that just shows you that the device is locked and needs to be verified
0:27
before you can finish up the setup. So to get started with the bypass, we're going to go back
0:34
by pressing the bug button, which is apparently invisible right here. There we go
0:43
Now, once you're on the first page, if you have progressed through the setup and connected to Wi-Fi, that's good
0:51
and you can go back. If you haven't done so just yet, then progress through the setup, connect to some kind of network
0:57
and then go back again to the first page. From here we're going to select vision settings and then talk back
1:04
and we're going to simply enable our talkback. Now, Talk Back on. Welcome to Talk Back
1:09
Once you enable... Once you enable Talkback as you obviously can hear, it starts talking to you
1:20
So I did mute it just so I can actually talk right now. It's not very important what the Talk Back is telling you
1:27
we just need it to access other settings. So once you have this page open right here, what you want to do is draw a mirrored L on a screen
1:36
like this. So I'm going to do that right now. And this brings up this window right here
1:46
Now additionally, as you can probably see, I am holding the device constantly
1:51
For some reason, the screen doesn't really work too well if I'm not holding the bezels of it
1:57
It really is glitchy, so I'm going to be doing that for the entirety of the video
2:01
just because something is, I guess, broken in here. But obviously it doesn't really change the process
2:08
So anyway, once you see this pop-up right here, you want to select Allow
2:13
Now, because we use Talkback, we only need to double top on each option that is actually selected
2:20
and single-top on it to select it. Hello, come on. There we go. So once you do that, I will then show you this window right here, use voice commands
2:32
I'm going to top ones to select use voice commands. And then before I double top it to confirm it I going to quickly tell you what we will need to say Because we will need to give a command verbally So the first command will be let me quick check
2:49
It's going to be open Google Assistant. And once it opens the Google Assistant, you're going to then tell Google Assistant to open YouTube
2:56
So I'm going to do that right now. Open Google Assistant. Open YouTube
3:08
Opening YouTube. There we go. So that's what you wanted to do
3:13
The first time around when you press that twice the use voice commands option
3:17
you will hear a beep. I did cover a speaker, so I don't know if you could hear it
3:21
But once you hear that beep, you want to then say open Google Assistant
3:25
And then another beep from Google Assistant will just tell you that it is listening to you
3:30
So you want to then say Open YouTube. Once you have opened YouTube, we will now want to pause TalkBox so we can use the device normally
3:38
because with Talkback, as you can see, can't really scroll up and down. So I will hold right now volume up and volume down at the same time
3:49
This will then bring up this window, turn on Talkback. We're going to select Turn on, then double tap on it
3:56
and then hold those two keys again. And now we can use our screen normally
4:05
So from here, we want to select the account icon. And from the account, we will navigate to settings, about, and then Google Privacy Policy
4:18
Select accept and continue and no thanks. And right at the top in the search bar you want to type in Hard Reset. Info slash Bypass
4:28
Now I will type it in myself and you can post the video if you need a moment to copy it
4:38
So now it be the time to pause
4:48
From here you want to scroll down until you see the settings icon click on it
4:56
And in the settings we will start by going into apps and notifications
5:03
So it's right over here. you want to select see all 52 apps top on that three dots right at the top and then also
5:10
select show system now once you see the system up you want to start off with android setup
5:17
now we do have two of them apparently so we gonna do both so click on the first one select disable disable up force stop and okay then go back Again if you don see the buttons they are here
5:33
There we go. So just click it till it goes back. And we're going to go to the second one
5:39
We're going to force stop this one. There is no disable option anymore. And once we have forced up and disable, I guess, both of them, we will now scroll down to
5:49
I'll quickly make sure Google Play Services. There we go. Google Play Services
6:00
And again, you want to select disable, disable up, and first stop and okay
6:06
Now, from here we're going to go back, back once more, and once more
6:14
And let me quickly check. and we're going to navigate to accessibility
6:19
right here Accessibility and then you want to check this box on
6:29
Allow Accessibility Many shortcuts Allow As you can see it gives us a
6:36
info how to bring it up so we do a two-finger swipe up so we got it
6:41
Now from here we will simply back out to the setup. And we will now progress through the setup
7:06
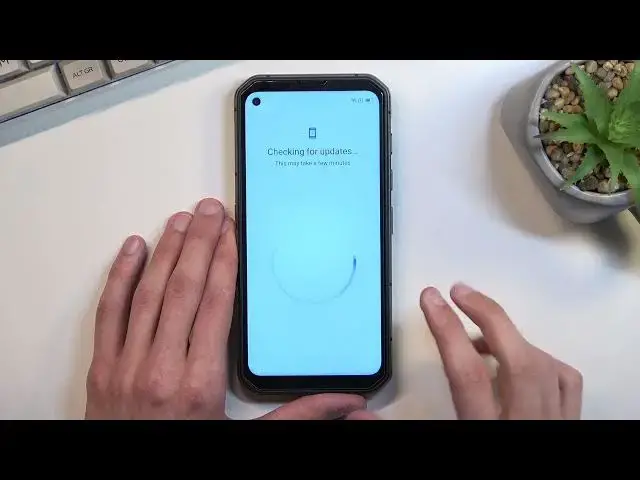
Okay, so we are at the point that we need to be. So anyway, once you see this kind of like blushing out, checking for updates
7:14
and then just a second. and then just keeps going back to checking for updates
7:18
We are right now at the correct place. So once you see this, you want to use those two fingers swipe up
7:23
to bring up the accessibility mini. Click on Assistant Settings, which does disappear
7:30
So the quicker you do it, the better the result. So you just want to kind of like spam all the keys
7:37
So I'm going to do this. Hello? Come on. All right, I'm not holding the device
7:43
So I'm settings. And once you open up this, settings you will have the enable option right here so you basically want to
7:50
click on that enable option and as you can see it disappears so just try to do
7:55
it quickly now I not exactly sure if speed is relevant but from how I experience it it looks like it is so that what I going to be doing Not what I wanted to do Just try it again
8:16
There we go. So it did enable itself fairly quickly. Now I did have times where this took me plenty of tries, so if you can't get it
8:26
but I like the third try like I did, don't worry that is normal
8:29
Just keep on trying it till you manage to enable it. Now once you have enabled
8:34
I'm going to go back. I'm going to tap somewhere on the screen just to get rid of the Google talkback and
8:41
as you can see we literally just skipped a page where it would normally tell us to verify
8:47
our Google account or the pattern that was previously used in my case
8:51
So right now I can finish up the setup without needing to verify it at all
8:56
But I will mention that the device is still locked so keep that in mind
9:04
Okay, so finishing up the setup, once we have done so, we'll gain access to our home screen, as you can see
9:24
And from here, you will want to navigate it into your settings, scroll all the way down to system
9:32
And from here we're looking for reset options and then erase all data, factory reset
9:38
erase all data, and then press on that button once again. This will perform a factory reset of your phone, which is a crucial last part of the process
9:49
Like I mentioned before, the device is at this moment still locked
9:54
Performing a factor reset of the device through settings will unlock it
9:58
Now I'm not going to go through it on the video just because factory reset is just a full
10:02
automatic process that literally doesn't really show you anything on the screen
10:08
And once it's finished, you will be back in the setup screen. And once you're on that setup screen, after going through the factory reset, the device will
10:16
be fully unlocked. So you can set it up however you like, and I'm pretty sure every one of you knows how to
10:21
go through a setup screen and set up the device however you like it to be
10:26
So I'm not going to be going through this just so I don't waste your time
10:31
So that being said, this is how you can bypass the Google verification on this phone
10:37
And if you found this very helpful, don't forget to hit like, subscribe and thanks for watching
#Science
#Intelligent Personal Assistants