0:01
I'm Filip and this is a Vivo V20 SE
0:11
And today I will show you how to go through the setup process of this device
0:15
So once you boot it up for the first time, you'll be presented with the screen as you
0:19
can see right over here. And all you need to do to start off is choose your desired language
0:23
I will be sticking with English, but if you want to change it, you can simply tap right over here and find your language
0:30
Then select Start. And we can now select our location. So choose your correct location
0:38
From there we have User Agreement. So obviously End User License Agreement
0:42
You need to select Agree before I can proceed any further. You have some privacy terms
0:48
Let's see if we need to agree to them. And it looks like we do also have to agree to them
0:54
So there we go. Select Next. Some more
1:05
Some privacy terms for eWarranty card. Again, I guess we need to agree to that one as well
1:16
I'm pretty sure there was a better way to do it than just force you to agree to everything
1:21
There we go. Like this. So once you do agree to most of this, you can then go to the next page, which is Connecting
1:29
to Wi-Fi. Now this step is optional and you don't actually have to do it
1:33
By skipping it, you will lose the ability to log into Google account, assuming you also
1:38
didn't insert a SIM card. So basically if you don't have any kind of network connection, date and time won't be
1:43
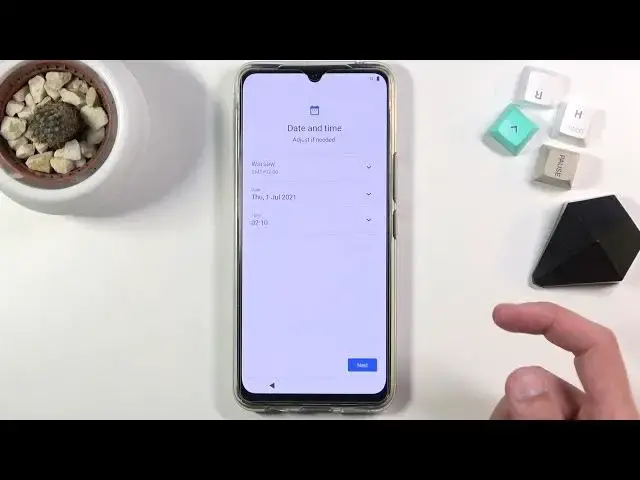
set automatically and Google page won't show up at all. So I'm going to go to the next page
1:49
I don't have date and time, so like I said, it's not being set automatically. So here I can fix up the time considering it's incorrect, but all you need to do is
1:58
just tap on it, set your correct time and actually we're supposed to click on OK
2:05
There we go. And from there we can tap on Next, which brings us to the Google services
2:09
So we have Location, Scanning and Sending User and Diagnostic Data. Now we can tap on the arrow to expand it and read exactly what these do
2:17
And at the end of the day, if you don't like it, you can disable them
2:21
Then scroll down, select Accept, go to the next page, which allows you to set up a screen lock
2:26
So we have a couple of different ways. We have Face Recognition, Fingerprint and also Pin Pattern and Password
2:33
Now if you choose to select any of these two below one, so Fingerprint or End Face ID
2:39
I can set both of them up or only one of them. You will always be required to set up a physical screen lock, so that'd be Pin Pattern or Password
2:48
But if you want to set up only a screen lock, you don't actually have to set any of these
2:53
Now I'll set up just a pattern here. So once you choose one of those, it automatically goes into a pin for the screen lock
3:02
So we can tap right here to change the unlocking method. I'm going to go with the pattern, draw the pattern, tap on Next, re-draw the same one
3:12
Confirm and this will automatically set it up. But I'm going to skip the rest
3:19
Then we have Keep System Up to Date. So we have two choices
3:25
We can either install manually, so you basically have to go into Settings and look for the
3:30
updates yourself or by tapping on Next it will do it for you
3:33
I assume when you're not using the device, so sometimes, for instance, during night time
3:39
And this finishes up the setup, so select Use Now and we should see the home screen
3:46
There it is. So, if you found this very helpful, don't forget to hit Like, subscribe and thanks for watching