0:00
Welcome, in front of me is an Infinix Note 30 Pro and today I will show you how you can bypass the Google verification on this phone
0:12
Now to get started let's talk about the state of this device. So you can see that it's telling me to draw the verification pattern to unlock it in order to finish up the setup
0:20
Now without it you usually wouldn't be able to finish it up and you would be stuck here
0:24
It also asks for the Google account, for instance I don't know the pattern but I'll know that
0:29
The guide here will show you how you can completely bypass this and remove it without providing any of these
0:36
So number one, we will want to navigate back to the Wi-Fi connection page right over here
0:41
And here you will click on the share button, so this QR code once you connect to your network
0:49
And I'm just going to kind of hover, cover it. Oh no never mind, it doesn't actually show it just yet
0:56
So I believe we need to press right over here. Yep, there we go
1:04
So it shows you the QR code and near, or at the bottom here you will find the nearby
1:09
You can click on that and then you want to select turn on and there's the QR code, though it's kind of not visible so it's ok
1:16
And then you want to select the blue text right here, we need help sharing
1:23
This will take you to an article so here we're going to click on the three dots and we're going to navigate to share article and you want to hold Gmail
1:34
From here select notifications and enable it and scroll down to notification style and then additional settings in the app
1:44
And three dots. And then select help and feedback. And in the search bar you want to type in delete. Or
1:57
And for some stupid reason the way it's kind of done here, we're looking for this option, it's an actual article option
2:05
Instead of showing it up right here, we have to click like on the search basically that we are searching for this term
2:13
And then it shows up with the same freaking thing right here, so delete apps on Android
2:18
So that's what we want to tap. And in here you want to select the first step, tap to go to application settings
2:26
And then we're going to start off with the Android auto. You want to just click on it and then at the bottom select disable, disable app and then force stop and OK
2:35
Go back, next thing we're going to do is select the Android setup and we're going to select force stop in here
2:41
Disable is already checked off so we don't need to do anything here
2:45
And then we're going to scroll down even further to Google Play services
2:51
And here again we're going to select disable, disable app and force stop and OK
2:55
I'm going to go back and scroll down yet again further down and we're looking for settings this time around
3:03
So right here, settings and here you want to select open. Under settings we're going to scroll all the way down to special functions, accessibility, accessibility menu
3:16
and you want to simply turn it on and allow and got it
3:22
OK, so we have now done everything that is in preparation for the actual bypass
3:28
So from here you're going to just press the back button. There we go, covered it up again because the QR code
3:39
And once you're on the Wi-Fi page right here, you want to click on your Wi-Fi and then select forget
3:47
And you're going to go back. There we go. And we're going to now select again, skip and we're going to reconnect to our network
4:01
There we go. As you've seen it looks like it's not doing anything, but it was
4:06
There's a little bit of a iffiness with this. So when you have already connected to your network, went back, it kind of doesn't want to go forward
4:15
That's why we needed to disconnect from it, go back and then reconnect to it by proceeding again to it
4:21
And still it kind of looked like it was not doing anything, but there we are on the next page
4:26
So from here we're going to select next. Now we're going to have the pop-up, getting your phone ready and then select don't copy
4:34
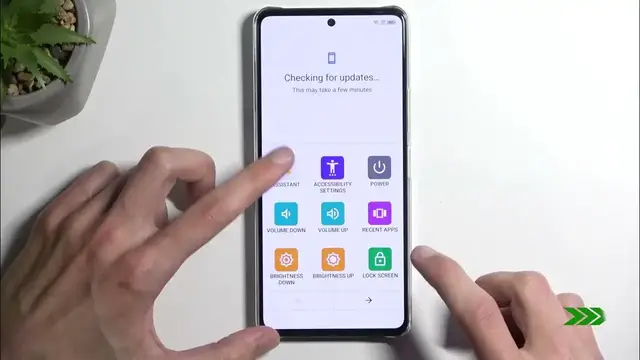
And that's where the bypass begins here. So we're going to click on this little button
4:40
We're going to select assistant. This will show up settings, though not always
4:44
And next, once you press on the settings, if it opens it up, it's an if because it will be repeating this process several times
4:52
It will open up the Google Play services page where we have selected to disable it
4:58
Now enable button will be somewhere right here. So let's see how many times it will take me to actually get this enabled
5:13
There we go. That took me a little bit quicker than with the other device that I was recording not long ago
5:20
So one thing that I noticed here, just as a little bit of a helper for people that might be struggling with this
5:28
is the faster you start spamming the buttons, I think it slows down the device enough for you to be able to actually enable it
5:35
So you will have a little bit more time the faster you start spamming everything that you can
5:40
So the accessibility assistant and then settings. So the quicker you try to basically do all of these steps
5:48
the longer the phone will actually need to think what's happening, and the more time you will have to actually do your action
5:56
So I don't know if that's just a placebo effect. It feels like it functions this way
6:02
So you can check it out if you're struggling with actually achieving the specific step as it's the most annoying one
6:08
But once you enable this, as you can see, it changes them to lock and tells you that it switches to disable instead now
6:15
So we're going to now go back, because we don't want to disable this
6:19
We're going to click somewhere on the screen once it brings up the Google Assistant
6:23
And then we can finish up the setup. Now, before you go clicking off the video, thinking that we're completely finished because we can now finish up the setup
6:31
there is one last step that we need to take, which is factory reset the device through settings
6:37
Now, it needs to be done specifically through settings, because doing so through it will force the device to remove all the protection from the device
6:45
So the Google account that was previously here and the screen lock will be forcibly removed from the device by doing so
6:52
And the reason I'm also telling you to do this as a last step is because these two things
6:58
the screen lock and Google account, are still present on the phone right now
7:02
so we now have access to the home screen and we can go into the settings and check that there isn't anything there
7:09
The system actually still keeps info about this because it is still a locking method for the device
7:15
as in verification method, which is still on the phone. So to get it removed, we're going to go into settings, like I mentioned, we're going to scroll all the way down to system
7:24
and then we're going to select reset phone, and then erase all data, erase all data
7:30
and then press on the button once more to erase all data. This will begin factory resetting your device and it will take a minute or two to finish up
7:36
Once it's completed, it will be presented with Android setup screen. So, I'm not going to go over this on the video, just because it's a simple setup
7:45
It's just a lot of black screen. Once it's finished, you're back in the setup, at which point you can set it up in whatever way you like
7:52
So, I don't really see a reason to actually showcase this. So, with that being said, hopefully you found this very helpful, and if you did, don't forget to hit like, subscribe, and thanks for watching