Up next in 10

Read more info about SAMSUNG Galaxy J5 2016:
https://www.hardreset.info/devices/samsung/samsung-j510fn-galaxy-j5-2016/
We are coming to present the video instructions, where we teach you how to bypass Google Verification in SAMSUNG Galaxy J5 2016. If you are not able to login to your Google account cause you forgot your account login details, find out attached instructions and unlock SAMSUNG Galaxy J5 2016 successfully. Let’s watch the above tutorial and learn how to remove Google protection in Galaxy device within a couple of minutes.
How to unlock FRP in SAMSUNG Galaxy J5 2016? How to bypass Google verification in SAMSUNG Galaxy J5 2016? How to remove Google protection in SAMSUNG Galaxy J5 2016? How to skip Google verification in SAMSUNG Galaxy J5 2016? How to unlock SAMSUNG Galaxy J5 2016? How to activate SAMSUNG Galaxy J5 2016 without Google Account?
Follow us on Instagram ► https://www.instagram.com/hardreset.info
Like us on Facebook ► https://www.facebook.com/hardresetinfo/
Tweet us on Twitter ► https://twitter.com/HardResetI
Show More Show Less View Video Transcript
0:00
Welcome
0:02
I follow me as a Samsung Galaxy J5 from 2016. And today I'll show you how to bypass the Google Verification Screen
0:13
So, number one, you want to turn off your device. Let's start with this thing
0:17
Want to hold a power key and then select power off. Then on the thing, you need a little cable and use for charging
0:24
and plug it into your computer and then have it ready. Then, moving onto the computer, from here we want to
0:29
From here we want to download a couple things that we will need
0:33
So go into the Hard Reset. Info website. And if I could actually spell it correctly, let's try that again
0:49
Okay. And then in the search, type in your phone. So Navi..
0:59
J5, like so, and then choose your specific model. For me, it's the J510FN, just right here
1:08
So I'm just gonna open it. And if you're not sure what your device is
1:13
you can go always to the recovery mode right here. Just see the method how to access it
1:20
And then when you're in the recovery screen, you will see the model number on the screen right at the top
1:27
And then you can go back and choose whatever, whichever one it is. So from here, assuming for instance we have the same one
1:35
you want to go into the bypass Google verification right here, and then tap on the first one
1:41
how to remove Google account protection. And then you'll see this, necessary tools
1:47
drivers and firmware. And basically download all of them. USB drivers are one of the more important ones. Otherwise if you don't install them
1:56
Odin won't work. Then there's the Odin, the Mini ADB and Flash boot
2:05
I also need to install both of them. So as you can see
2:10
already have all of them and all of it is already installed. So that's the second one
2:15
or the third one that you need. Both of them installed. Then FRP Unlocker
2:20
download this. Then for the first step, you want to get the ones from 2018 so when you tap on it we'll have a list and then find your model of your
2:35
phone which for me it's this one and then you can top on the three dots here and then tap on download
2:40
and standard download then moving on in the sixth one simpson combination firmware
2:46
top on the first one our upload 1718 then from the list find your j5 specific model
2:56
Control F to search. You can just scroll down. I find this faster, so I'm here
3:05
It's going to be 2016, so right here. That's basically what I have downloaded
3:12
You stop on the button right here to download it. It takes you, again, 2 mega upload
3:18
And you just hop on save. Now, you want to be able to download this
3:22
and the previous file at the same time, so you need to download each individual
3:26
not at the same time, otherwise it will tell you to log in or buy some, basically
3:33
limit to download more files at the same time. So closing that off, if we have already all the
3:40
files, we can proceed to install them. So like I said, install both of these in the ADB driver
3:49
as you can see right here, ADB drivers and tools. And then also the USB drivers, which is right here
3:59
Samsung USB drivers, install that too. I already have both of them
4:04
And then we can proceed to call the Odin and open it up
4:09
Okay, so this is open now. And we're basically now in the second step or the first
4:17
And you want to put your device in the download. mode and how to do it it's volume down power key and home button right here all
4:26
pressed at the same time when the devices shut off so we'll do it like this
4:32
volume down power and home button pressed all at the same time and you get
4:41
this little warning message then you have a volume up to continue and volume
4:45
down to cancel so obviously volume up and now we're in the download mode
4:49
Also, you can tap here and we'll take you straight to the page where we'll tell you how to do it on the specific phone
4:57
As you can see, it's pulling down, power, home button. Okay, so moving on, we can go back to the Odin
5:06
And as you can see, right here, the IDCOM, it's empty. Now once I plug in the phone, it should show up
5:16
and there it is now if you plug your phone in and you don't see anything here you
5:23
might need to install the USB drivers that's usually the problem if Odin doesn't
5:31
see anything and then moving on we want to do this let's go back here and now we
5:39
want to upload to the AP section right here tap on the AP and basically we
5:44
want to add the combination So, it's back and it's right here
5:50
I already named it like number six, added number coding for it
5:55
But it's basically the combination F-A-60, that will top on it. And Odin will basically freeze for a moment, so just be patient
6:05
it will unfreeze it momentarily once it fully loads the file. As you can see, now it's responsive again
6:13
Then go into the options and make sure that auto-rease it will be able to. and make sure that auto reboot is enabled and f time or f reset time is also enabled
6:24
And then once your phone is also visible you can top on start And you will get a little progress bar right here and also on a device So let wait for this to finish and once it has the device will repeat automatically
6:36
And at the time we can also unplug it. So all this is actually doing, we can look at the guide further on and basically what we need is
6:53
Once it turns on, we're going to go into the settings and then I bought phone and enable the developer options and enable USB debugging
7:04
And then put it back into the download mode. As you can see right here, so let's wait for that
7:23
I'm gonnae. Okay, as you can see, I'll get a little pass
8:13
So that means it's done. You can unplug your phone pair for it to turn on and I'm just going to close the program right here
8:23
Okay, so as you can see, factory binary. Just wait for it to actually turn on. Okay
8:36
And from here, I want to navigate into the settings, which is this icon right here
8:41
It's going to be the apps drawer basically. It's more, it's little like dots over here
8:47
And then choose the settings, scroll all the way down to about phone
8:52
phone then again down to build number and top on it seven times now I'll see that I'm
8:58
already a developer so it won't show up but basically when you top it seven times you will get
9:03
start getting a little countdown and then it will say that you are now a developer and if you go back
9:07
you'll have this above developer options from here you want to go and make sure that USB debugging
9:13
is enabled as it is right here and assuming for me it was enabled when I first launched this but
9:22
If it's not, make sure that it is. And then we can just quit this. And hold the power key to turn off the device once more
9:29
And then put it back into the download mode. Which wants more, it's volume down, power, and home button
9:37
So let's do that again. And then volume up to continue. And then launch Odin again
9:48
So I'm going to turn it on. Okay, and then I'm going to plug in the phone once more
10:01
As you can see, it automatically shows up in there. And from here we're going to choose again the AP file, but this time we're going to go with
10:12
this one, which is J510FN, which is the Samsung version that will top on it and let it update or upload
10:21
Once more if Odin becomes unresponsive, just a more being a little patient and it should unfreeze once it loads the file itself
10:51
Okay, as you can see now it's on, it's on and you go into the options and top one, auto reboot again, make sure that both of them are enabled once more
11:18
you have resets time and as you can see basically we're on this step right here
11:23
we basically add the home file okay so let's go back and then
11:31
tap on start So, I'm going to be
12:04
I'm going to be. And as you can see now the process is finished and let's wait for the phone to
12:44
actually turn back on but in the process we can actually unplug it now
12:50
And we can close the program Okay, so let's agree to this, continue to this continue
13:39
As you can see, we'll come
13:55
you can see we completely bypassed the verification and also if you see here if we
14:04
bypass it we can basically jump straight to the point 13 press screen
14:09
Just mostly step 13 if not just wait until you see the authorization screen so
14:14
basically whenever we have the Google verification so you have a little step for it
14:22
so plug it in back with the USB and then always allow from this computer when you plug the cable in and then you would
14:32
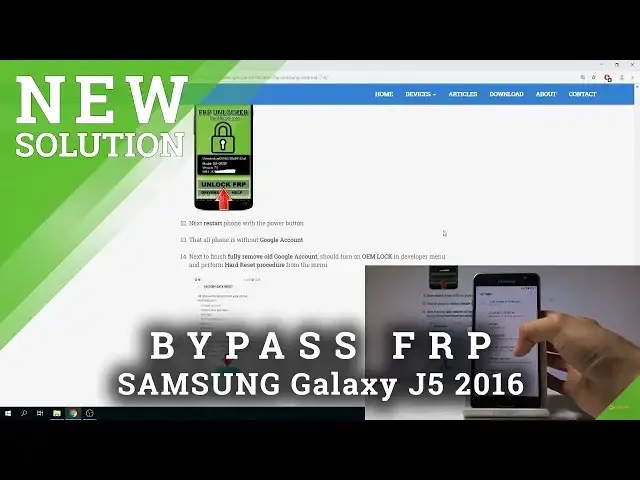
launch the FRP file or program which you'll say which is unlock FRP right here
14:44
so you launch this and plug in your phone and it will show up here the info
14:55
about the device and then you just stop on unlock as you can see right here unlock and
15:01
get basically a little message that it's unlocked and that's it and then you can close it up
15:08
close it and then we can proceed to the step 13 which is where I am at so basically now we want to
15:18
go into the settings so let's find the settings up Right here
15:33
And probably would help if I change the language, if I actually even know how. Nope
15:55
whatever I think we can do without it
16:14
So basically in settings we want to go into the about phone
16:21
So you also get a little animation right here. This is the one with the I, not this that I clicked, the I right here
16:35
And then go again into the build number, which might be a little bit more challenging
16:48
Let's see actually what it shows. So, I guess it's this thing right here. Hope
17:14
Okay, right here. So basically once more. go all the way down until you see the icon of an eye in a circle
17:23
And then whatever this is, right here. And from here, let's see which one is there
17:32
There we go. I think that's the build number. So you want to top that seven times, but apparently I'm already a developer
17:40
So now if I go back in the main screen, this is the developer options
17:46
and from here now it becomes even more challenging awesome let's see I'm actually
17:59
gonna use the guide here so to change the language But model isn't really helping considering my icons look a little different
18:33
Oh, found it. There we go. So now let's use English
19:03
Yeah and and Okay there we go Now it changed
19:37
So let's see. So it's under general management, which is this little icon
19:46
So if you go to it, it's basically the language and input the first option and also the first option
19:53
And from here you want to just add the top on the plus. and then choose the language that you desire
20:01
So now we can actually continue with understanding what I'm going to be selecting
20:12
So assuming, going back to About Phone and then software information, and from here, build number, as you can see, no need, you're already a developer
20:27
So going back to the developer options, what we want to enable is the OEM unlock, and once you enable it, basically the phone will go through a reset
20:39
So enable. And see, going back
20:50
right here and go back to an
21:00
other A account so it's going to Google where is it
21:10
Where is it? So I have a Google one and
21:31
Okay, so I guess that's it's it
21:48
Yes, that's it. We basically enable the OEM as we did in the developer options
21:53
Here and then we can do a hard we set up the device so actually let's go back into the
22:00
settings and from here let's go into into where is it
22:18
I think it's general management, yeah, there it is. Okay, so it's general management and from here, tap on reset and then factory data reset and
22:29
it's more reset and delete all. Now let the process go through
22:48
Now once it's finished we should go, we should be back in the setup screen
23:07
and this time there should be no Google verification account anymore at all
23:18
So, you know, and So, and then
23:50
I'm going to be Okay, as you can see now it's finished and we can go to the setup so let's start
24:27
with actually changing the language. Go English, for instance, let's go with the United States this time
24:35
And tap on okay. And then let's proceed on. We don't need to just connect to Wi-Fi anymore
24:50
I'm gonnae. I'm gonna go. I'm going to be. I'm going to be
25:26
And as you can see, now the device is fully unlocked
25:42
There was no need to log into Google account and everything is fully working
25:49
So that is basically how you bypass the Google verification screen and if you found
25:53
this very helpful, don't forget hit like, subscribe and thanks. Thanks for watching
#Science