0:00
Welcome! In front of me is a Poco X3 GT and today I'll show you how can bypass
0:06
the Google verification on this phone. So before I get started I'm just gonna quickly touch upon the state of this
0:18
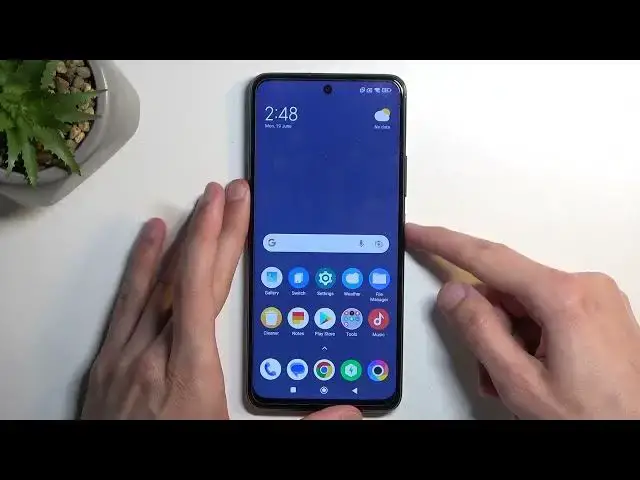
device. So you can see that it's telling me to draw the pattern to unlock it so I
0:23
can finish off the setup or I could use a Google account instead to unlock it
0:27
But assuming we don't know either of those I'm gonna guide you through the process of
0:31
number one bypassing this and then second thing will be removing it
0:36
So to get started you want to number one connect to some kind of network you can
0:42
see I am connected to it and once you have done so we want them back out to
0:46
the language section. I'm gonna stay right here or maybe even step earlier
0:54
because we will be changing the keyboard. So once you have your choose your region
0:58
we're gonna hold volume up and volume down. It's gonna bring up this pop-up right here turn on talkback shortcuts we're
1:07
gonna select turn turn on and we're gonna hold them again. I'm gonna mute it just because it's a little bit distracting to me so I just
1:23
prefer not to hear it but once you have this page open as you can see for me you
1:27
want to draw a L like this or I think it's a mirrored L to be honest
1:34
No no it's this one. Okay so just a normal L on the screen and from there we will be
1:43
selecting screen search so tap on it once to select it and then double tap to
1:49
confirm it and once you have this open we're gonna then hold volume up and
1:54
volume down again and this just turned off what we needed which is unfortunate
2:04
so let's try it again. Let's see
2:22
So I'm just closing it and I want to see
2:51
Okay so it did work so as you've seen I just kind of close this off now I'm
2:56
gonna select I'm gonna select the brilliant keyboard but before I do so
3:03
I'm gonna suspend the talkback so I can actually do it normally
3:08
I'm gonna select talkback brilliant keyboard go to the next page and from
3:13
here and again select it go to the next page next skip and next page and this
3:21
will obviously take us to the Wi-Fi connection page so here what you want
3:25
to do now do is scroll down select add network and then I'm gonna select
3:34
network name I'm gonna select the turn on and accessibility settings I'm gonna
3:44
choose accessibility mini enable it and allow and okay and then we're gonna go
3:52
back and we're looking for let me just quickly make sure because I'm checking
4:06
this as I go with the guide so we're gonna access the accessibility in many
4:20
that we've just turned on I'm gonna select Google Assistant and then we're gonna say open settings open settings so there we go we have just open settings
4:32
now and here we're gonna now scroll down to additional settings so right over
4:37
here I'm gonna scroll down again and we're looking for second space I'm gonna
4:44
select turn on second space continue and then I'm gonna select using a shortcut
5:04
continue set password are we gonna skip this okay so now that this is well now that we have our second space open which you
5:29
can define based on this wallpaper which is kind of like bluish typically you'd
5:33
have some kind of show me image obviously so this is the second space
5:37
once you have it you want to hold your power button and you want to select reboot now once the device boots back up you will see that we are actually taken
5:49
straight to our first space or just the main home screen the one that you would
5:54
typically see after I complete the setup as you can see right now so as you've
6:01
seen the previous one the second space had this static blue wallpaper this is
6:06
the main space with the normal wallpaper and we can technically switch between
6:09
them but we don't want to do that so what you want to do now is you're gonna
6:13
navigate into these settings and select about phone and we're looking for backup on a backup rainstorm we're looking for a
6:33
factory or set there we go so that's what we're looking for factory reset and
6:38
simply select erase all data factory reset and show me I has this stupid
6:45
thing where they black you with the timer so you can't press next so it just
6:49
wants to hammer down the info that a factory we said we set your device are
6:52
you sure you want to do that next and then another 10 seconds wasted just you
6:56
know even hammering it harder now once this timer goes to zero obviously you
7:02
want to click on ok now I'm not gonna do this on this video just because this is
7:06
a factory reset it provides technically and no extra there's nothing extra for
7:12
me to show once you press on it it goes fully automatically through the entire
7:17
reset which is a lot of black screen and once it's finished you are then taken back to the setup of your phone now at that point once the factory reset
7:25
is finished the device will be fully unlocked so you won't need to verify
7:30
anything now I'll be doing a reset of this device in a separate video just as
7:35
a reset through settings so if you want to really see me doing this on this
7:39
device after the bypass you can just look for that video although I'm not
7:43
gonna be really mentioning in there that this is after a bypass so for
7:49
everyone following this up from here you will know but other than that it's just
7:53
gonna be a normal reset on that one and yeah anyway with that being said this is
7:58
how you bypass you just need to perform that last erase now the reason why we
8:02
need to do this as a last step just to kind of clarify this so it's not just
8:06
kind of you know like on a whim trust me bro so the reason you wanted to do this
8:11
is when you're performing a factory reset of the device through settings the
8:16
device will automatically remove any kind of protection that was previously used on the device it's made this way so when you're performing a reset through
8:24
settings the device thinks that you're the illegitimate owner obviously which in almost every kind of circumstance that would be the case but here if you
8:34
didn't know your whatever Google accounts and other stuff and you needed
8:39
to do this it works basically the same as though you're the legitimate owner
8:43
and yeah performing a reset through settings just kind of forces the device
8:49
to unlock itself it's basically the simplest way I can explain it so that's
8:54
why I'm telling you to do this as a last step now anyway with that being said hopefully you found this video helpful if you did don't forget to hit like
9:00
subscribe and thanks for watching