Up next in 10

Learn more info about ZTE Nubia N1 Lite: https://www.hardreset.info/devices/zte/zte-nubia-n1-lite/
Would you like to make the camera usage in your ZTE Nubia N1 Lite much comfier and exciting? In this video we would like to show you all known camera tricks, which will improve your abilities. Let your ZTE device help you with taking perfect, incredible photos! Follow all shown tricks and try them on your own!
How to find camera features in ZTE Nubia N1 Lite? How to use camera features in ZTE Nubia N1 Lite? How to enable camera features in ZTE Nubia N1 Lite? How to find camera best options in ZTE Nubia N1 Lite? How to open camera best features in ZTE Nubia N1 Lite?
Follow us on Instagram ► https://www.instagram.com/hardreset.info
Like us on Facebook ► https://www.facebook.com/hardresetinfo/
Tweet us on Twitter ► https://twitter.com/HardResetI
Show More Show Less View Video Transcript
0:00
Welcome! Here I've got ZTE Nubia M1 Lite and I'm gonna show you the top tricks of its camera
0:11
So at first we have to tap on the center to get access to more apps of this device and from here we have to move to the camera app
0:18
By tapping on this we can easily open it and as you can see for now we are in the standard photo mode which shows us this icon here with the blue
0:27
So let's focus at first at this settings bar. When we change it to this button in the right corner we get access to the panoramic mode
0:35
and when we change it to this at the center we get access to the face beauty mode
0:40
So for now I'm going to go back to this normal mode here and let's focus on the settings here
0:46
Let's move to this settings bar here. The first one button is the gesture capturing so when this gesture with two fingers is shown to the camera we can take a picture without touching the screen
1:00
To show you how it works I have to change the back camera to the front camera and I can do it by using this button here
1:08
So hi again and let's try to take a picture by using these two fingers
1:12
And as you can see it take a photo by just seeing this gesture so let's go back to the back camera and for now I'm going to turn it off
1:24
And let's move to this button which is next here. This is the HDR mode so by tapping on this we get access to it
1:32
The HDR helps to improve the details in the brightest and darkest areas of picture
1:39
This is very useful and I suggest you to use this because this really improves our photo and make it just more beautiful
1:49
And to go back to the standard mode we have to tap on this again
1:54
And the next one button here is the flash so here we can turn on auto flash, turn on app flash every time we take a picture and also turn it off like that here
2:03
And now when we tap on the screen like that we have access to this square. This is the focusing
2:10
And when we use the two fingers we can easily zoom and get closer to our subject and also go back like that so this is how it works here
2:19
And now let's go to this button here in the left corner at the bottom. These are more advanced settings
2:26
Here we have the general settings, the photo settings and the video settings
2:31
So let's start with the standard general settings. At the first position we have the GPS location info so by tapping on this button we can turn on and turn off the saving location of our photo
2:44
Also the important information is that to make it work correctly when we really want to save our location we have to be connected with the internet
2:53
For example with the Wi-Fi here and we have to turn on the location of this device so remember about these two parameters and this is how it works
3:02
Also the interesting thing here in this camera app is that we have different modes to manage before we take a picture
3:10
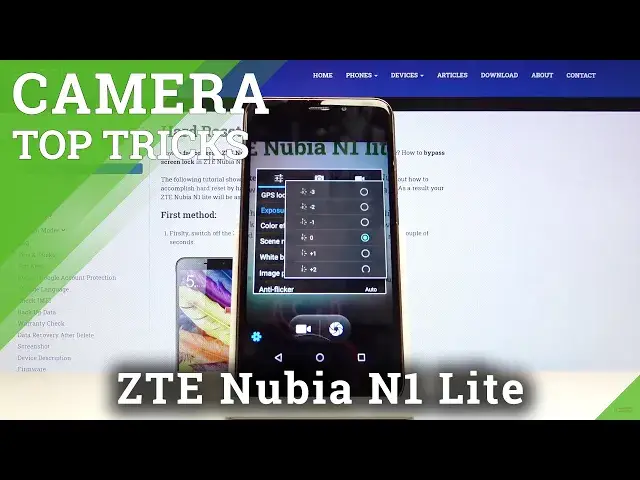
For example this is the exposure compensation so here we can control the light of our picture and can take it just more bright or dark as we need like that
3:22
As you can see when I pick these parameters the background changes and now I turn it to darker mode and to get to access the bright as you can see this is how it works
3:37
For now I'm going to turn it off because I don't need it and let's move to the next button
3:44
This is the color effect so here we can pick the filter and make our picture just more beautiful before we take it
3:51
As you can see for now I'm going to pick sepia and the background is changed
3:56
As you can see this is how it works for example blackboard also
4:01
This is how it looks like so just have fun with that and make experiments with that
4:08
Now let's move to the scene mode. Here also we can pick some kind of mode and filter
4:15
We can pick what scene we have as you can see this is the pretty wide spectrum for example when we are at the sea we can pick the beach mode here
4:24
and it adjusts the parameters to it so also make experiments with that and have fun
4:32
Let's move now to the next parameter here. This is the white balance so here we can control the temperature of our picture and we can pick different lights
4:41
As you can see this is also pretty wide spectrum. We can make our picture just more cold like in this white balance or more warm as you can see warm fluorescent for example here is
4:54
or the cloudy light. This is how it looks like so also this is the really cool thing here that we can adjust all of these parameters separately
5:06
And now let's go to the image properties. Also these are the next options to improve our photo and we can pick sharpness with low, medium or high, hue, saturation, brightness, contrast
5:20
So this is how it works and it's always changing at the background when we tap on this so also make experiments with that and have fun
5:34
And now let's go back to these settings and let's move to the photo settings here
5:43
These are more advanced about all of the photos and here we can turn on the zero shooter delay so here when we tap on this we can save our picture just when we take it
5:56
so it allows us to make a lot of photos at the same time
6:01
Also anti-shake option is very good here so here we can improve also our picture without shakes
6:11
And we can also pick auto scene detection so it recognizes the scene we have by using this button
6:20
Here we have access also to the option with self timer so here we can change the delay of taking picture
6:27
We can pick 2 seconds or 10 seconds for example 2 seconds I'm going to pick and show you how it works
6:32
Let me take a picture. And as you can see the picture was taken with 2 seconds delay so for now let's go back to these settings and for now I'm going to turn it off
6:47
And let's move to the next parameters here. We have the picture size here so here we can change the quality of our picture
6:56
This is the pretty wide spectrum you can pick from this format and 1 and 3 megapixels to the 13 megapixels and this is how it works here
7:06
Of course I suggest you to keep turning it on to the best possible quality
7:11
And now let's move to the next option this is the preview size and we can pick the ratio of our picture between full screen ratio so this is how it works
7:20
Set the background and looks like and the standard 4 and 3 ratio so it's a little bit shorter here
7:27
And that's all about this camera. When you turn on all of these settings after all you want to go back maybe to some original settings and we can do it by tapping on this button easily and restore defaults
7:45
And ok so this is how it works. Thanks for watching, subscribe our channel and leave the thumbs up
#Face & Body Care
#Software