Up next in 10


Read more: https://www.hardreset.info/devices/maxcom/maxcom-smart-ms457-lte-strong/faq/bypass-google-verification/
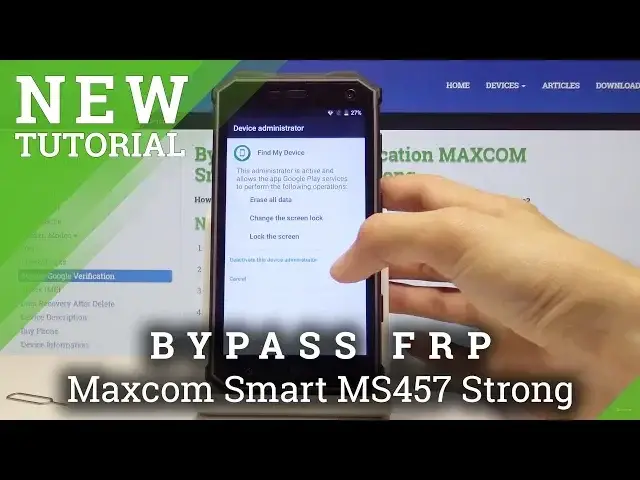
Let’s find out how to bypass google verification in Maxcom Smart MS457 Strong. If you just reset your smartphone and google password is forgotten, or if you bought a locked one, check out how to skip FRP. Watch the detailed instruction and successfully perform this advanced operation.
How to bypass google verification in Maxcom Smart MS457 Strong? How to skip FRP in Maxcom Smart MS457 Strong? How to bypass FRP in Maxcom Smart MS457 Strong? How to skip Google Verification in Maxcom Smart MS457 Strong?
Follow us on Instagram ► https://www.instagram.com/hardreset.info/
Like us on Facebook ► https://www.facebook.com/hardresetinfo/
Tweet us on Twitter ► https://twitter.com/HardResetI/
Show More Show Less View Video Transcript
0:00
Welcome
0:07
In front of me is a MaxComSmart MS-457 and today I'll show you how to bypass the Google verification
0:14
So as you can see the device in front of me is actually locked and if I wanted to I cannot progress
0:19
further on without the actual correct email address and password for that email
0:24
So to bypass it we're going to need a card like this one
0:30
And what you want to do is plug it into your computer and download the necessary tools that will be linked for this to work
0:36
So basically there will be a link for the FRP bypass for Android 712 and Android settings up
0:46
So basically what you want to do is copy them to the SD card there, just to the main folder of it
0:52
And once you have that, you can then put it into the device while, say you're here, it doesn't really matter where you are on the screen
0:58
basically once you plug it in you will get a message to switch the to the SD card so
1:06
the device can copy things to it instead of to the internal storage and if you select
1:11
confirm it it will take you to the actual card itself where you can open the apps so
1:17
start by actually putting them in there card itself down you can see you can see
1:28
see I'm laying there. What you want to do is now put it back in here
1:42
and close it. And as you can see, you get this message here
1:49
So just tap on OK. And from here, I will see the card that we have just inserted
1:57
inserted which is the SD send disk card tap on it and we'll take us to the content of it and
2:04
first you want to install the FRP VN ROM which is right here and once you tap on it you
2:15
will have to actually enable unknown sources so tap on the settings and then check this on
2:20
to unknown sources so you can install it okay and then go one time back and top on
2:27
it once more at this time we'll be able to actually install it stop on next and install
2:35
Okay, and instead of opening, just up done
2:48
And from here, I go into yet one, which is the settings
2:54
So install the settings as well. And once it's installed, this one you want to open
3:00
and from here we want to disable the find my device so let's go into security
3:10
right here and then device administrators and find my device check that off and once you tap on it
3:21
you will take you here so deactivate this device administrator and go back
3:26
to the main settings page and from here we want to go to go to
3:30
the apps and tap on the 3 dots up here and show system and scroll down
3:39
down is it so see in Google Play Services want to disable this and
4:00
There's one more. Google account manager right here. Also disable this. Go back
4:11
Go back once more. And from here we're going to go into the accounts
4:17
Add account. Choose Google. Give it a moment. And then sign in with a Google
4:30
account that you wish to use now if you don't have one you can always stop on here to create one and then log it in with it or use one that or you
4:40
already have like I do so gonna use mine then top on next and put in the
4:54
password for it so I'm just gonna do that off the camera
5:00
and then tap on next and you'll see this so just
5:10
so just tap on i agree to the terms of service of Google Tap on open again go back and now we gonna re everything that we have disabled
5:29
So let's go into the apps. And top on system again
5:40
And find the one that we disabled. So we have Google Accountant
5:45
so we have google account manager right here enable go back scroll a little lower
5:52
whoops and you have google play services enable go back and now all we need to do is hold
5:59
power key reboot the device confirm it and let's wait for it to power back on
6:15
Okay, so let's unlock the device again
6:27
And we should be now able to go through the setup of the device. okay now as you can see account added which is the account that we have added
6:59
before we reset and that is the account that it's using right now and i can just proceed
7:04
on by tapping on next and give it a little bit more time for it to find whatever
7:15
we don't want to really set up anything at the moment we're going to
7:25
perform another hurry reset of the device cool got it so once you're in the home screen just enable or go into the settings
7:38
and go all the way down into backup and reset and choose factory data reset
7:45
and reset phone I'm actually going to take out the SD card because it's not needed
7:51
anymore do that quickly I just like the device Okay So from here finish on
8:23
erase everything and let the hard reset basically go through and once it's
8:32
finished then we can set up the device the way we like it and it's going to be fully usable
8:53
and as you can see now the process is finished so we can set up the device as we like
9:09
i'm again going to go to the setup really quickly just to not waste any more time so let's
9:14
choose the language get started and i'm not going to connect to the network considering it's
9:22
going to take a little bit longer while it's finding updates and stuff like that
9:28
So don't use any network for setup and continue. Now if you would connect, it will start looking for updates and also allow you to log into
9:35
the Google so we can immediately start using App Store and stuff like that
9:43
So just go through this. You can also choose a password. Like I said, the device is fully unlocked now and you can set it up
9:52
as you like. So you can see we're on a home screen again
10:00
And if I go into the settings and then do the account
10:06
Oops, not really what I want to press. Let me go back. Accounts right here
10:14
There is no account added unless you're connected to Google and used one
10:17
Then you will see your account right now. but because I skeptical this field is completely empty and the device is fully clean now
10:25
so that is basically how you would perform a Google bypass on this device and if you found
10:30
this very helpful don't forget hit like subscribe and thanks for watching
#Science