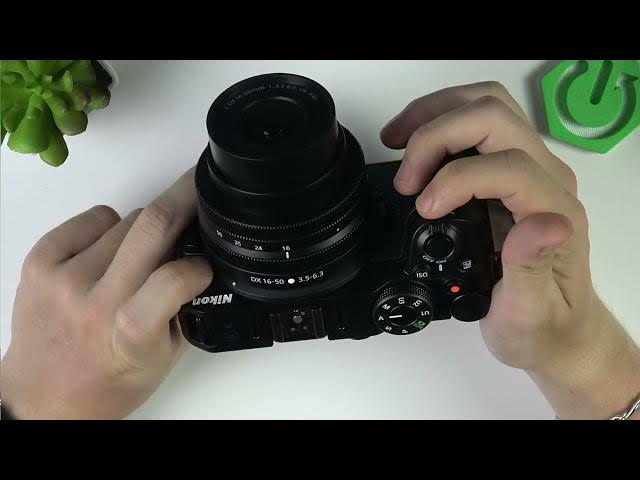
0:00
Hello. In today's video, I'll show you
0:02
the first 10 things to do after unboxing
0:13
Okay, so let's begin by first putting
0:19
and the SD card in. So, at the very
0:21
bottom of your camera, um, open these
0:25
door by pushing this lock like so and
0:28
flipping it up. Now, you can see it's
0:31
open. And let's put the battery first.
0:35
So, you just push it in like so. If you
0:39
want to remove it in the future, just
0:41
push this yellow uh lock and it pops out
0:44
automatically. So, I'll push it in and
0:50
insert the SD card according to the
0:54
symbol right here. Well, you can't
0:57
really see it. There's the symbol uh and
0:59
it indicates that the pins are should be
1:07
Now, if you don't have the correct lens
1:11
I'll show you how to detach it and
1:12
attach it. To detach it, press and hold
1:15
uh on this button and while holding on
1:21
this uh like closest to body uh ring, um
1:27
rotate it clockwise. Now it's removed.
1:31
And to put it on, find this white dot
1:34
right here and find this white dot right
1:38
here. Now, you don't need to press the
1:40
button. Just align these two dots and
1:44
rotate counterclockwise until you hear
1:48
Then remove the cover.
1:56
here uh are two rings. This one is for
1:58
focus or anything else that you set it
2:01
to. And this one is for um zoom. So just
2:07
rotate it uh counterclockwise.
2:10
um to any zoom that you like depending
2:13
on what lens you have. Um and now we can
2:16
turn it on. So let's flip the screen out
2:18
if it's not yet flipped out. Um
2:23
turn the uh device on. And mine is
2:27
already working, but uh if your asks for
2:31
some some things like language and uh
2:34
time, set it up. I'll set it up through
2:36
the menu. So let's go to the setup menu.
2:39
You can see there's the menu. Go to
2:40
setup right here. Go to the right and go
2:42
to language. Uh select the correct
2:45
language. So I have English and it's
2:48
okay. Then uh time zone and date.
2:53
I don't really feel like setting the
2:55
time zone because it's not going to do
2:56
anything to be honest. Uh I think but
2:59
let's do the t date and time.
3:02
And yeah, you can change the date and
3:07
And once you set it with the seconds,
3:11
let's see if I can see seconds on my
3:13
computer. No, I don't see seconds on my
3:16
computer. Okay, it doesn't matter. Um,
3:18
yeah, once you set the seconds
3:23
you can you can set them like to let's
3:27
say it's uh 20, it's you know uh
3:31
military time. uh 20 27
3:34
uh let's say currently it's 20 27 uh 02
3:38
so I can set it to like uh 10 and wait
3:41
until it becomes 10 on the clock and
3:43
then click on okay as soon as it becomes
3:46
and then it starts counting from then so
3:49
that is useful I think you can change
3:50
the date format and daylight saving time
3:56
and now uh these are the most basic
3:58
settings now um let's Uh
4:03
also adjust a few things. So go to
4:05
custom settings menu. Go to shooting
4:08
display. No sorry uh go to timers
4:12
um here and power off delay can be set
4:16
in standby timer uh to a certain time
4:19
and let's say 10 seconds. Now if I exit
4:24
you'll notice that after some time the
4:27
display will shut down automatically.
4:33
Yeah, just like that. I can click on
4:35
disk to turn it on. But I can also
4:37
adjust the timer to something else like
4:42
let's say 5 minutes and then it's the
4:46
time after which the display will turn
4:48
off. Um the next thing that I recommend
4:51
doing is custom settings menu shooting
4:53
display and uh setting uh the
4:58
uh grid. I recommend enabling grid um to
5:01
3x3 or 4x4 depending on your preference.
5:05
Then you'll see the grid that is super
5:08
useful I think for actually making the
5:11
photos look good uh or videos look good.
5:15
Here is how you change between photo and
5:17
video mode. And now let's talk a little
5:19
about the modes. Uh so there is full
5:22
auto mode. It's basically all auto. you
5:25
just take a photo or take a video
5:29
depending on the mode you're in. Um,
5:32
then there's programmed auto. So, that
5:35
basically has all all the same things as
5:42
as auto, but it lets you adjust a few
5:44
things more. Uh, so yeah, that is
5:47
basically it. Then there's shutter speed
5:51
Um sorry no programmed auto in photo is
5:55
actually lets you adjust the ISO
5:57
manually. So uh when you press and hold
5:59
on ISO button you can um you can now
6:04
rotate this wheel to change the ISO. But
6:07
when you release it, it goes back to
6:09
auto. So that is important to know
6:13
because you can see at some point it
6:15
will start adjusting again. So if you
6:17
want to disable auto ISO, you need to
6:19
find this dial wheel, rotate it once,
6:23
just one click, and then auto disappears
6:26
from here. You can release ISO or keep
6:29
pressing it and then adjust it with the
6:32
dial. You need to keep pressing ISO to
6:35
be able to adjust uh with the dial and
6:38
then release. And ISO is set to that
6:41
level now. So that is the thing. shutter
6:44
speed priority. Also lets you do the
6:46
same with ISO, you can set auto or not
6:49
auto. But once while you're not pressing
6:53
on the ISO and adjusting this dial, you
6:56
are basically changing the shutter speed
7:00
Uh and if you set to aperture priority,
7:03
if you're not pressing an ISO button and
7:06
adjusting this slider, you're changing
7:10
Then um there's manual which lets you
7:13
adjust both the shutter speed, the
7:17
aperture and the ISO. So uh these are
7:25
the the thing that I'd recommend doing
7:27
after inserting your SD card is to
7:30
format it so you have the best um
7:36
you know the best possible uh experience
7:40
with saving to your card. So, um I'll
7:45
click on m click on the menu then go to
7:50
uh setup menu on the left side and find
7:54
format memory card then yes but remember
7:57
if you have anything on your memory card
7:58
and you format it'll delete it. So if
8:01
you have anything important back it up
8:03
and then format the card. Um now uh the
8:10
is to uh adjust a few settings of photo
8:14
and video. So let's click on the menu.
8:17
Let's go to photo first. And here you
8:20
can change the image quality. And here
8:24
you can change in what formats the
8:27
photos will be saved in. Fine is better
8:31
than normal. Basic is worse than normal.
8:33
A raw is not viewable. So if you take a
8:37
raw photo, it's not like you can
8:38
immediately view it. It's for editing
8:42
and then you can export it. So if you're
8:45
going to ex edit it anyway with a
8:47
program, you can just take it in RAW.
8:49
But I'd recommend taking it in either
8:52
just JPEG or RAW plus JPEG. So JPEG is
8:55
just for viewing the photo quickly and
8:58
RAW is for editing in case you want to
9:04
so yeah, I like the RAW plus JPEG
9:06
normal, so I can edit the RAW later in
9:08
Lightroom on my computer. Um, you can
9:11
change the image size to large, medium,
9:13
or small. I do like the large because it
9:16
has the best quality, but if you want
9:18
medium or small, you can also do that.
9:21
Um, and uh, now let's go to, by the way,
9:25
raw recording is also can be set to two
9:28
different modes. The better one is the
9:29
better one. Uh yeah then video recording
9:33
you can change the frame size and frame
9:36
rate. Uh these are quite important uh
9:39
because you can use 4K but only up to 30
9:42
fps or 1080p up to 120 fps or you can go
9:47
down and record in slow motion. But
9:49
those modes I wouldn't recommend them
9:51
myself because I think it's better to
9:52
record a normal video and then slow it
9:54
down later. You know at like 120p it can
9:57
be slowed down five times. you can do
9:59
that instead of um recording it in slow
10:02
motion because maybe you don't want to
10:03
slow it down. Maybe you don't want to
10:05
slow down the whole clip, just a part of
10:07
it. So, uh that's why I would recommend
10:10
uh recording it in like uh just higher
10:13
uh frame rate instead of recording it in
10:16
uh slow motion uh like already. Um
10:20
then video quality of course can be set
10:22
to high quality or normal. That's
10:23
basically the bit rate. You can change
10:25
the file type. It's also pretty
10:27
important. Uh you can set it to which is
10:30
I think a superior format. It's just has
10:33
better quality but it may not be
10:36
playable without additional programs. So
10:38
for better compatibility you want you
10:41
maybe want the MP4 but I would set and
10:44
just download VLC on my computer. So
10:47
yeah, if if your computer doesn't play,
10:49
then just download a VLC. Unless you
10:53
actually need the file to
10:56
um fit a program, fit a certain program
10:59
that doesn't support, then
11:03
that's what I would do. And these are
11:05
basically the the most basic things that
11:07
I would do at the very beginning of
11:09
using the device. By the way, there's
11:11
many more videos uh on the channel on
11:13
how to do stuff here. So, in case you
11:16
need anything more, feel free to check
11:18
them out. And I hope that this video was
11:19
helpful. Don't forget to like and
11:21
subscribe, and I'll see you in the next