Up next in 10

How to Install Screen Protector on iPhone 14 Pro - Put On Tempered Glass on iPhone 14 Pro
Jul 23, 2024
Find out more tutorials about iPhone 14 Pro: https://www.hardreset.info/devices/apple/apple-iphone-14-pro/
In this video, I will show you the best method to protect your iPhone 14 Pro Display. I will install protective hard glass on an iPhone 14 screen to avoid all the scratches and cracks.
Follow us on Instagram ► https://www.instagram.com/hardreset.info
Like us on Facebook ► https://www.facebook.com/hardresetinfo/
Tweet us on Twitter ► https://twitter.com/HardResetI
Support us on TikTok ► https://www.tiktok.com/@hardreset.info
Use Reset Guides for many popular Apps ► https://www.hardreset.info/apps/apps/
How to put on iPhone 14 screen protector?
#iphone14pro #apple #iphone14
Show More Show Less View Video Transcript
0:00
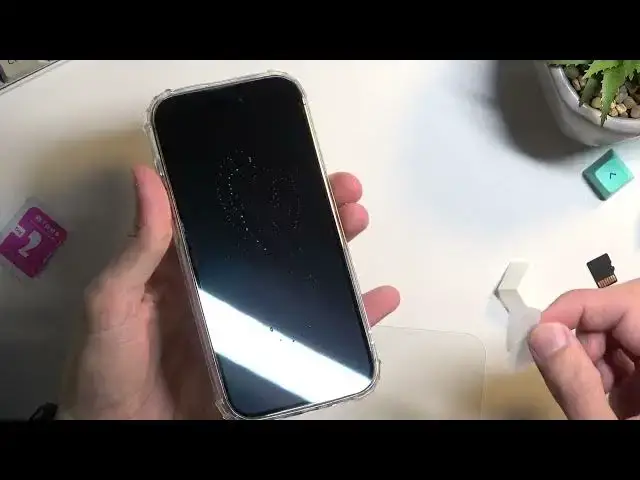
Welcome. In front of me is an iPhone 14 Pro and today I will show you how you can apply
0:06
tempered glass to this phone. So previously I did record, record, record how you can apply one of the trashiest, the worst
0:21
things that I have probably found which is this thing, some, uh, so call it ceramic foil. If it's a
0:30
can foil house it ceramic. Needless to say it's absolutely garbage and that is what I have
0:35
right here on the phone right now so I'm gonna remove it and substitute it for actual
0:40
tempered glass which well objectively in my case to me it's just significantly better
0:46
So anyway I'm gonna show I don't even need to take off the case but I do want to lift it up
0:53
so obviously I'm gonna be removing the old one. I can grab it come on
1:00
Oh, come on. Don't you even. There we go
1:14
That's kind of how this ceramic foil looks like. It's obviously soft
1:21
Not a big fan of it, so eat that to the side
1:30
Now with tempered glass usually, I'll probably always, you get obviously the glass
1:39
but you also get these things. So wet and dry wipe. So you can utilize those if you want to, but I'll be honest
1:49
they're not the biggest thing, and it might be just more comfortable to use something like a microfiber cloth
1:54
which is what I'll be utilizing. But just to showcase the size of these
1:58
This is going to be the wet wipe, do you think? Yep, wet
2:02
There we go. There we go. That's the size of this wet wipe
2:21
So you can clearly see it's... It's comical. call. Anyway, I'm just going to put that to the side. It also creates smudges on the
2:33
screen. The solution that they use is just kind of weird. I don't necessarily like to use it
2:37
So yeah. Now, before I actually start applying the glass, I'm going to quickly go into the
2:45
process of how I do it. If you haven't ever done this before, the way I do it seems to be working
2:52
for me really well. And that's usually what I'm going to be using. And what the heck is this
2:57
They grabbed the wrong one? Yep I did Okay So let me just put that away and grab the correct one which would be There we go pro that a big oof moment
3:13
Anyway, let's just continue this like nothing ever happened Is that the correct one? Yeah, there we go. So anyway, I'm not gonna open up
3:29
these wipes. I'm gonna put it for later to the other one, but anyway. So going into the application of glass
3:35
the way I do it is I would start off by applying it from the top just because there is usually some kind of like cutouts
3:41
or weirdness to it. As you can see right here we have for the speaker
3:46
for calls. So what I would do is just start off with the top
3:51
Make sure that it's spaced out even from left and right top side
3:55
and then that the speaker grill aligns with the cutout on the glass
4:00
once it does I'll just apply pressure while holding it at an angle
4:04
so just to show that from the side as you can see I'm lifting it up at an angle
4:08
and at the top of the phone it would be touching the display
4:13
so it would start to stick to it well here I would still have a little bit of control to kind of maneuver it
4:20
to the right or left side when doing so and then just start lowering it
4:26
kind of like this until it just drops fully and hopefully with that it would drop in the middle
4:33
Now, I do pinch the glass, as you can see, and I do also, while pinching the glass
4:39
feel the bezels of the phone, just so the glasses would I would consider in the middle
4:47
So just start dropping it like this. Now, that seems to be working for me super well
4:53
without any kind of problem, so that's what I'm going to, the way I'm going to be applying it
4:57
and hopefully if you have never applied it, this will work for you as well. Now, obviously, if you have your own method, this video probably is redundant
5:07
especially for you if you know how to apply it. But yeah, it's for people that haven't done this before
5:12
Just a quick little guide on how we can do this in a relatively easy and fast way
5:19
Now, going to cleaning your display, I'm going to be using microfiber cloth
5:22
You can utilize the ones that come provided with the device. Okay, so these wet and the dry wipes, but I just honestly don't like to use them
5:31
Now, I'm going to also show you what I mean by the smudges that it creates
5:37
So here's a dry wipe just prepared. Here's the wet one, and the wet one is actually quite wet, which is unusual
5:48
So, just to kind of showcase this, and I'm going to turn off the device
5:55
There we go So now there won be anything visible on the screen So as you can see it has some liquid to it
6:19
Now actually this one, maybe they use a different solution for it
6:23
but this one didn't create any kind of smudges, which is actually really nice
6:28
The lack of smudges, but still the size of these wipes is pitiful, so
6:34
and I use something else. So there we go. And once your display is ready
6:47
now these do leave residue, but like dust particles, the microfiber cloth, I don't know why
6:57
Never had that problem before. But once your display is ready, Which mine isn't, as you can probably see, there's some weirdness
7:08
Come on, focus on me. There's some weirdness happening right here around the bezels
7:12
so I'm going to clean that off. You do want to be fairly precise with cleaning your display
7:21
If there's any kind of like grime dust, maybe, or anything like that under the display
7:27
it might create air bubbles. That is especially true for trash like this
7:32
So just a single speck of dust created a massive. massive air bubble which these actual tempered glasses don't have such a problem
7:42
But obviously if you have something bigger under the display it might create some problem
7:47
Anyway, so with this specific tempered glass that I got, we also got these things, which we might
7:54
have seen fall out. So stickers. You can utilize those for just glue it. There we go
8:01
So once you are ready to apply it, you can just utilize this
8:07
Get rid of any kind of dust that might have settled, like such
8:13
Honestly, it might seem like a kind of a gimmick. And anyway, I'm just going to keep it news
8:22
Now, when it comes on to applying your glass itself, the way I do it is I just peel off
8:27
You do have just one side here. As you can see, just a single peeling side
8:32
Once you peel that off, whatever you're going to be holding right here when peeling it off
8:35
that's the side that you throw out. And this will leave you with just a glass itself
8:40
And obviously, the sticky side is right here. So right there. Now, once you peel it off, I do recommend just immediately going straight for it
8:51
If you have some kind of, I don't know, dust that might have settled, keep this upside down
8:55
This will reduce the possibility of dust settling on. the glue on the tempered glass
9:01
Let's see if I have any. Okay I think I good to go So straight away
9:33
There we go. And as can see, it's kind of gluing itself right now. I can speed it up, just move your finger through it, and there we go
9:43
It looks like I could have moved it a little bit higher
9:58
I'm not sure if you can see this let me just try to show it
10:03
So it's super hard to show. The cutout is a little bit higher than the actual glass itself but I try to space it out so it's evenly spaced
10:12
It's still kind of felt at it, it's a little bit lower anyway
10:16
But still the application went pretty well. As you can probably see, there is no air bubbles whatsoever under the display between the
10:25
temperate glass, so there we go. Obviously most of the times the temperate glass has some smudges on it, so just clean that off
10:34
They sometimes see some weird solution to cut it or when they're cutting it and that just
10:38
dries up and it's quite hard to sometimes clean it off. with persistence you can get it off here there is not much obviously there is a little bit but
10:48
it comes off easily but yeah anyway obviously you can see everything works fine and see if i put in
10:56
case just take that off because this doesn't really fit so would have been taken off
11:05
Yep, perfect fit. So as you can see, it's not pushing on the tempered glass anywhere
11:13
If you put it a little bit crooked, sometimes it might be pushing on the glass and lifting it up
11:19
So if that happens to you, then you might want to probably try to reapply it
11:28
Now, I wouldn't advise on this, but if obviously it's pushing on your
11:32
if the case that you're using is pushing on the tempered glass, it will just start getting air, dust in there, and it will start coming off
11:39
So in this case, if you see such a problem, I would recommend just, I mean
11:45
I wouldn't really recommend doing it, but it can be done. So you could just lift up the tempered glass again, do it really carefully so you don't get any dirt on there
11:54
and just try to shift it to accommodate for the screen protector or not screen protector
12:00
but the case itself. Hopefully that can solve your problem. and won't be pushing on the display anymore
12:08
So, anyway, if you found this very helpful, don't forget to hit like, subscribe, and thanks for watching
#Science
#Other