Up next in 10

Get more info: https://www.hardreset.info/devices/tcl/tcl-30-se/tutorials/
Let's take a look at the unboxing of TCL 30 SE (European distribution). Discover all additional accessories and the while initial setup process. If you wish to get some further information or learn useful tricks for your TCL, just visit our YouTube Channel. Enjoy!
How to Unbox TCL 30 SE?
What's Inside TCL 30 SE Box?
What Comes with TCL 30 SE?
#Unboxing #unboxingvideo #tcl30se
Follow us on Instagram ► https://www.instagram.com/hardreset.info
Like us on Facebook ► https://www.facebook.com/hardresetinfo/
Tweet us on Twitter ► https://twitter.com/HardResetI
Support us on TikTok ► https://www.tiktok.com/@hardreset.info
Use Reset Guides for many popular Apps ► https://www.hardreset.info/apps/apps/
Show More Show Less View Video Transcript
0:00
Hello, in this video we'll be unboxing TCL 30 SE
0:12
So in front of me I got it packaged and here is the tape, so it never been opened and we'll
0:20
be opening it the first time. On this side of the cover we can see some specifications, not as much about the phone
0:30
hardware, but we can see that the phone should be in the space grey colors
0:38
On the back we can see some specifications and here is the 50 megapixels camera, 128GB
0:47
of storage, 4GB of RAM, 5000mAh of battery and a screen with 6.52 inches HD+
1:00
And also the octa-core processor. So after we've read everything here, we can actually cut the tape and proceed with opening it
1:12
In the meantime the price goes around $160, when I record this video and it will be published
1:23
more today. We managed to open it and instantly we can see our phone
1:33
If you open it, be careful not to do it like this, because it can open and your phone can
1:38
fall off. Just hold it with your finger here, I would recommend that
1:43
So now let's open it, take out our phone
1:57
So here's how it's packaged. Let's move it to the side
2:06
We have some codes here
2:17
And here's in this, be careful, because in this package there's actually a needle for
2:21
your SIM card and all the stuff like that. So keep it safe somewhere, don't throw it out
2:30
Here's some services. We can also find instructions. So it's in form of a very big wallpaper
2:45
Quick start guide, which you can of course read in order to get some things done, like
2:51
how to insert the SD card. Here you can see what is actually on your phone, where to locate fingerprint scanner
2:59
lens camera, flashlight and NFC scanner, USB port, power on or off, volume down, volume
3:08
up, front camera and a jack plug
3:17
More instructions. So this one is just normal instruction, you can read it if you found any trouble using it
3:29
Here's the charger. It's probably some basic one. OK
3:42
USB port. Probably type C. Yep, type C
4:02
And USB of course, normal stuff. Let's put it inside. Here's some hard cardboard, there shouldn't be anything beneath it. No. OK
4:17
So let's actually check out our phone. So here's the phone. We can simply slide it out like that
4:28
It has installed some cover in order to protect the screen. You can also see some performance, hardware information about it in front of the screen
4:40
On the back we can see the cover, chromatic. It's grey as it said on the box
4:49
And some information right here. OK. Now let's check all the buttons and stuff like that
4:58
Here's the SIM card. Here's the jack, speaker, power on or off, volume down, volume up
5:12
Another speakers. Oh, that's microphone, I'm sorry. So here's the microphone and here you can find the speakers
5:20
And the charger port type C. Here's camera, the flashlight and the fingerprint scanner
5:29
So we have everything. Nice cover, I like that. Let's try to peel off the screen protection
6:23
So, this should be running on Android 12, but it also uses the TCL UI 4.0
6:41
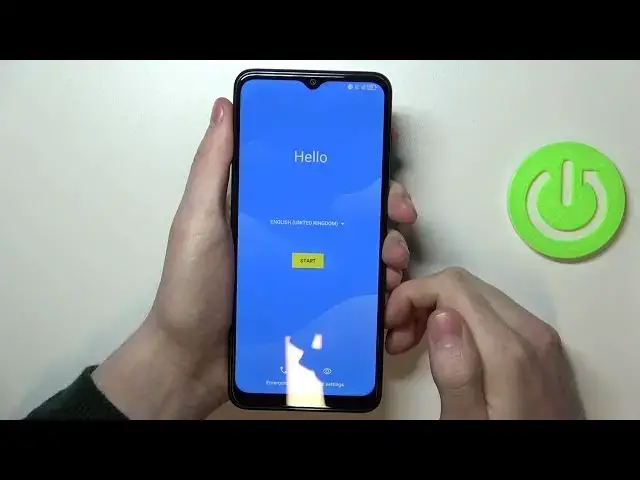
Here we can begin the setup of our phone. We have a nice hello and the language options
6:48
So we can pick in which language we're gonna use this phone
6:52
Let's choose English for that. We can also do emergency call if needed, hope not
6:58
And vision settings if you found any trouble with seeing stuff. You can increase the font size, change magnification, select to speak or talk back
7:09
Now let's start our phone with English language chosen. So if you have the SIM card, the mobile network, it will ask if you want to use your mobile network
7:20
I don't have the SIM card installed. You can of course install it right here
7:25
There's a needle which I mentioned in the beginning of the video. Simply open it up with a needle and then insert your SIM card
7:32
Now let's skip this mobile network. Here you can connect to any Wi-Fi network
7:40
And I'm not gonna do that right now. Let's just go through all the setup
7:44
But if you want, just pick the network you have password for and then simply insert the
7:50
password and you'll be able to log in without any problem. Setup offline, continue
7:59
Here you can choose the date and time. So we can set it to automatic date and time
8:05
Use network provided time. If you disable both of the settings, you can change the time zone, you can change the date
8:14
for a specific day, month or year. You can choose the time you want, use location to set the time zone
8:23
So I would recommend using automatic date and time because you might encounter some
8:28
problems if you change the time or date to not be actual as it is right now
8:34
Some websites or your Google Play Store might stop working. Now another thing is to use local default or use 24-hour format
8:43
If you don't like it, simply turn it off. So let's move to the next step
8:50
And here we can accept to some Google services. Of course you can do any of this
8:56
There's no need to accept to all of them. Just customize it however you want
9:02
Press accept. You can set up a fingerprint already in order to unlock your phone
9:09
So actually let's try that. Let's move to the next step. Choose which password you want to use along with your fingerprint scanner
9:18
So I would use the password. If you're not sure that you're going to remember that, try actually writing it somewhere
9:26
Because if you forget it, it might be hard to recover your phone and it would be a big trouble
9:32
So write any password and then write it on some paper to remember it
9:39
Or if you're sure that you remember it. Now let's move to the next step and go for another confirmation of the password
9:49
And we can start scanning our finger. So let's move to the next step
9:55
And here you can find the sensor. Simply put your finger on it and just follow the instructions that are shown on your phone
10:05
Once the process is complete
10:18
So one finger is added. Of course you can rename it if you want to give it a specific name
10:24
Or add multiple fingers later in the settings. Now let's move to the next settings
10:30
And you can also unlock your phone with a face. I'm not going to do that
10:35
You can of course press next and then follow the instructions to be able to unlock your
10:40
TCL with a face. Now let's skip that. And next, Deep Vision
10:51
Actually I would recommend enabling all of it because as you can see it, it makes some
10:56
of the pictures much better looking and all visuals on your phone will be a lot more beautiful
11:03
Than they are without it. So enable all of them like that
11:08
So they are glowing on the blue, this little switch. And then press next
11:15
Choose the lock screen setup. You can use the TCL style, it's default one or the classic normal one
11:24
I'm going to use the classic one for this example. On navigation you can pick buttons and then change their order right here
11:34
You can also set up gestures navigations if you prefer one. It's your choice, pick whatever you want
11:40
I'm going with buttons. Setup is complete, we can press finish. Agree to privacy policy and all the agreements that were left there
11:54
And then skip that if you want. You can of course join, it's always your choice
12:00
I'm going to skip that. And the phone is ready. It's unlocked already and we can actually check some settings
12:09
So let's go for the settings and see the device information. We need to go for the system, about phone
12:17
And here we can find all information about our device. Display 720x1600, front camera which is 8 megapixels and rear camera which is 15 megapixels
12:34
with 2 megapixels, storage is 128 gigabytes, CPU is MTK G25, you can see the TCL, UA version
12:48
which I mentioned and Android version as well. You can find battery capacity which is 5000 mAh, it's model name, some legal information
12:59
build number, status or other specs. Let's try taking some photos and checking quality on our camera
13:21
Now let's go for the gallery
13:41
Find our pictures. So I made four of them and here you can see some plant
13:48
Actually I like the quality. It's pretty nice. My hands were a bit shaky but it kept its quality
13:56
Very nice picture. Now let's go for our logo because it's a bit glowy and let's see how many details are captured
14:08
So I think it did pretty okay because for me it's really really glowy and here on the
14:14
picture it's very saturated and I like it. So I would recommend that camera
14:23
And that's it for this video. Hope you like it. Please consider subscribing to our channel, leave a like and a comment below
#Computers & Electronics
#Electronics & Electrical
#Mobile & Wireless Accessories
#Mobile Phones
#Gadgets & Portable Electronics