Up next in 10

How to unlock FRP in MOTOROLA Moto X4? How to bypass Google Verification in MOTOROLA Moto X4? How to remove Google protection in MOTOROLA Moto X4? How to remove Factory Reset Protection in MOTOROLA Moto X4? How to bypass Factory Reset Protection in MOTOROLA Moto X4? How to unlock Factory Reset Protection in MOTOROLA Moto X4? How to skip Google Verification in MOTOROLA Moto X4?
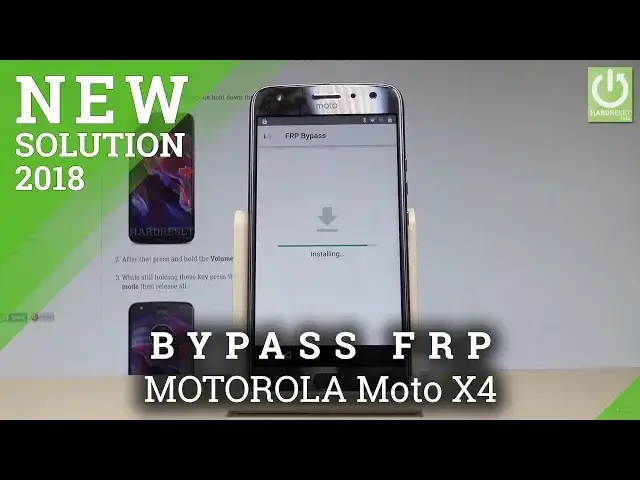
If you are lookinf for the way to bypass the Google verification in MOTOROLA / LENOVO Moto X4 you should watch this video. In just a few steps you can accomplish bypassing the Factory Reset Protection. So if you forgot your Google Credentials (eMail and password) our unlock frp video is the only help.
More Info:
http://www.hardreset.info/devices/motorola/motorola-moto-x4/hardreset/first-method/
Show More Show Less View Video Transcript
0:00
Here I have Motorola MotoX4 and let me show you how to accomplish bypassing Google
0:09
verification on the following device. So let me show you how to remove the factorous protection on the following phone
0:15
So at the very beginning let's start by using the following panel when you have to input your
0:19
password and email to your Google account. Let's just assume that you would like to bypass this step because, for example, you just forgot
0:29
your password so let me go back to the first screen to a welcome panel choose vision settings
0:35
choose talkback let's turn on talkback right here tab okay top back on top back is a screen reader primarily for people with blindness and low vision
0:45
now you can load down the program so let me use volume down to mute the to mute the talk
0:53
back let's use the l letter let's write l on the screen to open global
0:58
context menu let's choose talk back settings double tap here you have to always double
1:04
tap things to confirm it let's scroll down and choose the help and feedback as you can see here
1:11
you can scroll down by using two fingers choose help and feedback double tap let's use the search
1:19
key double tap let's use the following phrase voice Alright let's use voice choose the first league so get started with voice access
1:38
let's play it now we have to use the share key let's wait for the share key in that
1:46
corner this is the share key let's tap it choose more key
1:52
this is the YouTube application that's what we need let's Let's minimize this
2:00
Let me just quit this by using two fingers. Now you have to use the account right here in that corner
2:08
So let's type in account. Here you have to choose settings. So let's tap settings
2:14
Choose about. So let me tap about. Double tap. Here you have to choose Google Privacy Policy
2:21
Double tap. Tap accept and continue. Choose no thanks. Now use the following website
2:31
So let me just click on the following searcher So let's delete all phrase by using that key
2:45
And now you need to enter the following link download .hard reset
3:02
. . . . . info. So let's tap search, download. .hardresset
3:18
This is the following website. Let's make it bigger these folders. Here you have to find and select the mode of
3:27
Motorola folder right here So you need to navigate here by tapping appropriate options So let me find the way to navigate here
3:44
Excellent, so as you can see now you can scroll down to highlight the mod roll
3:51
It's not easy to navigate in the talkback, but when you have highlighted your folder, let's double tap
3:57
and here let's use the FRP so let's make it bigger also in my case and let me just use the FRP
4:16
this is the FRP highlighted double tap wherever you want and here you've got the following
4:27
folder Android 8 So let me also choose this folder Let me also choose this folder
4:43
Try to navigate somehow This is the Android 8 Let's double tap
4:50
Let's make it bigger And this is the one application that you have to install So let's open this up
4:55
Highlight this application, let's double tap
5:10
Tap continue. Tap allow Chrome to access photos, media and files on the device
5:21
Tap okay to the following information. If nothing happens you can tap on this application one more time and download it one more time
5:43
Tap allow. Choose download. Devices downloading the app. Now you can open this up
5:52
choose open so here the Chrome don't have the access to the installing apps but let's
6:00
choose settings let's allow from the source let's go back you just define the Chrome
6:08
as a source so now you can choose install tap open right here the FRP bypass
6:16
application and now you can use this so let's choose Google Account Manager AP
6:22
install let's choose for version 6.0 in my case tab settings let's allow from this source
6:38
let's go back tap next tap install and you just install the google account manager let's tap done
6:52
Now you can choose bypass FRP, double tap, let's choose browser sign in
7:03
Sorry let go back Just choose bypass FRP one more time Choose browser sign in
7:15
Double tap. And now let's choose more key. Choose browser sign in again
7:23
Tab okay to confirm it. And now you can sign in into the any Google account
7:28
So let's just sign it into the account that you know the credential, that you know the email and password
7:33
could be any Google account. So let's start by inputting the email
7:41
Let me input the email right here
7:55
Let's choose next. Let me correct my email. Alright, now I am almost ready
8:14
Let's tap next. Now let me enter the password, so let's wait a few seconds
8:29
Alright, if you are ready, let's just sign in right here by using that key
8:44
Wait a couple of seconds the device
8:54
I curious some problems but let's stop next. Next. Let's just open up again. Let's wait for a few seconds or maybe even a few minutes
9:28
The following info pops up, let's press power key, let me restart the device, tap restart
9:58
add the Google account to the device. So let me go back right here
10:16
Let's choose let's go. Tap setup as a new. Tab accept and continue
10:25
The phone is checking for updates. phone is checking for updates. As you can see, account added
10:32
It means that now the account that you add previously is ready to be used
10:37
You don need to enter the old Google account connected to your device next a couple of times let me tap skip right here let me
10:50
don't add any fingerprint skip anyway choose more key in order to go next tab agree choose next choose next
11:09
assistant permissions choose all set let's scroll down choose next let me
11:23
don't add any account so let me unclick it tab skip tab skip right here
11:34
here you've got the motto experience let's go next and now you can use your
11:39
device but let me fully erase the factorous protection by using the settings
11:46
let's scroll down and tap settings let me also disable the talkback so let's start
11:55
with the talkback type in in settings talkback so here I have talkback in accessibility
12:01
of course but let me choose the talk back and let me disable this feature by using the following
12:09
Switcher tab, okay. Now you can use the settings, so let me go back, choose the system
12:18
let's select About Phone, find build number and tab a couple of times on build number, you are now a developer
12:26
You can go back and here let's choose Reset, tab, Factory Data Reset, read the information, as you can see this is the email that you add previously
12:35
So the new email that you connect to this device. Let me perform the hard-witted operation to fully erase all account information on that device
12:45
But before you accomplish the following operation you need to find and select the developer options
12:51
So let me tap it. And here let's enable the OEM unlocking
12:55
Tab enable. Let's go next. Now let's choose Reset, tap Factori Data Reset, choose Reset phone and tab erase everything
13:03
Now the motto X4 is performing the Hard Reset operation and erasing all account information
13:08
and the factory receipt protection from the device. Now let's go through the welcome panel
13:33
Let me just activate the device, tap set up as a new. choose skip inserting the SIM card and also the connection to a Wi-Fi
13:42
Let me just go quickly through this connection and setup process. Let's choose skip anyway
13:48
Tap more key to Google services. Choose a grid to all of them
13:53
Tap next, right here. Motto experience, let's tap Got it. Tap allow
13:58
And now you can use your device. So as you can see, you just erase the factor risk protection
14:02
Everything went well. Now you may just use your device. Just use your device in a normal way. Thank you for watching, please subscribe our channel, leave thumbs up under the video