Up next in 10

If you are looking for other tutorials check our website: https://www.hardreset.info/devices/xiaomi/xiaomi-mi-9t/
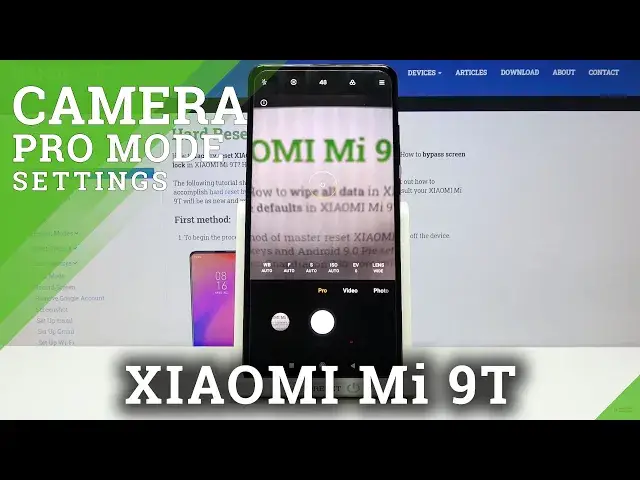
In this video we will show you how to properly use Camera Pro Mode in Xiaomi Mi 9T, which has some interesting features that our expert will show you how to use, for their intended purpose. It is not easy, but after this tutorial you will definitely know a lot more about the manual camera settings on the Xiaomi Mi 9T. If this video helped you, we would be very pleased if you leave a like, comment and hit subscribtion button. Remember that if you have any questions, feel free to ask them in the comment. Thanks for watching our stuff!
How to Open Camera Pro Mode in Xiaomi Mi 9T? How to Set Up Camera Pro Mode in Xiaomi Mi 9T? How to Get Camera Pro Mode in Xiaomi Mi 9T?
Follow us on Instagram ► https://www.instagram.com/hardreset.info/
Like us on Facebook ► https://www.facebook.com/hardresetinfo/
Tweet us on Twitter ► https://twitter.com/HardresetI/
Show More Show Less View Video Transcript
0:00
Welcome here I've got Xiaomi Mi 9T
0:10
and I'm going to show you how to use the camera pro mode at this device
0:13
So let's start by tapping on the camera button here to open it and for now we are in the standard photo mode
0:20
Let's change it by using this settings bar and just simply going to the left to pro
0:25
So here we are, this mode gives us possibilities to choose some shooting parameters by our state
0:29
by ourselves. This is useful when we want to learn photographic skills or making experiments
0:34
with photography. So let me start with this settings bar. Let's go from the right. The first
0:39
one button here allow us to pick the lens we want to use. We are on white lens. From the left
0:45
we have ultra-white and this is how it looks like. And from the right we have Detela so we can get
0:52
closer. Now let's stay on the standard white lens and let's move to this button. Here we have
0:57
the exposure compensation so we can manage the light of our picture
1:02
Now we are on zero, so the auto settings here. By going to the right, we can make our photo more bright as you can see
1:10
By going to the left, we can make it more dark. And with this button, we have also connected one extra thing that can help us to adjust
1:19
the exposure compensation better in a good way. So let's move now to the right corner to this button
1:25
When we pick it, we get access to more. options about the camera we can manage. Most of them is also in standard photo mode. In the
1:33
Pro we have two extra buttons. Now let me focus on this one from the left with exposure
1:39
verification. So we just want to turn it on and now when we go back to this settings
1:45
and want to try to use this slider once again. As you can see, when we give to our picture too
1:53
much light, we have this signs that shows us the areas of our photos
1:57
that are over and when we make our photo by using this more dark we have this blue signs that shows us the areas of our pictures that are under
2:13
So this is useful thing when we want to use this correctly
2:18
Now let me go back to the right corner, let's turn this off and let's move at this
2:23
settings bar to the next one button, the iso. we can adjust the camera sensitivity to light
2:31
So by using this side there, we can make it less sensitive from 100
2:35
By going to the right, we can make it more sensitive to 3 and 2,000 of it
2:39
I think this is really wide spectrum, like this kind of camera. And when we tap on this A letter button from the left, we can go back to the auto-iso
2:49
So this is really easy. And the next one button here is the shooter speed
2:54
So here we can adjust the time of the time. taking picture we can make it shorter from one and one thousand of seconds this is short time
3:03
and this should be definitely better to taking pictures objects that are for example in move
3:09
to frozen them at the picture with a good light by going to the right we can make our time
3:14
much longer to 32 seconds the longest time here and this should be definitely better to objects
3:20
that are stable and of course when we tap on this button from the left with a letter we go back to
3:26
to auto shooter speed. And I want to show you one extra thing here also when we adjust the
3:31
shooter speed manually and also the ISO manuali, the exposure compensation button is locked
3:38
because these two parameters together gives us kind of exposure compensation. So if you want to use
3:45
this, you have to set one of these on the auto. And now let's move to the next one button
3:53
Here we have the focusing. Now we are on autofocus we can change it to the manual one by using this slider and this is how to use this And of course to go back to the autofocus we have this A letter button from the left and we have here also one extra thing So let move again to the right corner and pick this button
4:16
The second thing here in this settings is the focus pegging. So let's turn it on like that
4:23
And now when we adjust focus, we should have some
4:32
signs that could help us to do it correctly. As you can see, this is how it works
4:41
We have these red signs and now it shows us if our focusing is correctly as adjusted
4:48
And now it isn't. So this is how to use this. We can check our settings
4:54
Now let's turn this off and let's stay on the autofocus and move to the last one button here, the white balance
5:02
So now we can control the temperature of our picture. It depends from the light we have in the area where we take a photo
5:11
So we have the tank stand light, daylight, white fluorescent light, the cloudy light
5:20
And by using the last one button here we get access to extra slider
5:24
Here we can adjust white balance manually in Kelvin degrees. So by going to the right we can make it warmer
5:31
By going to the left, we can make it colder. So this kind of balance, as you can see, between blue and the orange light
5:38
And of course, when we go back here, we can go back to the A letter button to the auto-balance easily
5:45
And with this settings is connected, also the other thing I want to show you
5:51
when we adjust all of these manually and want to go back to the auto settings
5:56
we don't have to use every time this A-letter button, button here so we don't have to separately adjust them to the auto
6:05
We have this button which appears here When we tap on it we can reset all these parameters to their default values So okay And now we are again on auto We can start using this from the beginning And let me show you
6:20
also the one extra thing. When we tap on the screen like that anywhere, we have this ring. This is
6:28
the focusing and the exporter compensation ring. So this is also a tool that can help us taking
6:34
better photos and we can separate this and pick the focusing separately and exposure compensation
6:41
matering also when we want to use this. And now let's move also to this settings bar we have here this button, the second from the left
6:51
Here we can pick the mattering of the picture frame average, also spot metering and the center weighted
7:00
At the center of this settings bar we have 48 megapixels. quality so the best possible of this camera and this is short access to it in this kind of
7:10
pro mode and the last one thing i want to show you here is this i letter button here when we tap on
7:18
it we can read about all of these pro features so you can also learn from this and this is how it
7:25
looks like now let me use this settings to take a picture so let me adjust for example
7:30
white balance here. The focusing let's stay on the auto, the shooter speed maybe here, the ESO
7:38
here. As I said, the exporter compensation is locked now and lengths maybe let's get closer
7:47
To see my picture as move to the left to this button, when we tap on it, we get quick access to the
7:53
gallery and this is how it looks like. Of course this is only an example. I suggested to
7:58
making experiments with all of the settings and just have a good fun
8:02
And that's all. Thanks for watching, subscribe our channel and leave the thumbs up
#Science