Up next in 10

The Tutorial with necessary link:
http://www.hardreset.info/devices/samsung/samsung-g950f-galaxy-s8/faq/bypass-google-verification/
The FRP Unlock Tool:
http://www.hardreset.info/FRP-Unlocker/
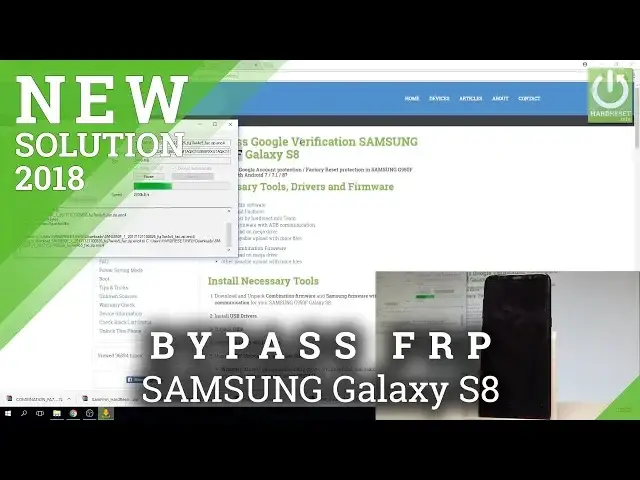
How to bypass Google Verification in SAMSUNG Galaxy S8? How to remove Factory Reset Protection in SAMSUNG Galaxy S8? How to remove Google Protection in SAMSUNG Galaxy S8? How to skip Google Verification in SAMSUNG Galaxy S8? How to actiavte your SAMSUNG Galaxy without Google Verification?
By flashing the device with Combination Firmware and Firmware with ADB communication you can accomplish the bypassing the Google Verification on all newset SAMSUNG.
Read More:
http://www.hardreset.info/devices/samsung/samsung-g950f-galaxy-s8/hardreset/first-method/
Show More Show Less View Video Transcript
0:00
Here I have Samsung Galaxy S8 and let me show you how to bypass Google verification on the
0:13
following device. So simply let me show you how to activate this phone without inputting Google email
0:18
and password. As you can see at some point of initializing setup process you have to input your Google's
0:23
credentials so the password and the email and let me show you how to skip this point
0:29
So at the very beginning I recommend you to use the following tutorial from hardwareset.info
0:34
and here you need to download a couple of things. The USB driver, Samsung Odin software, Mini-ADB with fastboot, the FRP Unlocker tool by hardwareset.info
0:45
and also some firmware with ADB communication. You can use our upload on Mega Drive right here
0:54
So you can use the following folders or you can also use the some firmware and let me
0:59
use the some firmware in my case and also the very important thing the Samsung combination
1:05
firmware so let's also open our Mega Upload right here. Let's choose the desired folder in my case is the following one G950F and as you can
1:19
see you've got three combination firmwares. If you would like to check which combination firmware you have to choose you have to enter
1:27
the recovery mode so let's press power key, choose power off, tap power off again, wait
1:33
until your device will be completely switched off and afterwards let's use the following
1:37
combination of keys. Power key, volume up and Bixby key. So let's hold down together these three keys for a couple of seconds, keep holding them
1:47
release all keys as soon as Samsung Galaxy S8 logo pops up in front of you
1:52
As you can see the Android picture pops up, let's wait until the recovery mode will be
1:57
available for you. Then our command logo pops up so simply start holding power key and while holding power
2:07
press volume up once. Wait a few seconds and that's it, this is the Android system recovery and here you can
2:16
read the exact type of your software right here. So in my case I am using the following one with the U1 ending right here
2:28
So as you can see I can use all of these firmwares, the combination firmwares but let me use the
2:34
newest one so the third one but it doesn't matter which combination firmware you will choose
2:41
So you can just press the right click, choose download, let's select standard download and
2:46
let's just download the combination firmware. So as you can see this is the folder where I have everything downloaded right here
2:53
Let me show you again. So this is my Odin, the USB drivers, some firmware, the link to some firmware will be
3:00
also under the video in the description and the combination firmware. Also of course the Android ADB fastboot
3:08
So now you need to install the USB drivers, unpack and install it right here
3:17
You can choose setup and install the USB drivers, the Samsung drivers
3:22
Let's just simply tap next a couple of times and let's go through the following wizard
3:26
I've got already my drivers installed. Let's do the same thing with Android ADB fastboot and let's also unpack the Odin application
3:37
and the some firmware. Afterwards let's open the some firmware. Choose the following folder right here, some firmware, hardwares.info
3:50
This is the following application. Here you need to choose model and region
3:55
If you would like to check out how to do it let's use our other tutorial
4:00
Here you can read how to do it. Here you've got the country, carrier, Samsung, so let me choose it
4:07
And here you've got the list of the country and carrier that you can choose and the code
4:11
that you have to use to download the special folder, the special software
4:16
So in my case let me choose the Poland and without any carrier
4:20
So let me use the following code XEO. Let's choose it into region
4:27
And into the model you need to input the following code sm-thefollowingcode
4:40
So let me do it. That's it. Let me also check which option I have to choose
4:54
I have to select the auto, check CRC32, decrypt automatically and binary nature
4:59
So let me do it. The auto, binary nature and the following two
5:05
Let me choose for the... looking for the update. Let's select check update
5:10
The some firmware is looking for available update. And this is the newest available firmware, the Android 7 Nougat
5:18
Let me choose download right here. Let me select the downloads as the default folder
5:28
Let me tap save. Let's just wait until the some firmware download my software
5:36
And after the downloading will be completed I will be ready to perform the next step and
5:43
to bypass the Google verification. On my device I can just close the Android recovery mode
5:56
Let me choose reboot system now. Press power key. Excellent, as you can see the downloading is done
9:26
Now the some firmware is checking CRC32. So let's wait a few seconds or maybe a few minutes
9:53
And the last step of downloading the firmware is decrypting
10:13
So let's wait until this progress bar will be finished
11:07
Excellent, decrypting is done
11:19
So now you are ready to use your firmware. So at the next step let's open the Odin application
11:26
So let me find the Odin folder right here. Let's open the Odin right here
11:32
That's it. This is the Odin software. So afterwards you need to open the download mode on your Samsung Galaxy
11:39
Let's just press power key to switch off the device. Choose power off and tap power off again just to confirm the whole operation
11:47
Afterwards let's use the following combination of keys. The power key, volume down and Bixby key
11:53
So let's hold down together these 3 keys for a couple of seconds
11:57
Keep holding these 3 keys and release them as soon as warning message pops up
12:01
Just press volume up in order to continue. And this is the download mode
12:06
So now you need to connect your device to your PC by using the USB-C cable
12:11
This is my cable. Let's connect your device. As simple as that
12:21
As you can see the following IDCOM icon is lighting on the blue so it's a good sign
12:30
And afterwards you need to check the options and select the auto reboot and factory reset
12:35
time right here. This 2 one. Let's go back. Let's choose the AP right here
12:44
Let's find your combination firmware. So let's choose downloads. Choose the combination firmware
12:55
And let's tap open. In order to load this combination firmware into the AP section
13:27
Excellent. Now you are ready to go next. Let's just simply tap start right here
13:38
The device is flashing itself so let's wait until the combination firmware will be on
13:43
your device. This is the progress bar right here
14:05
As you can see the flash is done. So now let me simply turn on the device
14:20
I think that the device is switching on so let's wait. You can also disconnect your device from your PC
14:32
As you can see this is the combination firmware. So it will allow us to go next and to accomplish by passing the Google verification. Excellent
15:04
So let me just find the settings. Let me tap this icon
15:14
This is the test mode. So let me choose for example the following apps icon
15:20
Choose settings. Now let's scroll down to the bottom of the list
15:24
Choose developer options. And let's enable the unknown sources. Sorry let's enable the USB debugging
15:32
As you can see USB debugging is enabled. That's it. So let's go back
15:37
If developer options won't pop up let's choose about and let's tap a couple of times on build number
15:43
But as you can see in my case developer options pops up automatically
15:50
And afterwards let's switch off your device by pressing the power key
16:00
Let's open the download mode again. So let's press power key, volume down and Bixby key
16:07
Let's hold down together these three keys for a couple of seconds
16:12
Release them as soon as warning pops up. Let's press volume up to continue
16:16
The download mode is already on the screen. On the Odin application let's choose reset to reset all options
16:23
And let's connect your device one more time. So let me do it as simple as that
16:33
As you can see the device is connected. Let's choose the auto reboot again and the factory reset time
16:40
And this time let's flash your device with normal firmware. The firmware from the SAM firmware application
16:50
So let me choose the BL. This is my... let me just find my flash applications, my flash folder
17:03
As you can see this is my flash folder. So let me find it into the downloads right here
17:13
Let me unpack it. Let me choose unpack here. Tap ok. Just wait until the unpacking will be done
18:18
Excellent
18:32
As you can see now we can go next. So let's go back to the Odin
18:39
Here I have Odin. Let's choose BL. Let's select the folder with your firmware right here
18:46
Select BL file. Select AP right here. Let's wait until the loading will be completed. Excellent
19:20
Let's choose the CP right here. And let's select CSC
19:31
Let's select home CSC
19:42
That's it. So now we are ready to go next. Let's tap start
19:47
And Odin is flashing your device. Just wait until the flash will be done. Excellent
20:30
As you can see the flashing is done. Now the device is restarting
20:33
So let me disconnect my phone from my PC. And let me leave the Samsung Galaxy S8 simple as that
20:42
Let's wait until the welcome panel pops up. Excellent
21:08
Let me just wait until the welcome panel pops up
21:17
Let me tap go next and OK. As you can see your Samsung Galaxy S8 is installing the application
21:25
Let me skip the Google account. As you can see my device isn't in English because my firmware goes with the Polish language
21:37
But let me simply go through the creator and let me skip all of the steps
21:45
And that's it. As you can see now you can use your device in the normal mode
21:48
So you just activate your device without the Google verification. But let me also show you how to permanently erase the factory reset protection
21:57
So at the very beginning let me just switch my language into the English one
22:03
So here I have my language settings. Let me add a language
22:07
Choose English. For example from United Kingdom. Let's make it as default
22:15
Let's go back and now let me show you how to permanently erase the factory reset protection
22:20
Let's go back to the list of settings. Choose developer options. Let's enable the OEM unlocking right here
22:28
Tap enable. Let's go back. And right here let's choose the general management
22:36
Choose reset. Select factory data reset. Read the information and choose reset
22:42
And select delete all. Right now the device is erasing all the stuff including the Google account details information
22:50
So this is the hard reset which allows you to remove the factory reset protection from
22:56
your device. Excellent, as you can see the welcome panel pops up so now let me simply go through the
24:00
initializing setup process. Right here let's tap OK. Let's tap start. Tap next
24:09
Next again let me skip all of the steps. Let me agree to terms and conditions
24:15
As simple as that. Let's go through the Google services settings. Let's leave date and time as simple as that
24:24
Let me don't protect my phone with a screen lock. You can do it later in settings
24:28
Choose skip anyway. Tap skip to Samsung account. Tap skip again. And choose finish
24:38
Choose later. And that's it. As you can see you just activate your device without a Google account and you just erased
24:46
the factory reset protection completely so everything went well. Thank you for watching
24:52
Please subscribe our channel and leave thumbs up under the video
#Other
#Other