0:00
Welcome. In front of me is a Xiaomi Pad 6 and today I'll show you how you can bypass the Google verification on this tablet
0:15
Now, before I get started, I'm just going to quickly mention, as you can see, the device is locked. It's telling me to draw the pattern to unlock it
0:22
So, you can see. And I can also use the Google account instead to unlock it
0:31
So, there we go. Now, for the bypass, all we will need is an internet connection
0:38
I am already connected, which you should be able to see once I back out right over here
0:43
So, connect to your network of choice and once you have done so, we will then go back to the first page
0:53
Right over here. And we will now hold together volume up and volume down. So, both of these buttons
1:08
You'll get this pop-up. Turn on TalkBack. I am going to mute it. This is a little bit too loud
1:16
So, once you start holding them, it will give you this pop-up. Turn on TalkBack shortcuts
1:21
We are going to select turn on. And then we are going to hold them again
1:28
This will turn on TalkBack right now. And from here, what you want to do is draw an L on the screen
1:38
Like this. And we are going to select screen search. Now, with TalkBack enabled, when you click on an option, it will get first selected
1:47
And you need to double tap on it to actually confirm it. As you can see, this opens up some kind of search
1:56
And here we are going to hold volume up and volume down once more. This will then turn off TalkBack. And for some reason, it also closes the search option, which is not what we wanted
2:09
So, I guess we are going to have to re-enable it. Let's see
2:24
So, let's see. I am going to quickly check out the guide. So, here we have info that we are supposed to hold these two keys, which again, that doesn't really help us
2:34
So, use the close button two times to go back to the first page
2:39
The welcome creator. Use the next button. Language. Country. I feel like there is something missing here in the guide that I am reading
2:53
Okay, so based on the guide, we are going to back out. Close. I am going to try this out just to give it a chance
3:15
So, choose any country. Ah, that's where the change comes in. So, once we enabled TalkBack and basically selected the option that we did, it adds a new keyboard here
3:29
So, as you can see, we have now additional TalkBack brilliant keyboard, which previously wasn't here before
3:36
So, we are going to select it. Yes, I have read and agreed. Then we are back in the Wi-Fi page
3:46
Here we are going to select the network. And let's see. Once we got the network, we are going to select the network
3:57
So, we are going to select the network. And we are going to select the network. And we are going to select the network
4:03
And we are going to select the network. Let's see. Once we click on the search bar where it just shows up with a keyboard, we have this kind of turn on TalkBack to use brilliant keyboard
4:16
So, here we will now select. Let me just quickly catch up here
4:28
So, we are going to select the option turn on an accessibility settings. Then we are going to select accessibility menu right over here
4:36
And we want to enable it. Allow. It adds this little thing right here. OK
4:43
So, that's cool. Next. And click on it. Select Google
4:55
Google Assistant. I did close it just because it would have been listening to me. So, we are going to select open Google Assistant
5:02
And we are going to say open settings. So, I am going to do that right now
5:08
Open settings. There we go. Once our settings is open, we can now navigate down to additional settings right over here
5:19
And then we are going to select. Select. Second space. If I can find it
5:29
Oh, there we go. Second space. I am going to select turn on second space
5:35
Let's give it a second. Now, it does flip it
5:45
So, let me just. Flip it like this. Back to how the tablet was
5:51
Select continue. I am going to select using shortcut. That's what the guide tells us to do
5:58
So, select continue. Set password. I am going to skip this. System, whatever keeps stopping
6:14
OK, cool. Close. Or cancel as it was. OK. So, now we are going to
6:31
Once we have that space open. Just to clarify this. This is a second space
6:37
As you can see there is no wallpaper. There is just this kind of like. Very dark bluish color
6:42
This is what second space usually looks like. So, what we want to do now on the second space
6:48
Is hold our power button and volume up at the same time. This will bring up our boot options
6:55
And we are going to select reboot. Select it once more. Now, the reason I pointed out the
7:05
The second space. How it looks like. It's because. Once the device boots up
7:10
Again. You will see that we are no longer in second space. Where we will be in main space
7:16
Which. Is well technically how not. How set up shouldn't really work. But
7:23
It's a bypass for a reason, right? So, there we go. So, from here we can unlock the device
7:31
And we should have access to. Yep, there we go. Our main device
7:36
So, this is the. I guess first space as you may call it. Compared to the second space
7:42
Which can still access by. Opening up the shortcut. Which I believe should be somewhere
7:47
But in any case. We are going to continue anyway. So. We now want to navigate into the settings
7:56
Sorry for that. So, we are going to navigate into test settings. And
8:00
Then we are going to navigate to about phone. Or about tablet more precisely
8:09
And in here we are going to select. Factory reset. Erase all data
8:15
Factory reset. It gives us a. Time blocking kind of pop up
8:21
So, are you sure you want to reset. Data will be removed. Blah, blah, blah. Cool
8:26
No one cares. So, we are going to select next one. There we go. We can
8:30
And another 10 seconds. Where again they try to hammer down the message. So, you know that everything will be reset. Erased
8:35
There is nothing to be erased here. So. From there we are going to select OK
8:40
And off we go. Now, the reset will probably take a minute or so
8:48
So, I am going to let it run through. And come back once it is finished. But, that being said
8:54
To be completely honest. The bypass is now completely finished. It is just a reset that is now finalizing
9:00
But once you have access to the setup screen. You can setup the device however you want. There is no extra steps
9:06
That is basically. After pressing the reset option. That was the entire bypass
9:11
So, I wanted to mention that. But I am still going to let it run through. And do a full setup of the device
9:17
Just so you can see that there is nothing stopping me from doing that anymore. OK
9:26
So, it is finished. So, I am going to now quickly go through the setup. I will be skipping basically everything that I can
9:33
One thing that I will mention is. When the device is locked. FRP locked like it was at the beginning
9:39
When you try to skip the WiFi connection page. You can. But what will happen at the end of the setup
9:45
It will tell you that you need to connect to network. For some kind of security reasons. I believe
9:50
It states. And it just blocks you out to the very first page of the setup. So, now you will be able to see that this
9:56
Shouldn't be. A thing anymore. So. Come on. Yep
10:06
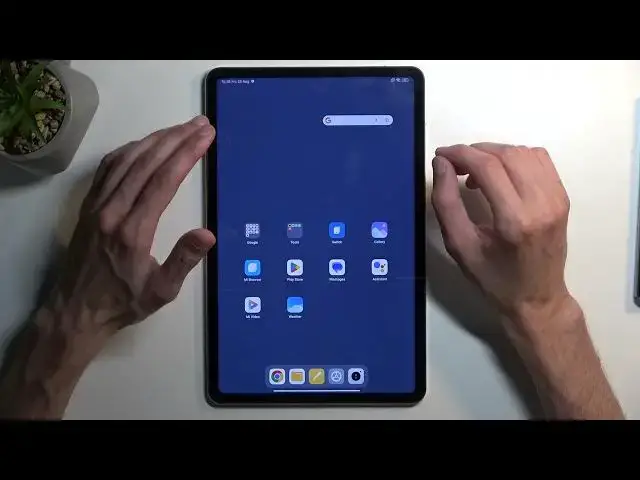
So, as you can see. It didn't give me any pop up. It just went to the home screen. So, there we go
10:10
No need to verify anything. The device is now fully unlocked. Now, with that being said
10:14
If you found this very helpful, don't forget to hit like, subscribe and thanks for watching