0:02
The phenomenon is a Samsung Galaxy J6 Plus and today I will show you how to set up the device when you first get it
0:12
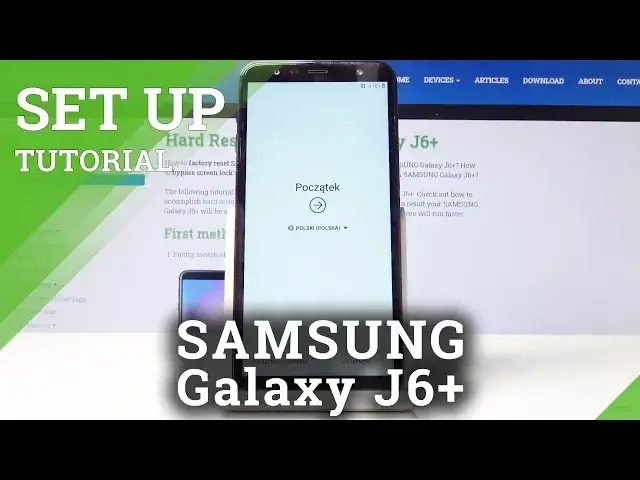
So when you put it up for the first time you should be presented with this screen right here
0:17
So you begin by choosing your own language. Now let's switch it from Polish to English which should be somewhere on the top and there it is. Okay
0:29
And you can see that it changes automatically. So from here, let's stop on start
0:34
There we go. Data network, now this will be disabled. I don't have the SIM card in there
0:42
You could just put one in. It doesn't really change the setup at all right now
0:48
The only thing you could just skip the connection to Wi-Fi and be able to use mobile data
0:55
So this doesn't really matter. here you can connect to Wi-Fi. Now if the device has been reset and there was
1:03
previously a Google account you will not be able to skip this step which at the
1:08
moment I can skip it by just tapping simply on the X without connecting to anything but I will connect to some network if I can find it
1:18
Simicenter that it is so let me just put in the password code for it
1:27
and connect. You can see I'm connecting right now. And there it is, so I'm now connected
1:35
It's up on next. In terms of service, now you have to agree to these ones
1:41
so have a button right there on the bottom that will check all of them. Top on next
1:45
And when you connecting to network it will start looking for updates and connecting to Google So this step might take a little bit Just be patient Now if you skip the connection to Wi you primarily skip this step and it will be almost instant
2:01
And, yeah. So let's wait for it to finish doing whatever it's doing
2:15
Okay, so there we go. Now, this step is only available, I think, when you connect to network
2:29
Now you can also skip it if you would wish to by tapping right here, skip
2:34
Or you can sign into Google as however you like. Or you can create an account if you don't have one but you wish to sign in
2:43
Now, I'm going to skip this. step for now just to save time the only benefit of logging in will be that you
2:55
will be able to use it to back up your device or restore it from here you can add a
3:02
name to your device so you have a easy way to distinguish what device it is this is
3:07
completely optional you can skip it and the name of the device will be based on the
3:12
model that it is so if I skip it it will be galaxy
3:15
J6 Plus. I just upon next protect your device now this is a
3:21
place where you can set up different ways of protecting your device so you have
3:25
face recognition fingerprint pin pattern password whichever one you like keep in mind
3:30
that if you go with the fingerprint or face recognition you will still need to set up
3:34
the third one as well so pin pattern or password that just the way it works you have to have basically two ways of doing apart from like face recognition or fingerprint or you can skip it as well now for this i just going to
3:48
set up for instance a fingerprint which like i said will force me to set up two different ways of
3:54
unlocking it so set up fingerprint security continue as you see i'm forced to set up either pin past code pin pattern or password
4:06
So I'm going to choose pattern. It doesn't really matter which one you choose, just each one of them has a different way of working
4:15
So do not require. And jot the pattern or put it in your password or pin, whichever one you chose
4:24
And top on continue and repeat that same process. And top on confirm
4:30
And now we have a passcode set. For me it's the pattern
4:34
And from here I can start scanning my finger on the sensor which is located right here
4:40
So probably the best finger to use would be my thumb considering this would be the finger
4:45
that would be using to unlock it so I'm going to grab the phone and start scanning as you can see
5:04
Now you want to make sure that you get your finger all around, just like the entire finger
5:12
so whichever way you press it, it will always read it. So you want to get all the edges, the middle of it, sides
5:19
And once it's finished, you'll see this, fingerprint added, and you can then tap on continue
5:25
or add there another one It up on next Now again Google Terms a Service so let stop on more and accept
5:38
And from here, you have some apps that it can add or not add, I guess
5:43
Like how you can disable them. Just disable it. It will be a little bit quicker, I think
5:52
Okay, and let's confirm it. Now, if you would have them enabled, I think it would start downloading them
5:57
Sign in to your Samsung account. Now again, this is optional. It will give you access to basically all the mentioned apps right here
6:10
So Bigsby, Google, I mean, Play Store, not Play Store, Samsung Store, Teams, Samsung Cloud
6:18
basically all the Samsung apps. To use them, you need to have an account and sign in, but you can also live without them if
6:26
you wish now I'm gonna skip it it doesn't really change much and finish all
6:35
done and there we go so the device is now fully set it also has protection so we have
6:43
to either put in a passcode to unlock it so if I lock it and try to unlock it
6:48
you'll see that I need to use a pattern or use my fingerprint to unlock it so if I
6:56
I can see that it automatically unlocks with the fingerprint. Also the benefit is you don't need to actually press the button you can just touch it
7:07
So yeah, this is how you would set up the device and if you found this very helpful
7:12
don't forget to like, subscribe and thanks for watching