0:07
Infraim is a RealMe 8 Pro and today I will show you how to go through the setup process on the device
0:14
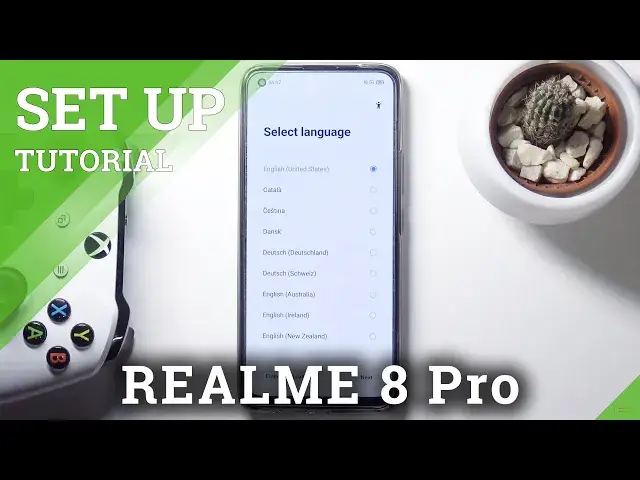
So when you boot it up for the first time you'll be presented with, well this screen right over here
0:19
So start off by selecting your desired language. I'm going to stick with the English, so it's going to select next
0:26
Can't choose your region. I say I don't really care for it, so I'm going to select the first one that I can, but you should select your correct one
0:35
Next page, Real Me Smartphone user agreement, so basically terms of service
0:40
You can scroll through this and read exactly what you're agreeing to, and then check the box right here and top on next
0:48
We have some more terms of service. So obviously the first one is automatically selected for some reason, so you can top on next and basically agree to it
0:57
the two other ones below that are completely optional so you don't have to
1:00
Now again, you can top on the blue text right here to have the entire thing, the legal document to read
1:10
to know what you're agreeing to. Oops, actually don't want to, there we go, like that, and let's stop on next
1:19
So once you agree to the terms of service, you will be taking to the Wi-Fi connection page
1:23
And here, obviously, you can connect to Wi-Fi. assuming you have one that you know the password too if you don't you can skip it now
1:30
by skipping Wi you will miss out on the date and time being set automatically and also you won have the Google account login page But I mention that once the setup is complete
1:45
you can still add your Google account through settings. So don't worry, it's not a kind of, it's not the one-time off thing
1:53
You can change it, log out, login through settings without any problem
1:58
So I'm going to skip this. Now one thing that we only does really nicely here is the Wi-Fi Assistant
2:05
So as you can see, the first option right here, I'm saying first option because there's two, once you enable this one, as the automatic select the best Wi-Fi
2:16
So if you are connected to more than one Wi-Fi, it will choose from those, for instance, two, the one that works better, the one that is faster and stronger
2:28
So it's a really nice option to have. Now once you enable that, it will also bring this one up
2:33
so automatically switch to mobile network. So assuming any kind of Wi-Fi that is near you that can connect to is garbage
2:39
and is outperformed by your mobile data, the device will automatically switch to your mobile data
2:45
Now, for people that have decent amount of mobile data to spare
2:52
this is a really good option. But for people that are rocking like, for instance, a gigabyte to maybe three gigabytes
2:58
this might be a little bit hard because sometimes I, the device might switch to it for some reasons
3:06
and you will start using your mobile data, so this will most likely result
3:11
and you're running out of your mobile data probably before the month ends, so this might cause you some problems in long run So if you don have a mobile plan that has a decent amount of gigabytes to use I would discourage you from using this one Now if you have something like
3:29
5 gigabytes an app, probably by all means go right ahead and enable it. From there, let's go to the
3:36
next page where we have Google services. So we have location, scanning and sending user and
3:41
diagnostic data. So again you can top on the arrow right here
3:45
expand what it says here and read it all if you are interested
3:49
From there you can also check it off if you don't want it and then tap on more and accept
3:55
Next page we have protection of our device. So we have three different ways
4:03
We can have the password, should have been named a screen lock
4:08
then we have fingerprint and face recognition. Now these are some basically cut
4:14
I don't know like the name is kind of weirdly face, like face what
4:21
So password is not a password like you are used to. It's screen lock, which includes a password
4:29
You can also go with a pin or pattern as well. So you can see
4:34
Now by default is going to go into a pin instead of a password for some odd reason
4:40
But you can top on use a different password type. unlocking type would have been probably a better word for this
4:46
but yeah once you top on it as you can see we have four different ones to choose from so we have pattern four digit pin
4:54
four to 16 digit pin and then we have actual password an alphabetical one so choose whichever one you want I gonna go with a pattern so let draw whoops let me go back
5:09
because I did mess it up there we go that's what I wanted and let's redraw
5:16
the pattern and this will automatically set it up okay so normally if you
5:23
wanted to add additional unlocking methods you could go back or you we could automatically choose either face recognition or a fingerprint and this will force you
5:31
into also a screen lock. So from there you'll be taken to the recommended
5:38
So the only recommended option here is apparently update overnight which if you want this you
5:44
can enable it if you don't just up on next. Now import data is a page where you can grab your old device and import all the data from
5:52
the old device so call logs, messages, apps and stuff like that
5:56
basically I can move it all to this device. Now I believe the import data on RealMe will use their
6:04
not proprietary, but they're like special apps for this. So you'll probably have to go into App Store on your old device
6:13
and download the app and then connect with this device to move the data over
6:18
But if you're setting it up as new, just as I am, then only need to do stuff on Next
6:22
and completely disregard that page. From there, head started will now take you to the home screen
6:29
So if you found this very helpful, don't forget to head like, subscribe and thanks for watching