0:00
Hi, in front of me I have Nokia 6300, 2020 edition and I'm going to show you how to go through the first setup on this device
0:16
As you can see, first we need to select the language. To do it, you can use the directional pad by pressing up and down buttons to scroll through the list of languages right here
0:26
Find the language you like to use. hover of it rather highlight it
0:32
for example I'm going to select English US and then press the
0:37
button in the middle of the directional pad to select it like this
0:41
once you select the language press the right selection button to go next
0:48
here we can select the keyboard language as you can see the English US got selected by
0:56
default but you can also select multiple languages if you want or deselect the one that was selected by
1:03
default and select different one if you like I'm gonna select English and for
1:08
example a Spanish that and then let's press the right selection button to
1:17
continue here we have a warning message that a setup process my use my
1:24
user mobile data if we have any Now let press the middle button to confirm and as you can see now we can connect to Wi You can also skip this step by pressing the right selection button now to skip it as you can see But I recommend you to connect to one because for example it going to set up your date and time automatically according to your Wi location
1:53
So, like I said before, I recommend to connect to it. It's going to make the installation process simpler
2:01
or other setup process. To connect to network, simply find the network you want to connect to, highlight it, press
2:07
the middle button to select it, and now we need to enter the password
2:11
To enter the password, use the keyboard right here. Give me a few seconds, I'm going to enter the password for the network
2:17
And once you've done entering the password, you can press the right selection button to connect
2:30
As you can see, after the device connects to the Wi-Fi, it will say connected on it right here
2:40
Once you connect to network, you can press right selection button to continue
2:48
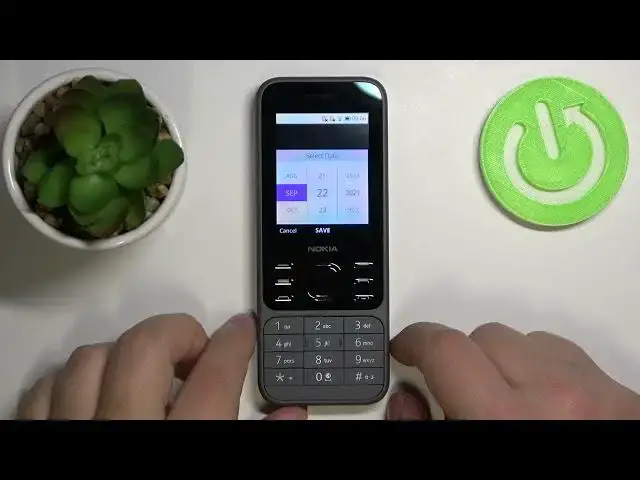
And here we can set up date and time. And as I said before, if you're connected to Wi-Fi during the setup, it's going to be autosyncing with your Wi-Fi location, as you can see
2:58
But if you want to change it anyway, you can select the auto sync and press the middle button
3:05
Select off and press the middle button to turn off the auto sync And now you can set up the date and time settings manually To do it simply scroll down select for example date press the middle button to enter
3:19
And here we can adjust the date. To do it, simply use the directional path, up and down buttons like this
3:26
To adjust the month first, as you can see, let's select, for example, January
3:32
Then press the right button to go to day. and now adjust the date by pressing up and down
3:39
then press the right to go to years, adjust the year, and once you're done, press the middle button to save
3:47
Like this. Now let's go down to time, press the middle button to select it
3:53
and adjust the time the same way as we were adjusting the date
3:58
Simply use the up and down to adjust the value, then press the right to go to the next value and adjust it as well
4:05
And once you're done, press the middle button to save, like this
4:10
Next we have a time zone. Here we can basically change the time zone. To do it, select or rather highlight the time zone option
4:18
Press the middle button. And here we have a list of time zones we can select
4:22
Let's select, for example, Santiago. So hover over it and press the middle button to select it like this
4:29
And at the bottom we have time format. Here you can basically change the format of the time
4:35
you can select between 12-hour format and 24-hour format. To do it simply hover over the time format press the middle button And here as you can see we have two options 12 and 24 Select the one you like press middle button like this Once you done setting up your date press the right selection button to continue
4:57
Here you can allow or deny the location access for the phone
5:01
So basically, if you want to allow your phone to access your location
5:06
you can press the right selection button to allow. Or if you want to deny it, you can press the left selection button to deny it
5:12
I'm going to deny it. And here we have terms of use and you can decline them or accept them
5:20
To accept them, press the right selection button, to decline them press the left selection button
5:24
I'm going to accept this. And here we have the software update settings
5:29
Basically, we can select if you want to download the updates for the software via Wi-Fi only or via Wi-Fi or mobile network
5:40
I think the via Wi-Fi only is necessary. a better option because you won't use your mobile data to download updates
5:49
They can be quite big so that would waste a lot of data. But if you like, you can select the first option by just hovering over it and pressing the
5:56
middle button. Select the option you like and then press the right selection button to finish the setup
6:03
And that's how you go through the first setup on this device
6:07
Thank you for watching. If you found this video helpful, please consider subscribing to our channel
6:12
and leaving the like on the video