Up next in 10

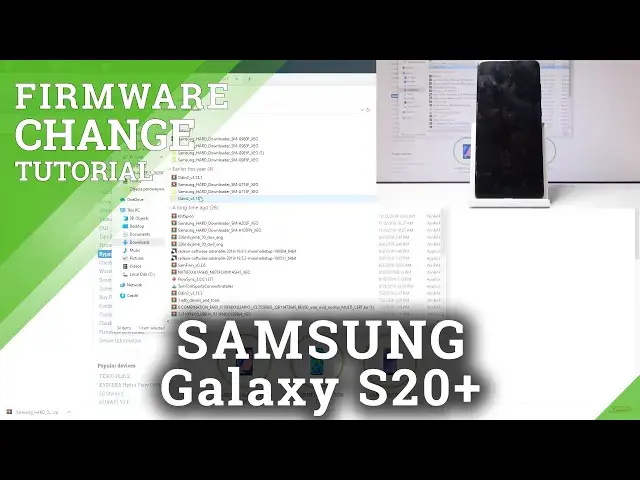
How to Change Firmware in SAMSUNG Galaxy S20+ - Download Software & Flash Tutorial
Jul 19, 2024
Read more about SAMSUNG Galaxy S20+:
https://www.hardreset.info/devices/samsung/samsung-galaxy-s20-plus-exynos/
In this video, you can check out the simple way to flash SAMSUNG Galaxy S20+. Follow our step and find the desired firmware for SAMSUNG Galaxy S20+. You can choose the software for your needs by selecting your desired country and carrier. In this tutorial, you can see how to flash SAMSUNG Galaxy S20+. Use the Odin in order to change SAMSUNG Galaxy S20+ with the new firmware.
Firmware Change and Update Tutorial: https://www.hardreset.info/devices/samsung/samsung-galaxy-s20-plus-exynos/faq/firmware-flash/
You can download the firmware by using this SAMSUNG Firmware Database: https://www.hardreset.info/download-firmware/samsung/samsung-galaxy-s20-plus-exynos/codenames/
How to change firmware on SAMSUNG Galaxy S20+? How to choose firmware for SAMSUNG Galaxy S20+? How to change carrier firmware on SAMSUNG Galaxy S20+? How to flash SAMSUNG Galaxy S20+? How to update SAMSUNG Galaxy S20+? How to change software on SAMSUNG Galaxy S20+?
Show More Show Less View Video Transcript
0:00
Welcome and following is a Samsung Galaxy S20 plus and today I'll show you how to
0:10
flash the firmware on this device. So before we get started there is one thing that
0:14
or a couple things that we will need but the probably physical most important one
0:19
would be the cable for the process. So just get the cable that is for charging, plug it
0:23
into your computer and have it ready. I have mine laying like right here and it's already
0:28
plugged in so it's basically good to go. From there we also need a couple programs
0:34
so number one you want to go into a hard reset that info website as you can see
0:38
right here this is the site so just top on it and and here you want to search for
0:44
your phone which for me is the Samsung Galaxy S20 plus and there we go and it's the
0:54
ex-nas version so it's this one and it's non-5g so this regard this one. So there we go. And then you want to go into firmware download right at the bottom
1:05
here. And you can see there's the model number of the phone itself. And if you're curious
1:13
you can see it right at the back of the device right here. As this text right here. It says
1:21
SMG-985F and then DS. The last part doesn't really matter. But it's the same one as right on the screen right here
1:35
So, download that. And I already have downloaded it. So I'm going to disregard this one
1:40
but I actually did not download one for the standard S-20. So I'm going to show you how to do it as though I'll be doing it for this one
1:51
So you can see, oh, no, this is also the same one, so not this one
1:58
Okay, there we go, that's the one. So once you are on the page where you get to download it, as you can see right here
2:07
I just click on it, then find your provider. I'm just going to go to mine, which is the Polish one, and I think I already passed it
2:16
Right, there we go. I'm going to choose this one, which is unlock
2:21
and then tap download again scroll down tap on the download right here and it starts
2:29
downloading now for me there was a problem with the the computer windows
2:36
of course detecting it as a virus because Windows is such a great operating
2:40
system that it only detects things that aren't a virus as viruses well the
2:44
other ones that should be blocked are basically like get a free pass but if you get a
2:50
pop-up right here that Windows has basically blocked something because virus whatever
2:56
you want to tap on that notification right there that will pop up now I'm trying to see if I
3:01
have one one right here there is Windows Security I think no that's not this one where
3:09
is threat found there we go so you get a pop-up like that the threat that was found and then
3:16
all you want to do is just find the thing that it blocked which is probably going to be the most
3:20
recent one at the top or just look by the time right here as you will see and from
3:26
there you can just stop on the security to expand it like I just did and then actually
3:33
well this one won't work because it's already yeah I won't be able to show but there
3:40
you will have action button at the bottom basically under one of these like somewhere here
3:45
so once you top on the drop-down action button you also should have something along the
3:50
lines of allow or on this device and like that i'm not necessarily sure what was telling me
3:57
but you just want to agree that you want to open this file basically and once you have selected that you can then close this and go back to pressing the download once more and it should then download
4:09
because the file that you first downloaded it was blocked it was completely removed right from the
4:13
get-go so it didn't begin downloading and once you have done that you can download it then and then
4:19
go to it extract it so extract and extract and I am looking for this one
4:31
Okay, there we go. So then you want to open up the file that you have extracted
4:37
Go into the folder I just did, as you can see. And you'll find this file here
4:43
Download SE and the model number of your device should be here. So double top on that
4:50
I will bring up this window right here. Give it a moment for it to load
4:56
And you just want to tap on that. download and then choose where you want to download it to so i'm just going to select desktop it's also
5:03
where the actual files for this specific model i have downloaded so it's going to be next to it
5:12
and then it will begin the download right here now this will take probably the longest time to get
5:17
although it looks like it's going fairly quickly right now um so i'm just going to move that out of
5:24
the way somewhere right there behind the camera itself so we can close this because it's not needed anymore and we can also
5:38
let's go back so what you also will need is a Odin software which I believe I can
5:50
find it here as well not the conventional way but it should be somewhere in here
5:55
bypass Google verification I'm just going to Check quickly. Nope, it doesn't look like it
6:05
Now this is, hopefully there will be a link for it in the description
6:13
But if you don't have a link in the description, I'm going to show it in a different way, I guess, how to get it
6:20
So I'm going to actually search for Note 10. Let's see. So I believe this one actually had bypass through Odin, so that's what I'm gonna try to use
6:43
Just quickly see. Yes, this one did not
6:57
this one did not, which just kind of makes this painful. Bear with me all, I try to find a decent place to actually get this
7:27
Yeah, whatever. I'm going to for now skip it. I know that there is somewhere a link, so it should be provided in the description
7:36
And if by some miracle it's not, I can just look for Odin
7:42
I'm going to show you how it looks like so. Actually, it should be probably in my downloads, so I don't know if I need to look for it
7:57
Oh there it is. So I have the right here. Odin So Okay so I know where I was using it see this model of
8:12
Samsung okay so once you find the Odin and download it you can then open it up
8:20
up on okay and that's the program right so
8:29
next thing we need to put the device in the download mode so to do so let's first power it off so
8:39
power that sucker off right here and once it has shut off we then will put it in the download mode
8:48
so to do that number one start by holding volume up and bar key and when you see the
8:56
the Samsung logo you can let go. And from here, we are now in the recovery mode
9:05
So you want to select the second option, which is reboot to bootloader using volume keys
9:09
and then confirm it with the power key. And it should be now in the download mode
9:16
There we go. And now you want to take that cable that you have prepared previously and plug it in
9:23
And pay attention to Odin. So, right here your device should show up
9:30
So, there we go. So it's working fine right now. And if your device didn't show up, you will need to get the drivers for it
9:46
So there will be USB drivers, also provided in a description. So install those, and then you want to try to try to it
9:55
you want to try it again and this time around you should see your device right here
10:00
so moving on we now need to add all the files right here so let's start with the bl top on this right here
10:10
and from here we're going to go into the desktop at least that's where i have downloaded
10:14
the files myself so once again wherever you saved this to be downloaded to that's where you
10:23
want to look for those files. So for me it's desktop and it is just extend this I can get the full
10:53
and unpack it, that's why I can see it. So, yeah, let's also unpack that
11:00
So it is right here. That's the file. Extract. So while this is extracting, I guess we just have to wait
11:21
I'm going to close this. it's not needed and I can minimize
11:52
Okay and as can see now it has unpacked so we can proceed further finally So again let stop on the BL file And let go back to the disc up
12:16
At least that's how I said it's for me. And there it is. So it's this one
12:20
As you can see, G985F. So that's the model of this one
12:26
And let's start with the BL. So right here, BL BL, let's double top on it
12:35
and then it is, then tap on AP and choose again AP
12:39
Now keep in mind, the AP file weighs 5.8 gigabytes, so once you tap on it, the computer will kind of, at least the Oden will freeze up
12:49
It will start processing the file and checking the file and this will take a little bit, a couple minutes probably
12:56
varying depending on how fast your computer is, but once it's finished the program will unfreeze and you can then
13:05
add the two last ones. So let's just wait for it to unfreeze right now
13:23
Yeah, there we go. It finally added it. So now let's stop on a CP, choose CP
13:30
SCS and SCS. And once you have added all four of these
13:42
let's go into the options and make sure auto reboot is enabled and F frame time is also, or F reset time, what am I saying
13:51
Is enabled. And once it is, all you need to do now is press start
13:56
Make sure it start seeing progress right here. and also, yep, there it is, on the phone itself
14:03
You can see it right here. So now let's just wait for this to finish
14:07
It will take probably several minutes. Just be patient. Once it's finished, the device will reboot itself
14:13
and it will still process basically installation of the software in the background
14:19
even though Odin will say it's finished. So you will need to give it a little bit more time
14:24
And once it has basically completed everything, you should see the Android set up
14:29
screen. So I'll be back once. Everything has basically completed. And as you can see, now the process is finished
15:41
You can unplug your device on the computer. It's already a get passed for a while
15:47
And it was only doing stuff on the phone then. So as you can see, you can now start by choosing your language and just going through the
15:54
setup process as you would normally do with a new device. So if you found this very helpful, don't forget to hit like, subscribe and thanks for watching
#Software
#Other