Up next in 10

How to Unlock FRP on TECNO Pop 7 - Bypass Google Account Verification / Remove FRP
Mar 10, 2024
TECNO Pop 7 Unlock FRP Tutorial:
https://www.hardreset.info/devices/tecno/tecno-pop-7/faq/bypass-google-verification/
If you forgot your Google account and you hard reset TECNO Pop 7 the only way to activate your phone is by our bypass FRP method. Follow our steps in order to remove factory reset protection in TECNO Pop 7. Unlock TECNO Pop 7 by using easy and free bypass Google account verification. Skip Google lock in TECNO Pop 7. This unlocks FRP method works with every Motorola phone with Android 13 and June 2023.
How to skip Google Verification step during the setup on TECNO Pop 7? How to bypass Google Verification on TECNO Pop 7? How to neglect Google Verification on TECNO Pop 7? How to unlock TECNO Pop 7? How to bypass Google Account protection in TECNO Pop 7 with Android 13?
#TecnoPop7 #GoogleVerification #TecnoUnlockFRP
Follow us on Instagram ► https://www.instagram.com/hardreset.info
Like us on Facebook ► https://www.facebook.com/hardresetinfo/
Tweet us on Twitter ► https://twitter.com/HardResetI
Support us on TikTok ► https://www.tiktok.com/@hardreset.info
Use Reset Guides for many popular Apps ► https://www.hardreset.info/apps/apps/
Show More Show Less View Video Transcript
0:00
Welcome. In front of me is a Tecno Pop 7
0:04
And today I'll show you how you can bypass the Google verification on this device
0:12
Now that being said, I don't know if it's going to show up here with the locked screen or not. You can see that it is locked with this tiny little icon right here
0:18
I am connected right now through Hotspot and I think that kind of messes up the
0:24
page where it tells us to verify our screen lock and Google account
0:29
But no matter, even if it skips it, you will see in a second that it won't let me finish up the
0:34
setup anyway. Now to get started with the bypass, we will need two things. Number one
0:39
it will be another Android device. So I'll be using some kind of Nokia. All it needs to have
0:44
is access to the Google Play Store. And that's about all the device needs. That's why I also
0:52
I'm saying that it needs to be an Android. Now that being said, another thing that I
0:58
quickly check I think we need is a SIM card. Once it actually loads up the page
1:06
Yep, so we will need also a SIM card. I have one prepared for this. It's going to be laying right here. And that's about it. Now to get started, I'm going to back
1:15
out. And as you obviously seen, there was a verification pattern. So it did show me that
1:20
the device is locked. Now I'm going to back out back to the Wi-Fi connection page right over here
1:28
And obviously, you need to connect to Wi-Fi. Once you have done so, if it goes to the next page
1:34
just press back to get back to this page right here. Then click on this little box right here
1:39
next to your connected network to share it. Then select nearby. Turn on and then select
1:48
the need help sharing. This will open up an article. Once it's open, you want to click right here on these three dots and select share article
2:06
And select X share mini. Allow anything that pops up with. And it will generate a QR code. Once that is visible, we're basically done with this device
2:22
for now. So I'm going to lock it, move it to the side and bring the Nokia into view
2:30
Now here we're going to start off by navigating into our web browser and then navigating to the hardware set that info slash downloads website. So
2:43
let's do that. So there we go
3:04
I'm going to select consent and then in the downloads search bar, I'm going to click on it
3:09
And we're searching for Android 11. There should be only one result. There it is. So we're going to select download
3:27
and scroll down again and select download once more. Download anyway. Then we're going to go back
3:36
And then in a search bar here, we're going to now search for FRP
3:46
Bypass. Bypass. I'll quickly make sure. Bypass login
4:07
Oh, FRP not from. And as you can see, it shows up with another one. Only one result. So again
4:17
we're going to select download. And then download. Download anyway. And it's downloaded. So now we can close this
4:28
And we're going to now open up our Play Store. And here we're going to search for Xshare
4:38
It comes up right at the front. I'm going to select install. And then we're going to click on install
5:05
Open it up. And again, we're going to need to agree to everything that it shows up with. So
5:12
allow while using up. I think that's the only thing for now
5:16
It's going to give us a list of different things that we need to agree to. So let's select open. And then enable it. Go back
5:24
Open next one. Allow. Open next one. Allow while using up. Open next one
5:31
And a last one. And it's now opening up the QR scanner. So going back to our locked device, we're going to
5:42
scan this code using our camera on the unlocked device. So just hover it over the QR code
5:49
And it will then begin connecting these two devices together. Give it a moment
5:59
And as you can see, they are now connected. So here we're going to select send. I'm going to select send more. And APKs. And select the two APKs that we have downloaded
6:10
from the Hard Reset Info website. And we're going to select send
6:18
We can select receive. And as you can see, it's already installing one, transferring the other
6:23
one. One is already installed. This one is installing as well. Let's give it a second
6:28
And that's it. It's now done. So we can move this device aside. And we can now focus on the
6:36
locked device. So from here, you want to open up the first one, which is FRP Bypass Browser
6:42
So just click on Open. And select the three dots. And select Browser Sign In. And OK
6:50
And in here, you can log in with any kind of Google account. Now, because this is kind of a
6:57
wonky way that we are logging into Google account, it's completely understandable if
7:01
you feel sketched out by this. So what you can do is create a completely disposable Google account
7:07
for this if you want to. And sign in using that. The account doesn't need to be old or anything
7:13
You can create a new account specifically for this, and it will work. You just need to log in
7:18
with any kind of Google account. And the reason for that is once we do so, it replaces the old
7:23
account that we would need to verify. So I'm going to log in using mine
7:39
And I'm going to put in the password obviously off the screen
7:53
Once it logs in, it automatically closes this off. There we go. So once it's closed, we can now go back. Are you sure you want to quit? Yes, I am
8:06
And just press the Back button until we get back to a little bit further
8:11
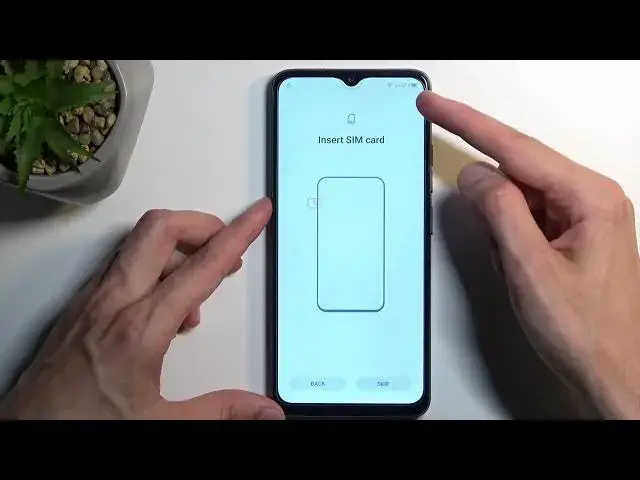
So right here, what we're going to do now is take our SIM card
8:23
I'm going to insert our SIM card. That's too small or too big, I mean
8:30
There we go. So I believe it already looks for reception, and I think it just found it. So great
8:54
So now we can select Skip, I guess. Yep, there we go. And once we're back in the Wi-Fi connection page, as you can see
9:02
it gives us now an option to use mobile network for setup. So that's what we're going to select
9:07
I'm going to click on Next. Now the reason we are doing this is because once you kind of go about through this kind of method
9:21
when you connect to Wi-Fi, it won't progress automatically to the next page again for some
9:27
odd reason. So that's why we need to insert a SIM card just so we can get to the next page
9:32
That's the only reason. Now on here, you can select Don't Copy. And the next thing you will
9:37
see is, there we go, the account added. And it's the account that I have logged in moments ago
9:45
It's not telling me to verify the old account, it just literally got replaced with the one that I
9:50
have logged in with. So right now we can finish up the setup. Now one crucial information is the
9:55
device is still technically locked, as you can see right here, which we will get rid of it in a
10:01
second, this lock. So right now you just want to finish up the setup. When going through it
10:07
just set it up in whatever way is fastest for you, because truth be told, at the moment it
10:14
doesn't really matter what we select, when we will be removing everything anyway in a moment
11:32
So okay, so now that we have access to our home screen
11:50
last thing that we want to do to fully unlock this device is navigate to our settings
11:56
From here, you're going to scroll all the way down to System, select Reset Phone, erase all data, erase all data. And then once you press on the erase
12:09
all data, once again, this will begin a factory reset of the device. Now it might seem kind of
12:16
redundant to do this, but as a last step doing this through settings, the factory reset
12:21
forces the device to remove any kind of protection that was on this device
12:25
either prior or new one. So that would include the previous verification method that we had to put
12:32
into the device in order to unlock it, which we did bypass this, but we didn't remove it just yet
12:37
Once you go through the reset, the factory reset through settings, this basically gets all removed
12:44
And afterwards, you can set up your device in whatever way you want
12:48
Afterwards, you can set up your device in whatever way you want. So it will be fully
12:53
unlocked at that point. So you can do whatever you want with it. Now with that being said, I'm not going to be going through this reset on video, just because it's kind of a waste of time
13:03
To be completely honest, it's fully automatic process. And once it's finished, you're in a setup screen where you can set up your device however you want
13:11
So with this being said, now, if you found this very helpful, don't forget to hit like
13:16
subscribe, and thanks for watching
#Mobile Phones
#Science
#Other