Up next in 10

How to Bypass Google Verification on MOTOROLA Moto G60s - Unlock FRP without PC / Remove Google Lock
Jul 4, 2024
MOTOROLA Moto G60s Bypass Google Verification:
https://www.hardreset.info/devices/motorola/motorola-moto-g60s/faq/bypass-google-verification/realme-android-11-google-account-bypass-2021/
Find the easiest and free method to unlock MOTOROLA Moto G60s. If you forgot Google password you should find the way to remove factory reset protection. By using our simple unlock tricks you can activate MOTOROLA Moto G60s without Google account. Let's remove factory reset protection from MOTOROLA Moto G60s.
How to bypass Google Account protection in MOTOROLA Moto G60s with Android 11 and security patch 11.2021? How to unlock MOTOROLA Moto G60s? How to remove factory reset protection in MOTOROLA Moto G60s? How to bypass Google lock on MOTOROLA Moto G60s? How to activate MOTOROLA Moto G60s?
#MotorolaBypass #BypassGoogle #UnlockFRP
Follow us on Instagram ► https://www.instagram.com/hardreset.info
Like us on Facebook ► https://www.facebook.com/hardresetinfo/
Tweet us on Twitter ► https://twitter.com/HardResetI
Support us on TikTok ► https://www.tiktok.com/@hardreset.info
Use Reset Guides for many popular Apps ► https://www.hardreset.info/apps/apps/
Show More Show Less View Video Transcript
0:00
Welcome, I'm from the Motorola Moto G60s and today I'll show you how you can bypass the
0:13
Google verification on this phone. Now before we get started, you'll want to grab some kind of SIM card and if you have
0:21
a SIM card with a pin that's great. If your SIM card doesn't have any kind of pin set on it, just pop it into a different
0:27
device, set up a pin and then use it for this. The SIM card does specifically need to have some kind of pin and as long as you know the
0:38
pin that's great, that's all we need. So from here I'm going to obviously take the case off and obviously you're also seeing
0:48
that the device is locked, there was a verification pattern and next page would be the Google
0:52
verification so no need to actually prove anything here. So anyway, let's pop out the tray and on here you're going to place your SIM card
1:05
Now I'll also mention that the SIM card doesn't need to be functional in terms of connectivity
1:11
so it can be some kind of old SIM card that doesn't function anymore, as in it doesn't
1:15
connect to any kind of network, but as long as you set up a pin on it, it will work
1:22
So anyway, from here as you will see it will pop up with the SIM pin, so what you want
1:27
to do is confirm it. Or was it confirming
1:36
Let me quickly check. Nope, my bad, we're not supposed to confirm it
1:45
And I'm going to go back to the first page because as you can see I had to change the
1:50
language when I popped in the SIM card for some insanely stupid reason, which bugs me
1:57
beyond belief, so there we go, solved a stupid problem, it's not like I'm still in a setup
2:02
where the first step is choosing your damn language. So yeah, from here I'm going to just pop it out again and pop it back in
2:14
So what are you supposed to actually do, as you put it in it shows you the pin and then
2:20
you take it out, which will keep the device locked. There we go
2:27
As you can see there is a little bit of a pop-up right here, so what you want to do is swipe down on it, it will pull down your notifications
2:33
Can we expand it? No we cannot. So I'm going to select Manage right here, and luckily it's still in English even though
2:46
part of the message was not, so it's still in English, so that's great
2:50
So in here we're going to tap on See all from last 7 days, and from there tap on the three
3:00
dots, select Show system, and we're looking for, let's see, not recent, all apps, there
3:12
we go, and we're going to swipe down all the way to YouTube I believe, yep, YouTube
3:20
So it is literally the last thing we can find. So there we go, the third one from the bottom, and from here we're going to tap on the icon
3:27
of the application right here, and select Open. So once you open it up, I'm going to tap on the account icon, I'm going to navigate into
3:38
the Settings, About, and then Google Privacy Policy
3:50
This will open up our browser, so let's select Accept and Continue, and No Thanks
3:57
Once you have your browser open, you want to click right here at the top and navigate
4:01
to hard reset.info.bypass
4:13
Like so. If you need a moment to write it down, now would be the time to pause the video
4:22
Once you're on the site, scroll down, and you'll find Settings Application, and here
4:28
you want to simply click on it, and this will take you to the phone's settings
4:33
And in the settings, we're going to scroll a little bit down to Accessibility, then we're
4:37
going to select Accessibility Menu, there we go, and we want to enable the Accessibility
4:46
Menu shortcuts, select Allow, it gives us a pop-up that you access it by swiping with
4:52
two fingers up, so I'm going to select Get It, and that's it
4:56
So we have enabled that, and we're going to go back to the Settings page right here
5:04
and we're going to go into Apps and Notifications, I'm going to select See All 4D Apps, Show
5:10
System, and we're going to start off by, let me check, we're going to start off by terminating
5:22
the Android setup, so is there only one? Yep, it looks like there's only one, so let's select Android setup, I'm going to force stop
5:34
and OK, I'm going to go back, and next thing we're going to do is find Google Play Services
5:40
There we go, Google Play Services, and this time around, we're actually going to select
5:49
Disable, disable up, and then force stop, now the notification was associated with the
5:56
Play Services, just kind of going boop, and being completely gone, I'm going to mute this
6:01
just so it doesn't annoy the living heck out of me, there we go, because it will probably
6:07
repeat several more times. And from here, once you have disabled the Google Play Services, we're basically going
6:15
to go back to the setup screen, so OK, there we go, and we're going to progress to the setup
6:34
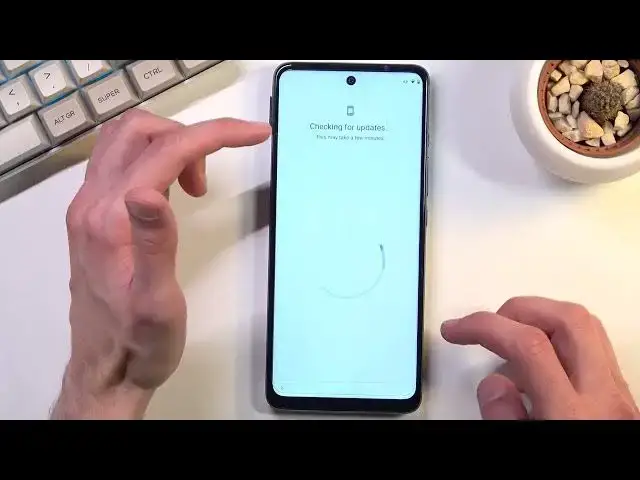
Now this time around, unlike before, we automatically skip the network connection, because I was
6:41
already connected, and we are stuck on this screen. Now normally what would happen, as a device would just start looking, find that the device
6:50
is locked and give you the verification page, so you basically can verify the device, right
6:57
But because we, select uncopy, because we don't have actual connection to the network
7:03
it's just going to be stuck on this screen right here. So what we want to do right now, using those two fingers, we're going to swipe up, this
7:09
is going to bring up that notification, on the notifications, the accessibility menu
7:14
and in here you want to select the assistant, so not always, as you can probably see, show
7:22
up a settings option, let's try that again, there we go, settings, now it will disappear
7:27
as you can see. Once you press on the settings, it will show you the Google Play services page, there we
7:40
go, like this one, it was briefly visible. Now normally, or not normally, there is no normal for this, sometimes it will stay open
7:52
for longer, sometimes for shorter, sometimes it doesn't open at all, so as long as you're
7:57
basically doing what I'm doing, which is selecting the assistant, then settings, and
8:02
then trying to press the enable button, which is somewhere here for the Google Play services
8:07
you're doing everything correct. Now that might take you a couple tries to get it enabled, or it might take you a couple
8:14
dozen tries, so just don't get discouraged, it works eventually, it really depends how
8:24
lucky you are, there is no right or wrong way to do it
8:29
So you can basically see it as I go, how many times I will have to do this before I can
8:34
actually get it. As you can see, it didn't even show up settings right now
8:48
As you can see, I pressed the button, but it didn't enable it, that's also a common thing, so don't worry
11:52
Finally
12:18
So as you can see, that took me way more tries than I have ever attempted to actually
12:28
do it in. Normally it takes me up to maybe like 10 on average, this was, I don't know, definitely
12:38
more than 10, probably approaching 100 tries. So yeah, good luck, that's basically all I can say
12:50
And once you get it enabled, you can go back, so we go to this, and as you can see, it goes
13:00
past the verification screen. So this is the next page after the verification screen, which is just skipped
13:07
Now from here, you don't have to change anything, so all you want to do is just finish up the setup
13:21
And additionally, at this moment, it doesn't really matter how you set up your device
13:25
You'll see in a moment why that is the case. So as you can see, we are now done with the setup, and what you want to do from here is
14:13
simply navigate into the settings, so go settings, scroll all the way down to system, system
14:23
there we go, and select the events where you'll find reset options
14:27
And here you want to select erase all data, factory reset, then select the erase all data
14:32
and tap on this again. Now the purpose for factory resetting your device right now, even though you have access
14:38
to your home screen, is the device is still locked. Even though you have access to your home screen, if you, for instance, try to do everything
14:46
that you normally do on your device, it will block you from certain things because the
14:50
device still has the old account in the system. And to basically fix that, all you need to do is factory reset it through the settings
15:02
specifically through settings, which results in the device basically removing everything. Patterns, PIN, passwords, Google accounts, and anything that was previously blocking
15:11
us will be completely gone. Now I'm not going to go over this on the video just because, to be frank, it doesn't really
15:18
give you any additional info. Once you press that button, the device is going to the factory reset and unlocking itself
15:24
And once that has been completed, you're in a setup screen where you can finish up the
15:27
setup in whatever way you want to. So with that being said, this would conclude the bypass of this device, the Google account
15:36
on this device. And if you found this very helpful, don't forget to hit like, subscribe, and thanks
15:41
for watching
#Computer Security
#Consumer Electronics
#Mobile & Wireless
#Mobile Phones
#Reference