Up next in 10

Find out more about bypassing FRP on Alcatel 1SE Lite:
https://www.hardreset.info/devices/alcatel/alcatel-1se-lite/faq/bypass-google-verification/
Hello, everyone watching. Today, we want to demonstrate how to get past the factory reset protection on your Alcatel 1SE Lite. We'll give you simple steps to help you bypass the Google account verification on your device. Just follow our directions, and you'll complete this process successfully. Thanks for joining us, and good luck! If you want to know more about your Alcatel 1SE Lite, visit our YouTube channel.
How to bypass Google account verification on Alcatel 1SE Lite? How to skip factory reset protection on Alcatel 1SE Lite? How to remove FRP on Alcatel 1SE Lite?
#BypassGoogleVerification #RemoveFRP #Alcatel1SELite
Follow us on Instagram ► https://www.instagram.com/hardreset.info
Like us on Facebook ► https://www.facebook.com/hardresetinfo/
Tweet us on Twitter ► https://twitter.com/HardResetI
Support us on TikTok ► https://www.tiktok.com/@hardreset.info
Use Reset Guides for many popular Apps ► https://www.hardreset.info/apps/apps/
Show More Show Less View Video Transcript
0:00
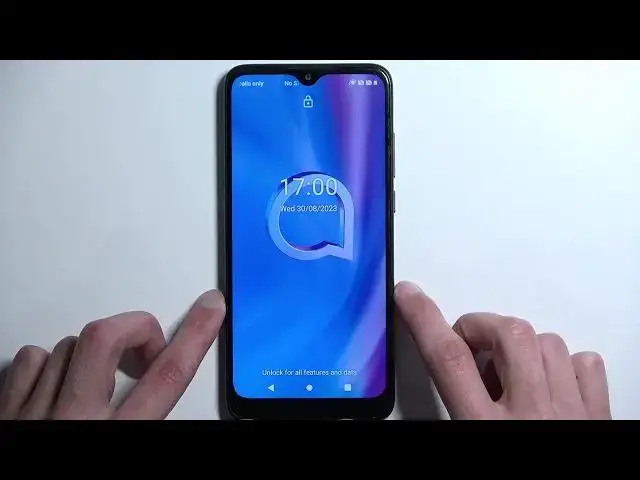
Welcome. In front of me is an Alcatel One SE Lite and today I'll show you how
0:06
you can bypass the Google verification on this phone. So before I get started
0:15
with the bypass I'm just gonna quickly mention the state of this device. So as you can see it is right now locked. It's telling me to draw the pattern to
0:22
unlock it or use the Google account instead to unlock it. Now with that being
0:27
said assuming we don't know either of those obviously we wouldn't be able to finish up the setup. So with that being said we're gonna back out to the very
0:33
first page and here we will be changing the language to any other language that
0:41
uses a different keyboard. Now in the guide it specifies two different
0:46
languages I believe that you can choose from. If I can find it. Give me a moment
0:55
I'm trying to look for it but okay so it you can choose a keyboard like basically
1:04
language Chinese or Indonesian or whatever the language actually is. It basically says China or India but if I am correct we can choose basically
1:16
anything from the very bottom all the way up to I believe it's Greek
1:21
So there we go. Possibly even Turkish. So just for this I'm actually gonna select
1:26
Greek just to test it out. And the reason we want a different language than what
1:32
we might actually want to use is because by selecting a language with a different
1:37
kind of letters in it, different keyboard, it forces the device to add a new
1:42
keyboard into the setup. So right now we're gonna progress to the setup by
1:47
selecting basically the typical stuff even though we don't know what we're really pressing on in terms of like what it says. It's still in the same
1:54
place all we need to do is just keep clicking the same things that we
1:57
would normally do. Now once we are back in the verification page we'll click on
2:09
the use Google account instead. And then tap on a field. This will bring up our
2:16
keyboard which now for some reason still in English one but we do have this globe
2:23
icon now which we didn't have before. So we're gonna hold it. This will bring up
2:28
additional language options or keyboard options and we want to select this text
2:33
at the bottom. From here we are going to be adding a new keyboard so we're gonna
2:42
tap on this text right over here. We're gonna tap on any kind of option that has
2:48
an arrow. I'm just gonna select the first one and then press on whatever that is
2:53
and then add which is this button. It's just closed on its own so I'm gonna
2:57
reattempt this. There we go. So once we have added our keyboard which I think I
3:04
actually added now more than one in any case we can now get out of here. We're
3:12
gonna go back to the first page and we're gonna change the language back to
3:15
our desired language which for me is English. And again we're gonna progress
3:20
through it forward. I believe I missed a step but we will find out in a second if
3:30
that is true or not. It looks like I didn't miss a step. We're gonna select to go back to language
3:42
settings and here we are now gonna again select add keyboard. Once more we're
3:54
looking for one with an arrow. Tap on the three dots, select help and feedback and
4:02
then in here we're gonna now search for a written Morse code but we do need to change our keyboard so again we're gonna
4:10
hold our globe icon and I'm gonna select English. So write in Morse
4:18
code, select that. It will open up this article and here click on the video that
4:27
is presented to you once. It won't start playing which is okay and here we want
4:35
to click on these three dots and we will select watch later which isn't
4:41
actually accessible to us for some reason. Not really what I wanted to do. There we go. I guess that will work as well. So as
5:00
you've seen I pressed on this like three dots and went basically to YouTube
5:06
or it attempted to open up YouTube but it gives us a pop-up. Now typically if
5:11
you have the share and watch later option you want to select the
5:18
watch later. If you had it like me just follow what I did and then we're gonna
5:23
select Chrome and we're gonna select this one. Accept and continue and no thanks
5:30
And then in the search bar we will be typing hard
5:41
reset.info bypass. Now if you need a moment to write this link yourself do
5:55
pause the video. Let's give it a second for it to fully load and once it did
6:06
we're gonna scroll down and we're gonna click on these settings. In here we will
6:16
now be navigating to security right over here and we're gonna be selecting screen
6:21
pinning which is barely visible at the bottom. There we go. We want to enable it
6:26
Enable lock device when unpinning and then choose screen lock. So as you've
6:30
seen before we had a pattern as a way of unlocking it so I will now change it up
6:34
to something completely different like pin. It tells me to put in the pin that I
6:39
want to use so I'm gonna select a very simple one. One, two, three, four. Next I'm
6:44
gonna confirm it by typing in the same one once more and now the new pin is set
6:49
Now I'm not gonna be adding any kind of fingerprint so I'm gonna select skip right here and once that's added I believe we should be able just to
7:00
reboot the device. That's what we're gonna do. Hold the power button, restart
7:06
okay. And we're gonna wait for the device to boot back up. Now as you can see we're
7:19
now back in our device booted up so we're gonna unlock it. Now we are still
7:25
in the setup screen but because we already have a screen lock set it's telling us to basically confirm it so we're gonna put the pin that I have set
7:33
one, two, three, four and this now takes us to the setup. From here we're gonna
7:38
just progress to the setup as we did before and I think it already skipped
7:44
a couple steps. As you've seen we didn't have the welcoming page where we get to select language. It's already starting off I believe after the connection to
7:52
Wi-Fi which right now in a second it's gonna tell us again that the device is
7:57
locked and then we need to now confirm the pin which you should see just in a
8:08
second. There we go. Verify pin. As you are aware at the very beginning it was
8:17
telling us to verify pattern and after we have set up the screen pinning and
8:22
chose our pin it changed to verify pin. So again we're just gonna put in one, two
8:28
three, four, enter and voila. It should go further now. I'm gonna mention one
8:40
important thing before people start to click off of the video. We have right now
8:45
technically unlocked the device as you can see we can now just kind of skip this and finish up the setup but there's one last thing that I recommend doing
8:52
once you have access to your home screen which is performing a factory reset of
8:57
your device that is done through settings. The reason I am recommending
9:01
this is because when you perform such a reset this forces the device to remove
9:06
any kind of protection from it which will include the Google account and the
9:10
pattern that was previously used on this device. Now I am not exactly sure if it's
9:14
still on here. I was a kind of like somewhere in the backlogs so that's why
9:20
I recommend doing this. So I'm gonna show you once I actually finish up the setup
9:27
where you can find the setting. So right now you can see that we have now gain
9:37
access to our home screen no problem. So last thing last is the reset. I will be
9:44
honest I'm not gonna be going through the reset on the video just because it's
9:48
fully automatic and it shows you absolutely nothing. But you can find the
9:52
setting by going into the settings all the way down to system and then
9:56
selecting... come on... Did it just crash
10:10
Hello phone? Well we just completely froze because we're gonna give it a moment to figure
10:20
out what it's doing. There we go. So we're still in the system. We're gonna
10:27
select advanced and reset options
10:37
Erase all data. Factory reset. Erase all data. Confirm your PIN or whatever you
10:47
have chosen to set up and then click on the delete all data to begin factory
10:54
resetting your device. Like I mentioned this is a recommended last step just to
10:58
make sure that any kind of leftovers from the previous account are removed. So
11:03
that's why I recommend doing this. It's not necessarily a requirement but you
11:07
don't have anything on the device just yet and this will basically ensure that
11:12
the device is fully unlocked and that you won't have any other problems later
11:16
on. So there we go. That's basically what I'm doing. Now with that being said
11:20
hopefully you found this video helpful. If you did don't forget to hit like, subscribe and thanks for watching
#Computer Security
#Software