Up next in 10

Learn more info about Samsung Galaxy S20:
https://www.hardreset.info/devices/samsung/samsung-galaxy-s20-exynos/faq/bypass-google-verification/
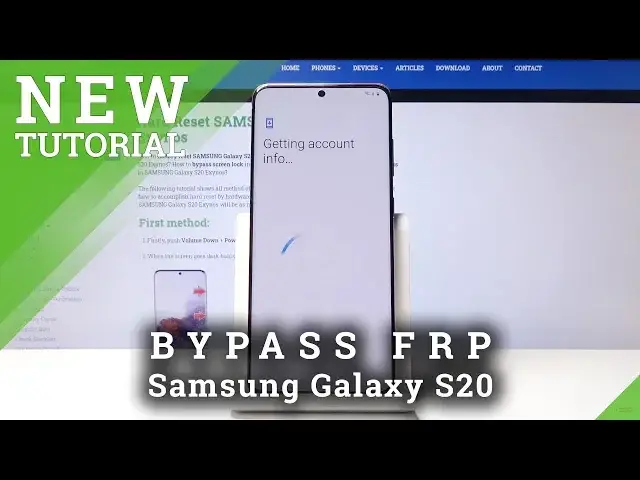
If you want to use your Samsung Galaxy S20 without Google Account, then find out our video on how to smoothly unlock Factory Reset Protection. Watch our video and follow the presented steps to perform this advanced Bypass process easily. Set up your device after the hard reset process without Google Verification. Let’s Bypass Google Verification in Samsung S20!
How to bypass Google verification in Samsung Galaxy S20? How to skip Google Verification in Samsung Galaxy S20? How to unlock FRP in Samsung Galaxy S20? How to unlock Factory Reset Protection in Samsung Galaxy S20? How to remove Factory Reset Protection in Samsung Galaxy S20? How to activate Samsung Galaxy S20 without the Google verification? How to bypass Google protection in Samsung Galaxy S20?
Follow us on Instagram ►https://www.instagram.com/hardreset.info/
Like us on Facebook ►https://www.facebook.com/hardresetinfo/
Tweet us on Twitter ►https://www.twitter.com/HardResetI
Show More Show Less View Video Transcript
0:00
Welcome
0:02
Infronomies a Samsung Galaxy S20 and today I'll show you how to bypass the Google
0:10
Verification Screen. So as you can see the phone Infoomomy is already locked and yeah so let's get straight to it
0:17
Number one you will need to connect to Wi-Fi and have an access to it because we will need
0:21
to download a couple things. So connect to Wi-Fi which as you can..
0:27
Well I guess I'm not connected anymore. Let me quickly do that. Let's connect
0:40
Hopefully I wrote it correctly. Okay, there we go. So you can see that I'm now connected
0:46
So once you are, you want to go back to the first page right here. And we're going to start taking screenshots
0:52
So hold, or not hold, but press, power key and volume down
0:56
Both keys at the same time. and you will get a message that it needs storage permission, so deny it
1:03
Then do it once more. Deny and don't ask again. Once more take a screenshot
1:12
And we can now go into the settings. So top on the settings
1:17
From here we're going to scroll down to permissions, tap on the search button, and we're going
1:22
to go into Chrome. So Chrome, there we go. And from here, once you tap on the Chrome, you can see that there's a button for opening it
1:32
top on it, and it opens up Chrome. Accept and continue. No thanks, we don't want to log in at the moment
1:39
And from here we want to navigate into a hardreset.info website. So let's do that right now
1:45
There we go
1:54
So hard reset. info. And once you're on the website, you want to top on the three bars right here and go into the download category
2:05
Then top on the search field and you want to search for Android 7.1.2
2:21
From here, scroll a little down where you will see download. button then scroll down again and tap on it once more
2:27
tap on okay and we will need to actually grant access after it's done
2:33
installing so we can install it so there we go so once it's finished
2:38
tap on open and go into the settings allow from this source so we can install it
2:44
go back and tap on install once it's done you want to top on done
2:54
and then go back so we can go back to searching in the download category and
3:01
remove that and now search for settings like so and again top on the download
3:13
scroll down and download once more okay and once it finished open install and And this time you want to actually open it So top on open okay and we now in the settings
3:30
So once you have settings open, you want to scroll down until you find apps right here
3:38
Top on three dots and show system apps. And what we're looking for is the Google one, so scroll down to G
3:48
where I am right now and you will find Google Play Services and Google Play Store
3:54
So let's stop on the services first. And right here you have the disable button
3:59
So top on it, disable app, go back. Tap on Google Play Store
4:05
Also disable, disable app and go back. And now go back once more to the main settings page
4:13
as we are right now. And here we will go into account
4:16
or accounts and backup and top on the settings add account and you'll have the Google option right
4:25
here so choose that continue and disregard this the app will be the app will keep crashing right now
4:33
but it already did what it needs to do it has allowed us to access the Google itself as in for the
4:39
login so just close up and every time it will pop up in a feature you want to close it and
4:44
disregarded. The process of it is basically by now done and it will keep crashing
4:50
till we do a reset of the device later on. So let's just open okay. Open a search right
4:56
here and log in with an existing Google account. If you don't have one you can always
5:01
create one and then use it. Now I already have it so I'm going to use mine
5:14
it so give me a moment and here we go so you can see that we're now logged in
5:33
top on I agree and you can see that it's added so now let's go back and we'll need to
5:42
re-enable the apps that we have disabled so let's go back to the apps, again show system apps and then scroll down to Google
5:53
And there we go. Now the two disabled ones, so again, tap on it and now we want to turn on
6:01
Go back, up on the other one that is disabled, turn on, go back
6:06
And at this moment we're basically done at least on this part. So hold the power key, turn off, and select Restore
6:14
And once more, and wait for the advice to boot back up
6:44
And again And you can see that the device is back on so let go to the setup process
6:55
Now, you want to skip most of it as much as you can. What we set up right now won't really matter because we're going to perform another
7:03
reset of the device in a moment. So I'll just stop on next
7:11
And you can see, account added, and it provides the account that I have added right before the restart of the device
7:22
And we can basically progress. That's usually where the previous screen would be blocking us from continuing with the setup process
7:29
But as you can see, it now thinks that we have added a new account and it allows us to progress
7:35
So just don't copy next. And as you can see, the app crashed again
7:42
Disregarded, we'll see that message a couple more times. More and accept
7:49
Skip. Skip anyway. Turn off. And let's go back and okay. Close up once you see it, and do it once you see it once more
8:37
Skip, skip and finish
8:54
Okay, so once you have access to home screen, again close this. Disregard the apps right here, well, as you can see the flipping over there, over there
9:07
Basically the app is constantly crashing because it's not supported by this version of Android
9:13
But we'll also get rid of it by going into the settings
9:18
And from here we want to go into where it's going to be a scare, I believe maybe, or not
9:25
I'm just going to search for it
9:37
So it's an account and backup
9:49
Just check it. Account and backup. No
10:03
Oh there we go Reset so stop on that set settings we set factory data reset so we looking for this I gonna quickly look where it exactly is so that in
10:22
general management okay so I'm gonna go so you're not getting confused so let's
10:28
find general management in these settings your general management and here you have reset factory data reset and once you tap on it you get a list of everything
10:40
that we'll remove so you can have a google account and you also see the google account that
10:44
will remove right on the bottom it provides the one that we have added but it also removes the
10:49
previous account that is not provided here that was previously blocking us if we were to do a reset
10:55
of the device through recovery mode so a different way than we're doing right now and the device
10:59
would go back to being locked if we do it through here it will then remove all of the accounts and the
11:04
device will be fully unlocked. And it also removes apps and settings. So basically
11:09
the app that is right now keep crashing, it will also be gone. Just up on reset
11:13
delete all, and the process will begin. So give it a moment for it to finish. And
11:20
once it has, we should be then created with the Android setup screen once more. And
11:24
from there we can go and perform the setup of the device fully to basically as you
11:30
would normally do to set up whatever you want. Now, I'll be back once the Android setup screen is visible
12:04
So once the process finished, as it is right now, we're going to go through another setup
12:20
So let's start by changing the language. Let's go with English, on top of next. Next
12:28
I agree. And number one, the first thing that probably jumps out is the fact thataupt
12:34
button is not grayed out now. Now usually if the device would still be lacked, you would not
12:38
be able to skip. You would actually have to connect and then it will tell you that while the device
12:42
is lacked to confirm it. So let's just stop on skip and you don't want to copy data from previous
12:48
device and up on next. More. Now like I said, you can set up your device as however you like
12:54
So you can connect to Wi-Fi, log into your Google, set up patterns, passwords, whatever
12:59
you want and everything will work just as it's supposed to. I'm just skipping most of it
13:04
to save on time so let's just skip this once more and finish and boom there we go
13:13
you can see that the device is now fully unlocked and ready to use so if you found this very helpful
13:18
don't forget to hit like subscribe and thanks for watching