live_tv
Livestream Starting Soon
00
Hours
:
00
Minutes
:
00
Seconds
Up next in 10

Check out more useful tutorials on our page:
https://www.hardreset.info/devices/oppo/oppo-reno-5-z/tutorials/
Hi there! Have you ever been wondering how you can bypass FRP on your Oppo Reno 5 Z? If you've been, then you should check out our new video! In today's video we're going to show you how you can bypass FRP on your Oppo Reno 5 Z just in a couple of simple steps. In case if you forgot password to Google Account on your Oppo Reno 5 Z, and now can't even access this device, then this video is special for you! So if you wish to learn how you can bypass FRP on your Oppo Reno 5 Z, all you need to do is just watch this short video to the end, follow the instructions provided by our specialist and try to perform this operation yourself on your Oppo Reno 5 Z. If you find this tutorial useful, don't forget to hit that like button, leave a comment and subscribe to our channel. Thanks for watching!
How to bypass Google verification in Oppo Reno 5 Z? How to skip unlock FRP in Oppo Reno 5 Z? How to bypass Google protection in Oppo Reno 5 Z? How to activate Oppo Reno 5 Z without Google Account? How to remove FRP? How to delete Google account in Oppo Reno 5 Z?
#bypass_frp #bypassgoogleaccount #OppoReno5Z
Follow us on Instagram ► https://www.instagram.com/hardreset.info
Like us on Facebook ► https://www.facebook.com/hardresetinfo/
Tweet us on Twitter ► https://twitter.com/HardResetI
Support us on TikTok ► https://www.tiktok.com/@hardreset.info
Use Reset Guides for many popular Apps ► https://www.hardreset.info/apps/apps/
Show More Show Less View Video Transcript
0:00
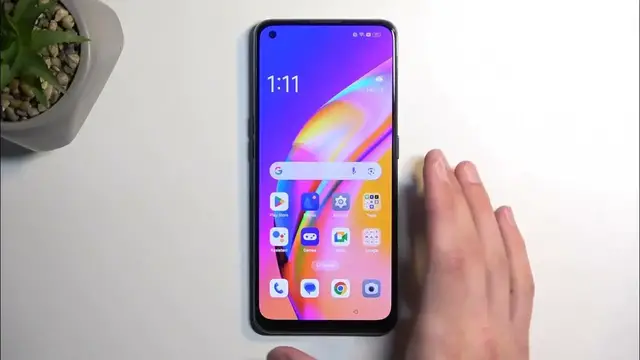
Welcome. And follow me as I up Po Reno 5Z. And today I will show you how you can bypass the
0:06
Google verification on this phone. Now to get started, number one, you can see that the device
0:16
is locked. It's locked using a pattern. And if I close this, it's also locked using the Google
0:20
account. So throughout the process, I'll show you how you can bypass this and then completely
0:25
remove it. But for this, we will unfortunately need a secondary device. That can be any kind
0:31
of phone that is running Android, which will give you access to the OPPO phone clone or clone phone
0:39
application. So that's basically what we will need a secondary phone. Now, additionally
0:47
this process is going to work for Android 13, which this is running. And I'm recording that
0:53
at the beginning of 2024. So keep in mind, Android 13 is not the newest Android. It's 14
1:01
So if your device or whatever device you're trying to do this with is running Android 13
1:06
chances are this will continue to work throughout as long as it's not updated to the newer Android
1:14
Now with that out of the way, let's get started. Now one thing that you need to do is connect to
1:18
your Wi-Fi network, which I have already done. So if you are at the beginning of the setup
1:22
just go forward, connect to your network, and then basically progress forward. Or if you're
1:30
already connected, then stay here. Now one thing is when you connect to network chance is that
1:35
it's going to go to the next page. If it does, so just go back. Now once here, we're going to click
1:40
on that information icon next to our connected network, which just to show this, if you do this
1:46
on ones that aren't connected, that's the options that you see right here. If I click on this
1:52
on this one, which I am connected to, I'm going to hover my hand just for a moment, just so I can
1:56
see. Oh wait, there is no password. So anyway, you will see that's how it looks like when you
2:02
click on the information icon on the connected network. Here you want to select share, which
2:07
I'm again going to put my hand over, because it's going to bring up the QR code along with the
2:12
password. Now the thing that actually matters is this button at the bottom right here below the QR
2:17
code nearby. Click on it, continue, and then select allow, need help sharing, and that's
2:26
basically it. Next, click on the three dots and select share article, message, new message, two
2:38
just slap any kind of numbers on there. It does not matter whatsoever. Keep in mind
2:43
there's no SIM card in this device whatsoever. Give it a second and we'll basically paste that
2:51
article into our message field. So we want to get rid of it because we don't really care for it
2:58
And what we care for is YouTube. Now, it is important that you put in the www extension before. If you don't
3:14
and you send this and try to open it up, it's going to open up YouTube in a pop up view
3:18
It's not what we want. So when you add the www extension, it actually opens it up in its full
3:24
fledged application form factor. And that is what we need. That version has more options
3:29
which we will need to utilize. So just keep that in mind. So from there, we're going to send it
3:35
which this message isn't actually being sent to anyone, as you can see, not sent
3:38
because there's no SIM card, and the number doesn't exist. Now in this pop up right here
3:44
from our sent message, you want to click on top to load preview and then click on the image of
3:49
which will obviously open up our YouTube. Now here we're going to select the account icon
3:55
settings, about Google privacy policy, which opens up Chrome, select without using an account
4:04
No thanks. And then at the top, you want to navigate to hard reset that info slash bypass
4:10
Like this. Now if you need a moment to write this link yourself to pause the video
4:21
Continue with recommended. Now here we're gonna start scrolling down, ignore the
4:26
abominable amount of ads. And you want to select settings right here. And you can
4:32
scroll down. And you want to select settings right here. And you click on it
4:40
it actually opens up the phone settings to browser, which is pretty nice
4:45
And in here, we want to go to home screen and lock screen
4:53
And then home screen layout. When you click on it, it just closes it up and opens up our
4:58
home screen. Now it is very important to note that this device is still not unlocked. The phone
5:03
is still in the setup stage. And anything that we were to do right now, the phone would consider
5:08
this as a setup stage. If we reboot the device, it might just go back to the setup screen
5:14
So keep that in mind, we're not finished. And it will matter this kind of state of the device
5:19
later on once I'm going to say, guide you through basically the finishing processes later on
5:25
But right now, what we wanted to do is swipe to the left. And we're looking for clone phone
5:30
which actually isn't here. There are tools. So you're looking for the tools folder and you have
5:36
the clone phone application, open that up, then select that this is a new device. Hello
5:44
other Android, assuming obviously, you are using other Android as your secondary device
5:50
which you probably should, I have no idea if this would work with iPhone, even though if we go back
5:56
we do have an iPhone as an option. I have no idea, like I said, if this will work, never tried it
6:03
So I will be doing this through Android, which has been tested by me, and I know that it works
6:10
So this phone is right now prepped. Now we can grab our second device
6:13
Here you want to go into your Play Store. Search for clone phone. I already might have it installed
6:27
Here we go up for clone phone. Okay, I don't so I'm going to select install
6:43
I'm going to select open. Agree and continue. Start migrating settings. And we're going to need
6:50
to allow a bunch of different things. So just whatever it opens up kind of window, whatever
6:54
window, select settings or in here and list like this, you're looking for the actual application
7:00
which is clone phone. I have two of them. Don't worry, this one is from OnePlus. This one is from
7:05
Apple, same company. And in all honesty, I could have been using the OnePlus version, and it would
7:10
still work. But for the purposes of this video, I'm going to be using the dedicated one that is
7:16
named the same way. And in case, once you enable whatever I want you to enable, go back again
7:25
and again, settings, toggle on whatever. Okay, settings, toggle on, go back, allow
7:34
And we're good to go. So now we can see cameras launched. So all you want to do is point the
7:41
camera on this little box right here. It will then connect these two devices together
7:50
Give it a second, it's going to load all the data that is on your device. And you want to
7:55
deselect everything by clicking right here at the top. Next, and you want to deselect everything by clicking right here at the top. Next
8:04
select apps by tapping on the text itself, and then choose any kind of application from the list
8:11
Now, I do recommend selecting an application that is smallest in size. So something like
8:17
Google Podcasts seems to be the smallest one. Let's see if there's anything lower than this
8:23
And there we go. Oh, no, that's 117, not one. So yeah, it looks like the Google Podcasts is the smallest one. The reason I'm picking the smallest
8:39
size from the list is because we do need to transfer it over, the bigger the size, the longer
8:44
it's going to take. So it's just kind of more convenient to pick something that is smaller
8:50
In this case, it's going to take a shorter amount of time. Next, I'm going to select next
8:57
Actually, before I do so, I'm going to go back. Never mind, I guess I'm not
9:02
If understood, start migrating. Okay, so it's going to start migrating. This one just took a
9:10
literally brief moment. Done. So we're finished with this phone. Move it to the side. Next
9:16
you can see on the phone right here that the migration has been completed. Now
9:22
it says that migration report successful, zero, failed, one. You probably will see the same thing
9:29
It does not matter. The fact that it tried to migrate and it technically completed the migration
9:36
is all we need. The fact that it didn't actually migrate anything does not matter. Anyway, next
9:43
once you press to basically complete the migration, it takes you to the setup screen
9:48
with the navigation, which if you already set up this kind of device before, you probably are aware
9:53
that navigation settings are after verification. So right here, we're just going to select our
9:59
navigation method. I'm going to skip selecting any kind of screen lock. I'm going to select done
10:05
and get started. And this finishes up the setup. Now, that being said, the phone is still
10:10
not unlocked. We just managed to bypass the verification, but the verification still exists
10:18
on this phone. So there is one last thing that we will need to do, which is navigate into the
10:22
settings, scroll down to additional settings, and scroll down again and select... where is it
10:31
There we go. Back up and reset. Reset phone. Erase all data. Erase all data. And once you click on
10:39
the erase all data for the second time here, it's going to go through a factory reset. Once that's
10:45
completed, the device will be fully unlocked. Now, going back to our thing before, the reason we
10:51
didn't do this right off the get-go when we did the glitch so it opened up the home screen is
10:56
because at that point, the phone knew that it's still in a setup process. So by going to the
11:02
settings in... through there, back then, and performing a reset, this would have done nothing
11:08
Now that the device is past the setup screen, it's going to allow us to reset the device, which
11:14
will force the phone to remove any kind of protection from the phone. So that's why this is
11:19
the last step, which will fully unlock your device. Now, that being said, I'm not going to go over this
11:24
specific process on the video just because it's a factory reset and it's fully automatic
11:29
Once it's completed, the device is unlocked and you can go through the setup process, which you
11:33
will be at, in whatever way you want to. So with that being said, if you found this
11:39
video helpful, don't forget to hit like, subscribe, and thanks for watching
#Computer Security
#Software
#Operating Systems