live_tv
Livestream Starting Soon
00
Hours
:
00
Minutes
:
00
Seconds
Up next in 10

Read more info about OnePlus 8T:
https://www.hardreset.info/devices/oneplus/oneplus-8t/
We are happy to present the video guide, where we teach you how to skip Google verification in OnePlus 8T. If you want to find out how to smoothly login to your OnePlus device with a different or even without a Google account, check out the uploaded tutorial and remove Google protection in few steps. Let’s use the attached instructions and skip FRP in OnePlus 8T successfully. Visit our HardReset.info YT channel and get more useful tutorials for your OnePlus device.
How to unlock FRP in OnePlus 8T? How to remove Google protection on OnePlus 8T? How to remove factory reset protection on OnePlus 8T? How to skip FRP on OnePlus 8T? How to activate OnePlus 8T without Google account?
Follow us on Instagram ► https://www.instagram.com/hardreset.info
Like us on Facebook ► https://www.facebook.com/hardresetinfo/
Tweet us on Twitter ► https://twitter.com/HardResetI
Show More Show Less View Video Transcript
0:00
Welcome
0:06
Infraim is a 1 rez.8 team and today I will show you how to bypass the Google verification
0:13
Now as you can see the phone in front of me is already locked and I can unlock it either using
0:18
the Google or using a pattern that was previously set. So to bypass this there is actually one thing that we will need and that is another phone
0:30
then that phone needs to be well unlocked. And to get started we will need to, on this device, go back to the first page, change the language
0:41
to any kind of language that uses different keyboard. So as you can see basically any language right here down will work
0:49
I'm going to stick with, for instance, Greek, but Russian or languages like that will work as well
0:55
And from there can progress. let's agree skip this and we're back in the verification pattern so let's
1:09
top on use Google top on a field right here and then hold the globe icon and from
1:15
here we're going to go to language select which is the option right over here then
1:19
top on up add a keyboard and choose any option without the arrow and then choose to
1:26
add. Once you do that you can go back again to the first page from there, switch it
1:31
back to your desired language which for me is going to be English and again
1:36
let's progress through the setup. Again hold the globe icon and go to language
1:43
settings, add keyboard and this time around you're looking for an option with an
1:47
arrow so select that and then once you have tap on a three dots go to help
1:54
In feedback. Top on the field and type in Morse code. Now as you can see my keyboard is right now in a different language so hold globe icon
2:06
select English QWERTY. There we go. Use Morse code. Top on a video itself
2:13
It will load it and you want to top on three dots. Go to watch later
2:19
Tap on accept and continue and no thanks we don't want to sync and then in the search bar
2:24
you want to navigate to hard reset. info slash bypass. Like so
2:40
From here, scroll down to the second option, which is the Google Search app
2:46
No thanks. And this will basically open out the Google search app
2:51
So from here, in a search bar, you want to look for a one plus switch and it's right over here so it's this kind of like icon with
3:00
black and red phones almost and basically like an arrow between them so select that
3:08
agree and once you have that open you can well it will pop up with messages that you need to
3:18
allow everything whatever it pops up allow basically everything and you can see that it opens up some back out into this page right over here So at this stage we partially done At least we can set this phone to the side
3:36
And then take your other phone that is unlocked. And what you want to do is on that phone
3:43
you want to go to Play Store. Let me demonstrate it now. Bear with me, this is a super slow phone
3:50
So in the Play Store, you want to, again, search for a One Plus switch
3:56
and here you want to download it. Now as you can see I already have downloaded it, I can open it up
4:02
And once you have it, again open up the application, not this one
4:09
and I agree to whatever it's going to tell you. And from there you can close it. Now I already have agreed to everything, so you can straight up just begin
4:18
And there's also one another thing that we will need on this device, which is by going into
4:23
Hard Reset That Info website. I have already downloaded it and installed it
4:28
That's because this device is super slow so I just wanted to save on time
4:33
But basically I can go to HardWeset that info website just without the bypass
4:37
So like you can see right up on top right here. And from here you want to top on a three bars
4:42
Go to the download category. And then in a download search bar you're looking for Android 7.1.2
4:51
As you can see there is suggested Android 7.1. It's good enough
5:00
Just select it so I don't have to type it and search
5:04
And there should only be one pop-up, so bypass, FRP, Android 712 and 10
5:11
Simply tap on the download. Scroll down and then download again. This will in turn basically download it, but as you can see there is one because I already have
5:21
downloaded it and installed it as well but once you have downloaded it
5:25
there will be a pop-up choose to install it and once it's installed just close it and
5:30
then go to the one-plus application and from here let me quickly do one last
5:37
thing just so it's a little bit easier um um Okay, so I have just changed the language so it's a little bit easier
5:58
Okay, so let's open up the One Plus switch up on our unlocked device and go to start
6:05
And like I said, agree to any pop-up that it will give you
6:09
And it will enter launch camera right here so we can scan the code on this phone
6:15
So I'm gonna go back to this one while keeping whatever is open right here
6:20
here so from here select that I'm a new phone then choose other let's go to
6:29
next and this will generate a QR code so simply now take your phone and scan
6:35
that QR code and there we go so it will connect to it give it a second you can see
6:43
it's gonna connect So now we can set the lax device to the side once it connected and go back to the unlocked one and what you want to do here is deselect everything like so and then go to applications and from here find
7:14
the application so bypass frp nrrrrom.net want to select that one go back and then
7:26
start. I'm going to bring this back. Okay so let's confirm it and this will begin
7:34
transfer. Now it won't really show that it's transferring apart from the animation
7:41
right here. Basically we'll transfer this one up immediately so it'll go from zero to
7:46
being basically done. So just give it a moment and there we go later retrieval
7:54
successful. So from here go back, let's just stop this. This phone hasn't I
8:08
believe catched up to the fact that it's already done sending so just
8:13
disregard it. And from here I'm going to close this and then you want to tap on
8:18
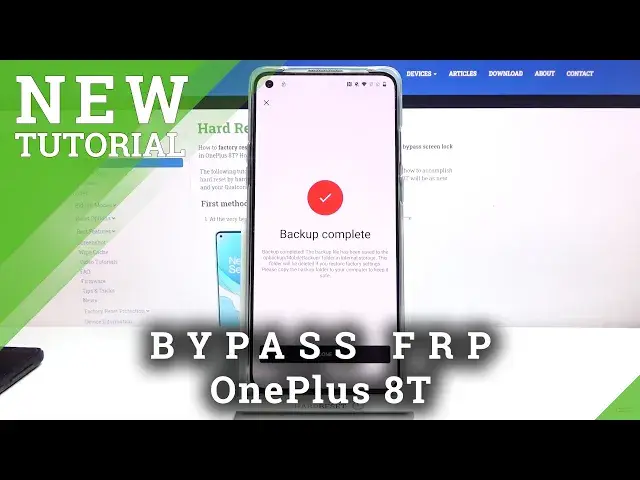
backup and restore new backup and back up now give it a second there we go so now it's done and from here let's go
8:34
back again back to the Google application right here that we have opened before
8:42
now if you're if you went back too far so for instance right here again just
8:47
simply tap on the application and now you want to search for settings so
8:54
and there is settings as a suggested one and this will open up settings on our
8:59
phone from here scroll down to apps and notifications C all 43 top on three dots show system and scroll down to
9:13
I can't grab this but we're scrolling down to G there we go so we're looking for Google Play services right over here
9:24
tap on it, disable, disable up, then go back, go back once more and once more
9:34
And in the main settings page, scroll down to accounts, right here, tap on add account and
9:39
choose Google, let's continue. Now it will give us a mirror and just crash, it doesn't matter
9:49
This app allowed us to actually have this in the back, the ability to log into Google
9:54
so it has done its job already. So from here, look into your Google account
10:01
Now, if you don't have one, you can simply create it. If you do, you can use it if you want to
10:06
Or, again, you can also create it just for this purpose, just for the bypass if you don't feel comfortable
10:12
I already have mine, so that's what I'm going to use. Let's go to Next
10:22
And now I'm going to put in a password. Let's log in
10:29
Hopefully I did write it correctly And from here let agree Then go back once you log in and go back to the apps and notifications
10:41
C.O43, show system, and scroll down to OG. And now you want to re-enable Google Play Services
10:51
It's enabled. There we go. Once you enabled Google Play Services, hold power key, select, restart
10:59
and let's wait for the device to put back up. Okay, so as you can see, we're now back in the setup screen
11:12
So let's go to start, agree, and again progress through the setup
11:18
the key difference now being the fact that we will be able to skip signing in
11:24
And there it is, so that's previously the set up. so that's previously the page that was telling us to confirm our Google account
11:32
Now it's simply telling us that account was added and it's the one that I have added right before the reboot
11:37
Let's just progress further and also the bypass app will keep crashing
11:42
It doesn't really matter, it has done its thing. So let's go further
11:47
From there, select anything that you want. It doesn't really matter at this moment what we select, so you just want to go to the setup
11:58
as quick as possible, skipping basically everything. From here again let's skip anything that it pops up with
12:11
Apparently you cannot go through it through the setup without actually finishing the
12:18
guide right here. So let's quickly do that and there we go
12:25
So once you gain access to the home screen, from here. Here you want to go to the settings
12:30
Not here, settings, there we go. And scroll all the way down to system
12:42
And from here, reset options and erase all data, factory reset. Again choose erase all data, confirm, erase all data
12:52
and this will begin the process of resetting the device. and also with this being done it will also remove the Google accounts that were
13:01
previously blocking us and fully unlock itself so let's simply wait for this
13:07
to finish up and there we go as can see now reset is finished so we can
13:22
now again go to the setup process this time around we can set up anything that we
13:26
you like. So if you want to add some kind of protections to your device, go right ahead
13:30
Connect to Wi-Fi, you can skip it if you don't want to. It's an option now because the
13:34
device is fully unlocked. But once more I'm just going to skip through most of this just
13:39
to save on time. And there we go. As you can see there is no need to verify anything
13:49
The device is now fully unlocked and if you found this very helpful, don't forget to head
13:54
like, subscribe and thanks for watching