Up next in 10

SAMSUNG Galaxy Z Fold4 Camera Tricks and Tips | The Best Advanced Camera Features
Jun 28, 2024
SAMSUNG Galaxy Z Fold4 Camera Hacks:
https://www.hardreset.info/devices/samsung/samsung-galaxy-z-fold4/tutorials/
The list of top camera tips in SAMSUNG Galaxy Z Fold4. With our tricks, you can shoot amazing photos and record cool videos. Find cool options, advanced modes, and camera hacks. Become a pro user of SAMSUNG Galaxy Z Fold4 camera.
#CameraSamsung #SamsungGalaxyZFodl4 #CameraTricksSamsung
Rear camera: Wide (main): 50 MP, f/1.8, 23mm, 1.0µm, Dual Pixel PDAF, OIS; Telephoto: 10 MP, f/2.4, 66mm, 1.0µm, PDAF, OIS, 3x optical zoom; Ultra wide angle: 12 MP, f/2.2, 123˚, 12mm, 1.12µm.
Front camera: Under-display: 4 MP, f/1.8, 2.0µm, under display; Cover camera: Wide (main): 10 MP, f/2.2, 26mm, 1/3", 1.22µm.
Follow us on Instagram ► https://www.instagram.com/hardreset.info
Like us on Facebook ► https://www.facebook.com/hardresetinfo/
Tweet us on Twitter ► https://twitter.com/HardResetI
Support us on TikTok ► https://www.tiktok.com/@hardreset.info
Use Reset Guides for many popular Apps ► https://www.hardreset.info/apps/apps/
Show More Show Less View Video Transcript
0:00
Welcome guys, so today I'm with the Samsung Galaxy Z Fold 4 and I will show you few camera
0:06
tricks on this device. Okay so when you open the camera for the first time you will be in the photo mode and honestly
0:17
right now I'm gonna close this big screen and use only this one, the front one, because
0:23
it's a little bit easier to me to hold this phone like that
0:27
But in the few modes, in the few options I'm gonna go back to the open mode of this device
0:34
so don't worry. And we can simply start from the volume buttons
0:39
So you can find the volume buttons on this place, right? So when you click on volume up or volume down, as you can see you can take photos
0:49
When you click and hold this volume button you are going to take series of the photo
0:55
As you can see you can take a lot of photos because we take right now 100 photos so we
0:59
can get in each series 100 photos. And also it works the same for the volume down button
1:07
After that, after a few options I'm gonna show you how to adjust the function of them
1:12
because we can switch function of this volume buttons. So right now we can smoothly move to the shutter
1:17
When you click and hold the shutter we can quickly record video
1:22
And we can get for the lock so we don't have to hold the shutter anymore
1:27
We can also take photos while recording video. We can pause, unpause, we can switch the zoom while recording
1:36
That's very simple. We can also finish. So that was the first option with the shutter
1:41
We can also drag the shutter to the bottom and we can also take series of the photo
1:47
When you swipe like that you will get additional shutter. So it's useful for example when you are not able to reach the bottom shutter
1:55
For example you have small hands and it's easier to tap right here
2:02
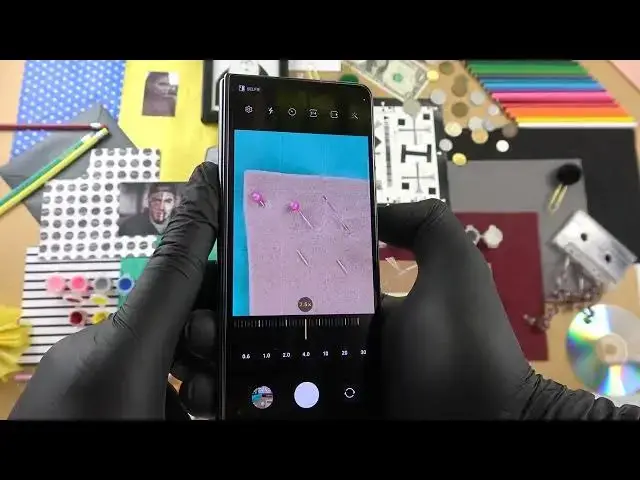
You can also get it back by dragging right here. Okay and right now we can smoothly move to the zoom feature
2:10
As you can see we can find here three different presets. That's the ultra wide lens, wide lens and also the telephoto lens, 3x zoom
2:18
So when you keep tapping right here we will also get additional modes in this place
2:23
So we can go for example for 4x, 10x, 20x and the 30x
2:28
And as you can see that's actually really good quality of the zoom
2:32
And when you go for the 20x we will get in the right upper corner the small preview how
2:39
it looks in the normal preview. And if you wonder what is the maximum zoom on this phone it's 40x
2:46
40? I mean 30. 30x yeah. So yeah that's how it looks with the zoom
2:51
You can also zoom in and zoom out by pinching screen with your two fingers
2:57
I think that's the time to do the last option on the photo mode
3:00
So when you click on the screen you can adjust brightness level by moving this sun icon to
3:04
the left or to the right. You can also make it automatically by tapping on the screen once
3:11
Right now we can move for this upper bar where we can find different filters
3:15
As you can see they change color and the temperature on our photos
3:21
And with this slider we can adjust the filter strength. If you want to take photo for example with this mode just click on the shutter
3:30
If you want to power it off just go right here. We can also go for my filters tab and right here we can also find few different options
3:42
Ok let's power it off. We can also enable the camera timer between 2, 5 or 10 seconds
3:49
So when you get for example 2 seconds and click on the shutter there will be countdown
3:54
and after this time the photo will be taken. When you click in this place you are also able to adjust the aspect ratio but you can
4:02
also enable the high resolution mode. So right now we can make the small comparison
4:09
Ok and let's do the same but with the normal mode. And I think it's time to open our Fold and just take a look on the preview on the big screen
4:22
It looks definitely better. So this photo was taken with normal mode and it looks like that
4:28
Take a look. It's not bad. But when you go for the 50 megapixel mode as you can see right here we can find definitely
4:36
more details and we can also zoom in a little bit closer. So this 50 megapixel mode allows you to get more details on your photo and if you want
4:44
to get it just activate it by tapping on this aspect ratio
4:50
Ok right now we'll go back for sure for our camera and we'll go for the camera settings
4:56
because we can find here also a lot of useful options. So for example I just show you that you can swipe the shutter button to take the birdshot
5:04
but you can also create the GIF so we can switch and use also this option
5:11
When you keep scrolling we can also enable the gridlines and as you can see right now
5:15
the gridlines appears on the screen and they help us to take better composition on the photos
5:24
When you open this settings for another time we can go for the shuttering methods and I
5:28
just show you that you can zoom in. I mean that you can take photos or take series of the photo with the volume buttons but you
5:35
can adjust the volume buttons function so we can for example zoom in and zoom out and
5:40
take a look how it works right now. So we have to click and hold the volume up to zoom in and click and hold volume down
5:49
to zoom out. As you can see it's very smooth so for example this function will be useful when you record videos
6:00
You can try it and then tell me in the comment if it is good for you
6:07
We can also enable the voice comments so as you can see we can take pictures by saying
6:10
smile cheese capture or shot and also we can record video by saying record video
6:16
So let's try this feature. We can for example use the photo mode so let's say cheese shot cheese
6:35
Okay the photo was taken so we have to speak loudly to take photo
6:41
Let's go back for the shutting methods because we can also use option it's show palm of your
6:46
hand to take the selfie or start recording the selfie videos so we can also try it and
6:53
I think that's all. There's nothing more that you can be interested in
7:00
Maybe the location tags. Yeah I think that's the last option that we can use
7:05
So location tags it's the function that when you take photo or record video and after that
7:10
go for the settings for the details of this photo you will get information where the photo
7:18
was taken or where the video was recorded. So it takes a little bit too much time actually
7:24
Okay right now it is. So let's open the details and as you can see that's our workplace right here
7:31
So as you can see that's the exact location. And right now we're gonna open the fold because I want to show you the last option from the
7:42
photo mode that it's really useful because you can take selfies with the rear cameras
7:50
So you have to click in this place and right now on the cover screen that's the preview
7:56
So take a look. As you can see right now. Let's just turn it off
8:04
I just take photo. Nevermind. So one more time. As you can see that's the preview of the rear cameras right here and we can just get definitely
8:15
better quality while taking this kind of the selfie right. So that's really useful option that you can probably use and you will be probably use
8:27
And I think that's time to get for the more modes because right here that's one very interesting option
8:35
Very useful option. It's called the single take. So right now I'm going to show you how to use it but the preview of this mode I will
8:45
show you with my friend. We take this I mean we take the video with this mode outside and it looks a little bit
8:53
better when someone is in front of the camera. So what you have to do now you have to click on the shutter and after that you got you
8:59
got like 15 seconds to catch the good angles and after that the phone will be automatically
9:07
create few shots from this one video. Okay so let me just go for this preview right here and that's our friend and as you can
9:19
see that's the video that we take. Not like that. That's just normal video right with this mode
9:27
And when you swipe like that you will get all of these shots taken with the phone
9:34
So as you can see it just take photo from this video from the few angles
9:43
That's also filter picture. That's probably the portrait mode I guess. That's the crop shot
9:52
Right here we got the fast forward clip. That's another angle of the photo
10:06
Okay that's the portrait mode. There's information about each mode. So that's the portrait mode and when you go right here we can change the background effect
10:16
because that's how the portrait mode works in the Samsung. So we can adjust the effect strength right here
10:23
We can also change the background. We can apply for example this mode
10:35
Of course you can change it later so don't worry. And that's the college right here
10:42
Handsome guy. Okay I just turned off. Let me just go back for it
10:56
And the last it's the original video. So that's the video that I take and after this video, after like 10 seconds the phone
11:05
itself make all of these shots and use all of these modes from this video
11:11
So I think that's probably one of the most useful option that you can find in this phone
11:16
and also in the other flagship Samsung phones. The single take I can really recommend you to use this option
11:24
And what we can get right here there's also modes like panorama modes, slow motion, super
11:28
slow motion and hyperlapse are probably all of you know that modes but that's also the
11:33
directions view and that's option that we can just get the preview of each camera that
11:39
we have and we can just simply record video and then smoothly switch between each lenses
11:47
So you're gonna record like that and then you can just switch between each lens
11:52
I mean between lens that you want. Because for example some angles looks better in the telephoto lens for example
12:02
Okay and that's all. And I think that's all for this video
12:06
So that's my tricks and tips for the Samsung Galaxy Z Fold 4
12:14
Let me know in the comment if you like it and just remember to leave a like, comment
12:19
and of course subscribe to our channel
#Camera & Photo Equipment
#Science